Table of contents
- Tips and tricks – Taking photos on motorcycle trips Just take better photos
- The way to a good photo
- Do not place the most important detail exactly in the middle
- Creative means
- Diagonals can be streets or individual details
- Eye guidance
- To be in the right place at the right time
- Diversity and a change of perspective are the order of the day
- Which camera is the right one?
- The 10 most important tips from the professional
Jo Deleker
22nd pictures
Jo Deleker
1/22
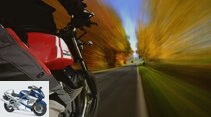
Tips and tricks: Simply take better photos.
Jo Deleker
2/22
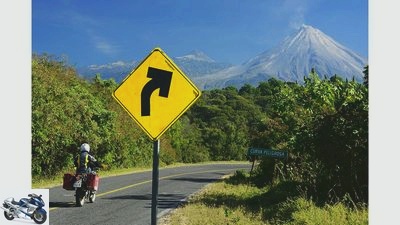
Golden ratio: One of the most important design features is the golden ratio. The golden ratio divides the total area into thirds. This is exactly where the most important detail of the photo should be so that the picture looks harmonious.
Jo Deleker
3/22
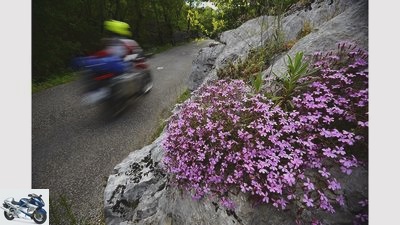
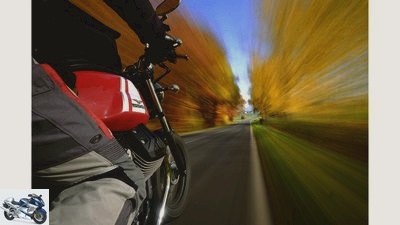
Viewing: The clear division of this wide-angle photo emphasizes the foreground and provides depth. The diagonal road and the blurred motorcycle appear dynamic. The viewer’s gaze wanders from the conspicuous foreground to the motorcycle and then follows the road to the next bend.
Jo Deleker
4/22
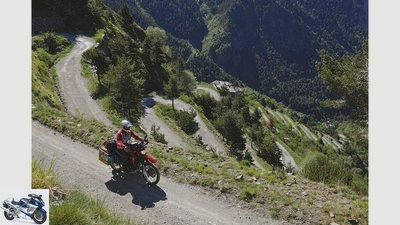
Dynamics: Photos with aha effect: the tripod is attached to the bench, 18 millimeter wide angle with gray filter, two seconds exposure time, level, slightly sloping road, the Guzzi engine is off, that avoids vibrations, speed 20, radio trigger.
Jo Deleker
5/22
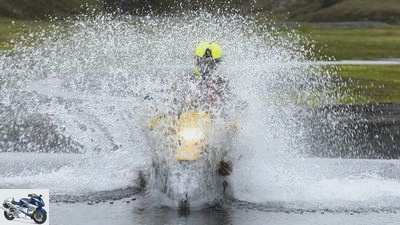
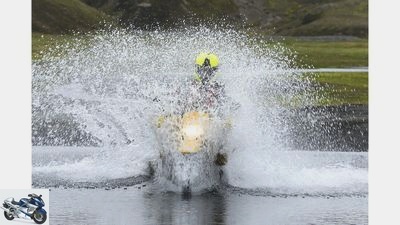
With dynamic photos, the hit rate is good pictures
small amount. During this river crossing in Iceland, the predictive continuous autofocus helps keep the motorcycle sharp
map. The 200 telephoto lens condenses the scene.
Jo Deleker
6/22
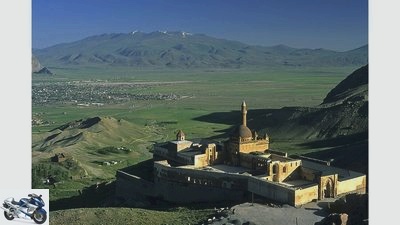
Light: Photography means painting with light. Twice the Ishak Pasha Palace in Eastern Anatolia. Early in the morning with a wide-angle lens …
Jo Deleker
7/22
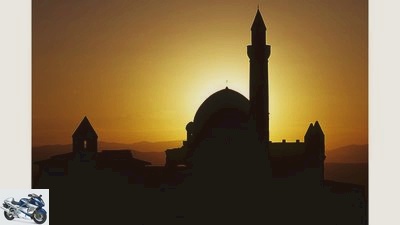
… And twelve hours later, the light and the telephoto lens do their magic
a different mood for this motif, a picture from 1001 nights.
Jo Deleker
8/22
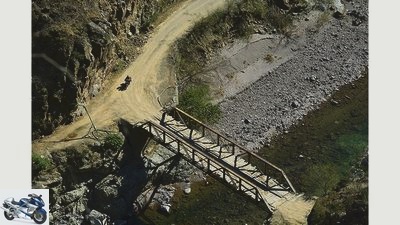
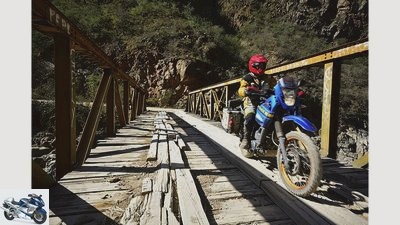
Change of perspective: Different perspectives of the same motif result in completely different images. Once from high above with the telephoto …
Jo Deleker
9/22
… And photographed here directly on the bridge in the Mexican Copper Canyon with the wide angle and longer exposure time.
Jo Deleker
10/22
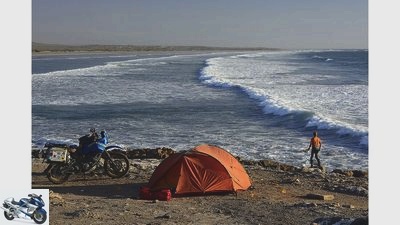
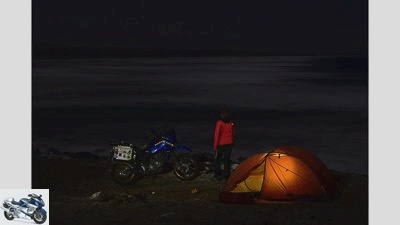
Unusual times: a lonely beach on Baja California. The picture in the warm evening light shows the whole beauty of this great place …
Jo Deleker
11/22
… Same place, same motif, two hours later. Illuminated by the full moon and two LED lamps, the photo is completely different.

Jo Deleker
12/22
Experimenting: thinking, being creative, telling stories with pictures. Strong emphasis on the foreground with the eye-catcher of the Arab cola can and the apparently dying of thirst motorcyclist on the Chott el Djerid in Tunisia.
Jo Deleker
13/22
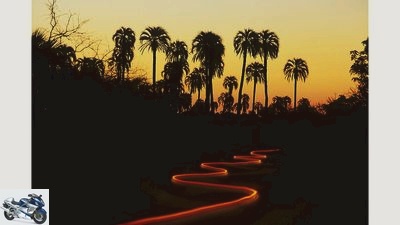
An exposure time of 30 seconds and a sinuous motorcycle – the red curves come from the brake light – ensure an exotic eye-catcher at the blue hour in the palm forest on the Rio Uruguay. A tripod is mandatory for such photos.
Jo Deleker
14/22
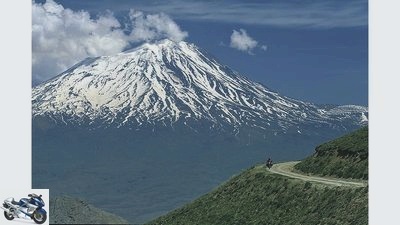
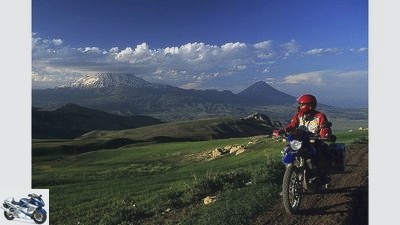
Focal length: The same subject looks completely different with different focal lengths. The 200 millimeter telephoto makes the Ararat appear huge …
Jo Deleker
15/22
With the 28-millimeter wide angle, the foreground is emphasized, the Ararat in Eastern Anatolia is now only a supporting actor.
Jo Deleker
16/22
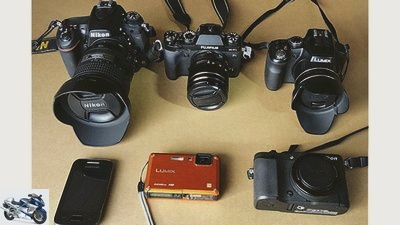
Full-frame DSLR, system camera, bridge camera, classy compacts, outdoor compacts, cell phones.
Jo Deleker
17/22
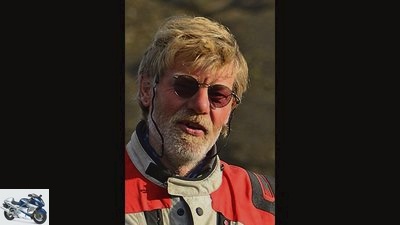
Jo Deleker is one of the most famous authors and photographers in the motorcycle travel scene, he has published over 300 reports, many of them in MOTORRAD. His travels have taken him to all seven continents, and the best pictures can be found on his homepage www.jodeleker.de.
Jo Deleker
18/22
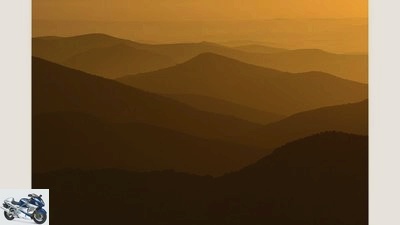
“If you can see, you can also take photos. However, learning to see can take time ”- Leica
Jo Deleker
19/22
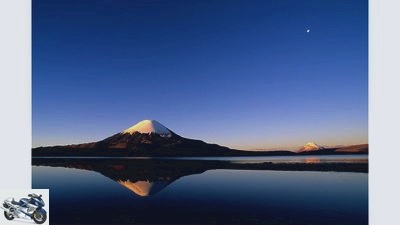
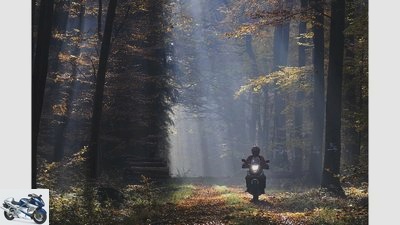
“To be ready is a lot, to be able to wait is more, but first seizing the right moment is everything” – Arthur Schnitzler
Jo Deleker
20/22
Tips and tricks: Simply take better photos.
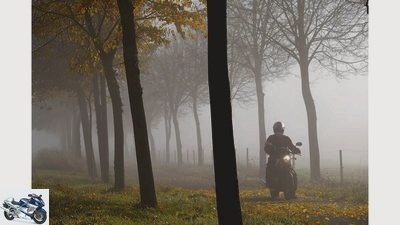
Jo Deleker
21/22
Tips and tricks: Simply take better photos.
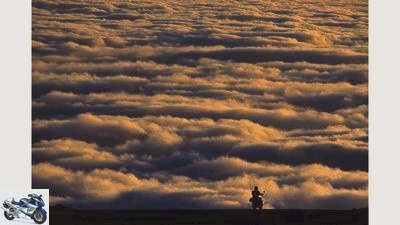
Jo Deleker
22/22
Tips and tricks: Simply take better photos.
to travel
Tips and tricks – taking photos on motorcycle trips
Tips and tricks – Taking photos on motorcycle trips
Just take better photos
A powerful photo is created in the head even before the camera’s shutter release is pressed. Sounds easy? It is. The best tips and tricks to create great pictures.
Joachim Deleker
08/18/2016
Photography has never been easier than it is today. Simply press the shutter release on the mobile phone or digital camera, and the fully automatic system will set it up. But at home when looking at the photos, the enthusiasm is kept within narrow limits. There is a motorcycle right in the middle of the picture, nobody can be seen far and wide, the next photo with the sensational sunset in Brittany is far too bright and the horizon is terribly crooked, and the fat cables of a power line hang in the great curve photo against the blue sky. Take a quick snap. For some, these souvenir photos (“e-photos”) are enough, but those who expected more are simply disappointed. What to do?
Think early enough before the shutter is released. A few small photo errors can be corrected with Photoshop and Co., but those who generally take clean and well thought-out photos can largely do without the sometimes time-consuming post-processing on the computer. Thinking alone doesn’t help, however, you also need basic knowledge of photography. For example, on the subject of image composition, recognizing a subject, choosing the perfect focal length or playing with shutter speeds, selective focus and the optimal light. Then it becomes really easy to enhance your own photos. Snapshot or competition photo, there are often only a few leaps of thought in between.
The way to a good photo
Do you still remember the doorbell that did the job? Everyone has it on board as standard, and it rings as soon as it recognizes a motif. Now it is important to develop an idea for a picture and to skillfully transform it into a photo. There is seldom the one ideal solution. Ten photographers can take ten different pictures of a subject because everyone has a different idea.
Your own camera shouldn’t be a mysterious black box; Knowing them exactly helps to get quick and technically precise photos. But which image program should I choose? “P” by no means means “professional”, but program automatic. Here the camera takes over the thinking, choosing the aperture and shutter speed as it sees fit. Seldom a good idea. Aperture or automatic aperture control “S” or “A” are recommended, where the photographer determines one of the values himself and thus maintains control.
Do not place the most important detail exactly in the middle
The auto focus options are even more important. Most cameras have adjustable autofocus measuring fields that are shown in the display or in the viewfinder. This is exactly where the AF measures. But please do not repeat one of the most common image errors, to place the important detail exactly in the middle, just because the AF point is there.
Such pictures are usually boring. The operating instructions for each camera reveal how all of this works in detail. It can’t hurt to make this description your favorite read.
Creative means
Much more important than the technology, however, is to implement the image idea with the creative means. One of the most important is the golden ratio. The ancient Greeks already knew how to use it, it defines the harmony in an image, photo or object. The Greek temples were built according to these principles, and even today we feel their proportions to be extremely harmonious. The golden ratio is the relationship between straight lines and surfaces. In simple terms, this rule divides an image into two vertical and two horizontal lines. The image-important details should be positioned at the four intersection points so that the image appears harmonious. Many cameras allow grid lines to be displayed in the viewfinder or monitor. These not only help to get a straight horizon on the picture, but also make it easier to find the golden ratio and thus the desired asymmetrical image structure.
The division of the image into foreground, middle and background is also important. This is especially true for wide-angle lenses, where the photo has a much greater spatial depth when an object in the foreground is clearly emphasized. But even with telephoto shots, this division brings the desired depth into the picture. However, there are certainly motifs that at best have a middle ground, because the division described is not possible at all. The photo doesn’t have to be bad as a result.
Diagonals can be streets or individual details
Diagonals bring dynamism to a photo and are important for directing the eye. Diagonals do not have to be lines; they can also be streets or individual details that, due to their arrangement, form an optical diagonal.
If this diagonal increases from left to right, we perceive the statement as positive, if it falls from top left to bottom right, it has a negative effect, but this does not have to be bad. Here, too, it depends on the image idea.
Eye guidance
The guidance describes how the eye wanders through the picture, where to look first and where the structure of the picture directs the gaze. If the photo is cleverly arranged, the composition guides the viewer’s gaze through the picture. This can be done with diagonals or by arranging various details in the photo. A motorcycle should always drive into the picture and not out. The same applies to portraits of people or animals, here their gaze needs space in front of the eyes. Therefore, it is best to choose the image section so that the eyes of the person portrayed see into the picture.
But please don’t follow these design rules slavishly. Knowing them is important, but your own creativity in implementing the image idea is even more important. Sometimes a photo becomes suspenseful if you deliberately disregard the rules. For example, if you place a face at the edge of the picture and the eyes look out of the picture and not into it, the viewer wonders what the person is seeing there. That increases the tension. The horizon can just as easily be moved very far down from the actually recommended position at a third or two thirds of the image height. This highlights the dominance of the sky. The main thing is that the horizon is not exactly in the middle, it usually looks boring.
To be in the right place at the right time
In any case, the most important thing is your own creativity as soon as the motif bell sounds the alarm. A good picture takes and deserves time: trying to play a subject with different focal lengths with the depth of field, which depends on the aperture of the lens and its focal length. It takes time to change perspective, sometimes from below or above, from left or right, and to pay attention to the details that can disturb a photo. Understanding travel partners who accept it when you crawl through botany for 20 minutes in search of a special perspective are a gift.
Concentration is particularly required with wide-angle lenses, which tend to be “chatty” and sometimes capture too many details that can interfere with a good photo. Perhaps the harsh midday light does not fit the picture idea at all, then it is optimal to have the time to come back again, in the warm light of the evening sun or even at night. Then the motif will look completely different. Usually much better. Ultimately, there is another factor that can be influenced with precise planning, but not completely: the happiness of being in the right place at the right time.
Diversity and a change of perspective are the order of the day
If you are planning to give a lecture with your travel photos, design a photo book or even offer your production to a magazine for publication, it is of little use if you put two dozen impressive pictures with a tiny motorcycle in a huge landscape on the chip has burned. Diversity and a change of perspective are the order of the day!
Here a portrait, there a close-up of a flower or a colorful Tuscan front door, a dynamic image from the pillion seat while driving, maybe even a sharp pull-out from a moving bike (the fine art of camera control), a lively market in Provence or a mysterious northern lights on a starry night in Lofoten. Photos can make a lasting impression, but that depends largely on the competence of the photographer. The best “clippers” already have their picture in their head before they press the shutter release.
Which camera is the right one?
The range on the camera market is huge, as are the price differences. But which one is the ideal companion to bring back strong images from the motorcycle trip?
Herbert S. from B. no longer understands the world. His professional camera, which costs 5,000 euros, does not deliver crisp images. Just why? The budget was almost exhausted with the high-tech bolide, there were only a few hundred left for one of these “vacation zoom” with a huge focal length range. They can do a lot, but the images lack sharpness. The quality of the lens still determines how sharp and brilliant a photo will be. The digital camera only converts the light on its sensor into electrical signals for the image processor, which calculates the photo.
The second quality criterion is the size of the sensor. With compact cameras, the sensor area measures just 29 mm². The popular bridge cameras mostly have similar sensors, but much better zoom lenses and therefore deliver photos that are suitable for prints up to 20 x 30 cm and which can be projected onto the screen with a projector up to three meters wide. The mirrorless system cameras with interchangeable lenses (DSLM) are gaining popularity. They are smaller, but not necessarily cheaper, than single lens reflex (DSLR) cameras. The best of their kind (Olympus OM-D, Fuji XT1 or Sony Alpha 7) deliver high-quality images that are not inferior to those of a DSLR. However, the newcomers often still have weaknesses in operation, they do not have an optical viewfinder like the DSLR, but mostly a practical folding monitor. The DSLR is at the upper end of the quality spectrum. They either have a DX or APS-C sensor with an area of 367 mm² or in full format even over 864 mm². The larger the sensor, the more space the individual pixels have, and the sharper and finer-grained the images will be. The number of pixels is not a quality criterion. The more megapixels jostle on a sensor, the more sensitive the camera is to noise at higher ISO numbers and little light, and the images become more grainy and blurred. Many manufacturers have now moved away from the megapixel madness, instead trying to find a reasonable balance between sensor size and MP and thus increase the image quality.
The 10 most important tips from the professional
1. Thinking: As banal as it sounds, a good photo is created in the head before the shutter button is pressed, and by no means at home on the computer. “If your picture is not good enough, you weren’t close enough,” said the legendary photographer Robert Capa. Whereby he did not mean the spatial proximity, but the intellectual examination of the motif.
2nd light: Steep midday sun is poison for photos. The flatter the sun, the warmer, softer and more plastic the light. Twilight and backlight create special moods.
3.Unusual times: Night shots are complex but fascinating. The pictures are even more beautiful at the “blue hour”, around 20 to 30 minutes after sunset and before sunrise. A tripod is required for these photos.
4. Image composition: Without basic knowledge of the image composition – golden ratio, diagonal, image division into foreground, middle and background – hardly a good photo will succeed. Show grid lines in the viewfinder (also for a straight horizon)!
5. Experiment: Take several pictures of the same motif, with different focal lengths from different, even unusual perspectives. Experiments can easily go wrong, but they can also lead to surprising results.
6. Colors: Black motorcycle, driver dressed in black, black helmet – the GAU of color photography. The motto for a better picture is dare to paint, light jacket, colorful sweater, an orange tent, maybe a red helmet, but please no safety vest.
7. Take your time: Snapshots can be delightful, but a good photo takes time. Time to think, time to try things out, time to take photos.
8. Dynamics: Long exposure times ensure tension, especially with moving subjects (dragons, passengers, wipers). Experiment with times and image sections. Taking photos on the damn fine line between grits and awesome.
9. Role models: Analyze outstanding photos: why do I like the picture? What impresses me What am I fascinated by? Analyze role models, but do not copy them (e.g. Ansel Adams, Sebastião Salgado, Art Wolfe).
10. Less is more: Concentrate on what’s important to the picture. Don’t try to put everything that the eye sees on the photo. Overcrowding makes you arbitrary and boring.
Related articles
-
Tips and tricks for motorcycle care
Rolf Henniges counselor technology & future Tips and tricks for motorcycle care Tips and tricks for motorcycle care Breaking in a new engine is…
-
Johann to travel Organized motorcycle trips Organized motorcycle trips Not just for lemmings The shorter the time and the more stressful the job, the…
-
MOTORCYCLE tips for racetrack training
jkuenstle.de counselor workshop MOTORCYCLE tips for racetrack training Tips for newcomers to the racetrack Always nice and slow You’ve got your hands on…
-
Tips for mechanics – correct motorcycle chain maintenance
Photo: Ralf Petersen 13th pictures Ralf Petersen 1/13 / 1 / A typical lack of maintenance: everything sparkling clean, even the chain. Ralf Petersen 2/13…
-
Tips for wintering the motorcycle: Short and sweet for the impatient
Jorg Lohse counselor workshop Tips for wintering the motorcycle: Short and sweet for the impatient Tips for wintering the motorcycle Short and sweet for…
-
Tips for motorcycle travelers to prepare for long-distance travel
Photo: Biebricher 27 pictures Army car 1/27 A MOTORRAD volunteer fulfills a lifelong dream: from Alaska to California on a motorcycle. Army car 2/27 Pure…
-
Motorcycle tour tour tips Aosta Valley Italian Alps
Jo Deleker 19th pictures Jo Deleker 1/19 After these 15 dead ends in the Aosta Valley, you will love dead ends. Jo Deleker 2/19 Dead ends in Aosta. Jo…
-
archive to travel Photo special for travel Photo special for travel Take better photos The road to a good travel photo doesn’t have to be rocky. If you…
-
Used motorcycle: checklist & sample sales contract & tips for buying and selling
Photo: Sdun 16 pictures archive 1/16 Bent or otherwise damaged steering stops indicate that the bike had at least a moderate fall. Then the frame could…
-
Screwdriver tips for motorcycle seats
Ralf Petersen 13th pictures Ralf Petersen 1/13 Ralf Petersen 2/13 Ralf Petersen 3/13 Ralf Petersen 4/13 Ralf Petersen 5/13 Ralf Petersen 6/13 Ralf…