Table of contents
- Workshop guide: install small indicators Flasher conversion on a motorcycle
- Indicator conversion
- Mechanical and electrical accessories
- Flasher relays and resistors
- First test
- Assembly
- finish
Schermer
accesories
Workshop guide: install small indicators
Workshop guide: install small indicators
Flasher conversion on a motorcycle
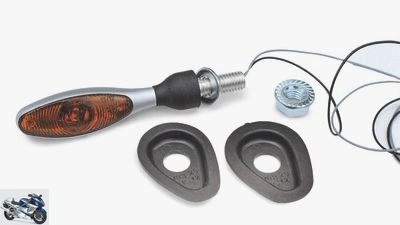
Mini indicators are number one on the conversion hit parade. There are seldom practical reasons for retrofitting. But one convincing argument weighs heavily: the small parts just look a lot better. What needs to be considered when growing is in this story.
Franz Josef Schermer
06/06/2012
Indicator conversion
Customization by retrofitting indicators has become a big topic in the last 15 years. It all started with the Aachen-based Kellermann, the “Kellermann” produced by him are not only trendsetters, but also today leaders in terms of design, selection, accessories and end-user service (!). For every type of machine, Kellermann has small, larger, round, flat, pointed, angular, elongated, knobbly or anything else retrofit indicators and lots of indicator tips on the homepage (www.kellermann-online.com).
In addition to the high-priced cellarers (unit price 50 to 90 euros plus add-on and cabling parts), there are simpler retrofit indicators and the necessary accessories in the accessory shops of Louis, Polo, Gericke and Co. These parts are usually “Made in China” or “Taiwan”, which can be quite annoying to the perfection freak if he sits down on it with a magnifying glass and that certain “I-know-everything-better-look” and examines the smallest details.
For some time now, many branded motorcycle dealers have also been offering branded blinker accessories that fit their machines. Which has the advantage that you can ask the brand dealer in advance what is suitable (!) For the machine and what it costs (!!). Brand accessory indicators are priced roughly between Kellermann and the accessory shop. Regardless of whether it is a luxury, discount or original accessory: There are a few basic things to consider when purchasing and growing.
Mechanical and electrical accessories
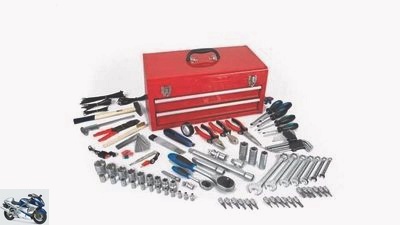
The right accessories and the right tools are important.
Take a close look at how the stock turn signals are attached. The new indicators are mostly equipped with M8 or M10 threaded pieces, while the old indicators are either fastened with stable click-plug brackets or somehow different with vibration-absorbing rubber plates and molded parts in large, often rectangular holes. In general, you cannot use any fastening parts from the previous indicators for the new indicators.
There are so-called “spacers”, which are intermediate parts in a shape that matches the old “hole” in the standard fairing, lamp or license plate holder. Spacers are available in pairs; on the back of the package it says which model and which model year they are suitable for. And if you tear open the package and think that this disc belongs in the front and the other in the back, but it does not fit, then please do not use a hammer or pliers to drive the disc open or in, but see whether the other one might be is a little bit smaller than the one that fucking doesn’t fit. Because despite the same production type number, we had spacer parts in our mounting kits that weren’t of the same size! And if it still doesn’t fit, take a small file and carefully adjust the spacer. Always remember: Don’t file off too much, because what’s gone is gone …
You also need connection cables: from the plugs attached to the cable harness to the new indicators. There are also intermediate pieces (“adapters”). DO NOT BREAK OFF THE PLUGS ON THE ON-BOARD CABLE – we know what’s gone is gone…
Because the plugs are usually located in plastic sleeves and should grip tightly, test BEFORE plugging the plug parts together (“father” is the name of the plug, “mother” is the socket), whether the cable ends are really firmly pressed with the father and / or mother: Looking at it and pulling something on it creates clarity. If too loose, re-squeeze with special “connector pliers”.
Flasher relays and resistors
Schermer
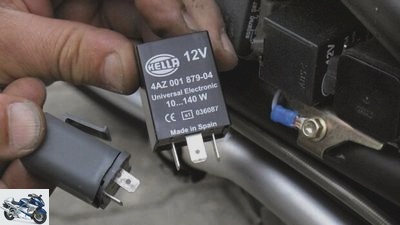
Feel free to forget: Without a suitable relay and / or resistors, little or nothing works.
Now we come to two crucial components that are usually “forgotten” when purchasing retrofit indicators.
- Flasher relay: You don’t know which flasher relay is installed? Consult the vehicle manual, ask the brand dealer or look for the flasher relay yourself to see where it is installed. Depending on the type of flasher relay, there are those with two or three connection plugs. The type is printed on the housing. Depending on the type and type of new indicators, it is quite likely that the standard flasher relay will have to be replaced with a special one. It becomes very critical with new machines that have a fully electronic cockpit in which the flasher relay is an integral electronic component of the innards, i.e. not an extra component. Even if the flashing control is just a light and does not have a separate display for right and left, the highest alarm level is required.
It is said to have happened on new machines full of electronics that the entire instrument mimicry went off when retrofitting indicators were tested for the first time. The required spare part (or the complete cockpit) may well be in the price range 1000 or more euros – the beautiful new computer era and the new BMWs, Harleys and Ducatis with Can-Bus electronics or single-wire systems send their regards.
- And then there is the matter of the resistors: If the standard turn signals are equipped with 10-watt lamps, but the desired turn signals only have 6 or 4.3 watts (LED), then the flashing rhythm is too fast. Corresponding resistances must then be built into the cables between the plugs on the cable harness and on the turn signal cable for each turn signal.
- Important: When the turn signals flash, these resistors get warm. For this reason, they should not be installed in direct contact with plastic parts, but rather with the appropriate space.
First test
Schermer
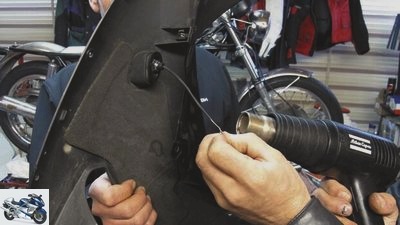
Made hot: heat shrink tubing protects cables from fraying and kinking.
Keyword: “Try it first!” We haven’t dismantled the old indicators yet. Instead: create access to the vehicle battery. Expose your connections (but do not unscrew!). Connect the cables of the new indicators with the interposed resistors to the battery poles (red is “plus”, black is “minus”) and see whether they light up. This is called a functional check. The ignition does not need to be switched on.
- Now look for the connectors for the standard turn signals: Preferably at the rear, there is the least amount of screws to screw, you can usually get to the connector by removing the seat. Pull apart the plug of a turn signal and now connect the new parts: adapter, resistor, turn signal. Then switch the ignition ON, operate the turn signal and look: the new rear turn signal must flash to the rhythm of the front one; one side with the old and the new blinker must blink as fast as the other side with the two old blinkers. If the new side doesn’t do it, you have to look for the additional resistor and install a suitable one.
Assembly
Schermer
Install airily: mount cables without drafts and mount all components away from heat sources.
Now the screws are finally being done properly – when all four new indicators have been checked, their plugs are tight and all parts are in place. It takes between one and a half and four hours until the old indicators are removed and the new ones installed, because the fairing parts have to be removed on machines with fairing. But it can also be the case that you have to remove the tank and the airbox to find the connector of the front indicator cables, because the cables with the connectors are hidden on top of the cylinder head cover (“valve cover”). Joy arises …
Before dismantling the old indicators, look at how they are attached; on older machines they are screwed, on new machines they are plugged in and somehow wedged into one another. DO NOT work around roughly! First use the brain and then use good tools!
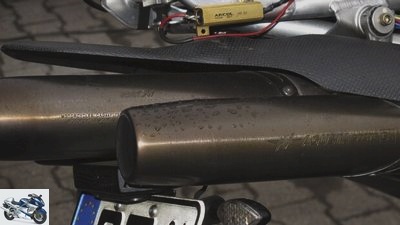
The cables of the new indicators should be covered with shrink tubing. This is not only common with motor vehicle electricians, but cables that are combined with shrink tubing and thus secured are also protected against chafing and kinking.
When installing the new indicators, please ensure that the screw connections cannot loosen later during operation: Either place a washer and spring washer (“snap ring”) und / or apply a drop of “medium-strength” Loctite to the thread. When tightening the nuts, keep the indicator on the outside in the final mounting position and then tighten the nut with feeling, not “bombproof”, it is not a crane hook that is mounted here, but a very filigree component.
When laying the cables, it is very important that each cable is laid without tension, it must lie “loosely”. But again, it shouldn’t be too loose and it shouldn’t have any contact with moving mechanical components (clutch lever at the bottom of the engine, throttle cable on the throttle valve housing, strut deflection, etc.) or even with components that get hot (exhaust manifold, engine housing, cylinder head) , otherwise there is a risk of burns.
finish

Gori
The test to the example: blink, look, be happy.
Flash, look, look forward. If you like it, the money and work have paid off, the owner can be proud. If you don’t like it, set everything back to zero and start over …
Related articles
-
Photos: Franz Josef Schermer counselor workshop Workshop guide Workshop guide – provisional Recognize botches on the motorcycle Recognize botches on the…
-
Workshop guide: hoses and clamps
Schermer counselor workshop Workshop guide: hoses and clamps Workshop guide Hoses and clamps To ensure that air, fuel and coolant get exactly where they…
-
Workshop guide for plastic repairs
Dentges 13th pictures Dentges 1/13 Dentges 2/13 Dentges 3/13 Dentges 4/13 Honda Fireblade with retrofit fairing: cheap and good too? Dentges 5/13 Repair…
-
TuneUp 2.0 Tuning and Conversion Guide Honda Fireblade
Ines Mannl 17th pictures Ines Mannl 1/17 Don’t worry, it has to be that way! Even if this Honda is not ready to drive, it all serves a higher goal!…
-
Workshop – screwdriver tip for the inspection
Ralf Petersen 15th pictures Ralf Petersen 1/15 Every motorcycle must be serviced regularly if it is to function properly. Ralf Petersen 2/15 What is…
-
Conversion and tuning guide optical tuning Suzuki GSX-S 1000 1-2
Ines Mannl 21 pictures triplespeed headquarters / Ines Mannl 1/21 How it all started: With a standard Suzuki GSX-S 1000. Technically first class, the…
-
Recall Scrambler 800 Night Shift: Incorrect indicators installed
Ducati counselor traffic & business Recall Scrambler 800 Night Shift: Incorrect indicators installed Recall Scrambler 800 Night Shift Wrong indicators…
-
Mona Pekarek 10 pictures 1/10 2/10 3/10 4/10 5/10 6/10 7/10 8/10 9/10 10/10 counselor workshop Guide to downtime and petrol Guide to downtime and petrol…
-
Advice: workshop – repair ignition box
Ury accesories Advice: workshop – repair ignition box Guide: workshop Repair ignition box Ignition control failure can be surprisingly expensive – but it…
-
Cheap tools: horror stories from the workshop
Schermer counselor workshop Cheap tools: horror stories from the workshop Horror stories from the workshop What good is cheap tools Order to the author…