Table of contents
- Adviser: change the wheel bearing Change the wheel bearing
- More about technology
- Install wheel bearing
Schermer
7th pictures
Schermer
1/7
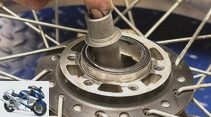
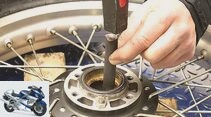
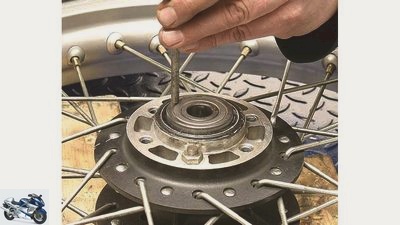
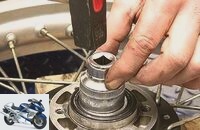
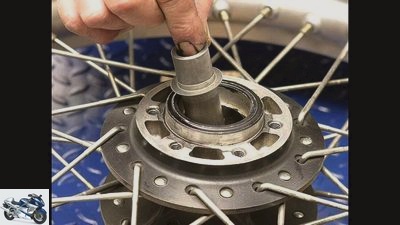
Changing the wheel bearing Step 7: When driving in, carefully tap into the outer ring with a mandrel..
Schermer
2/7
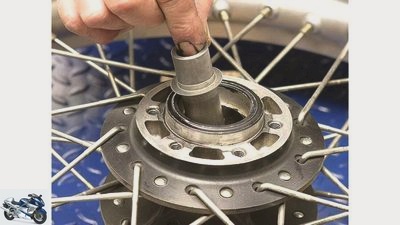
Changing the wheel bearing Step 6: Before driving in the opposite bearing, insert the spacer bush.
Schermer
3/7
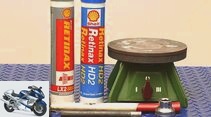
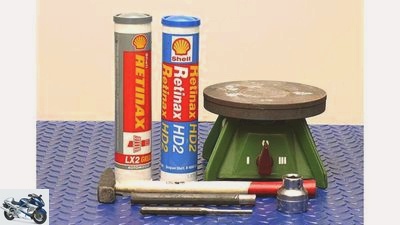
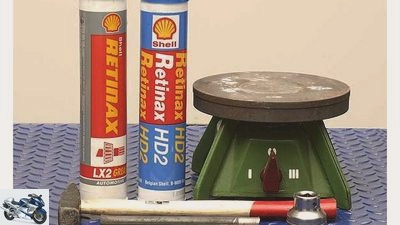
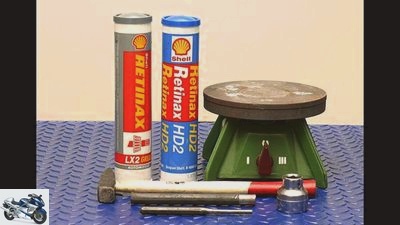
Changing the wheel bearing Step 1 – The basic equipment: heating plate, bearing grease, hammer, nut and mandrel.
Schermer
4/7
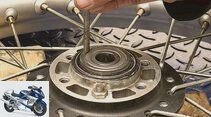
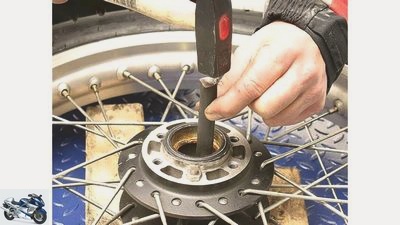
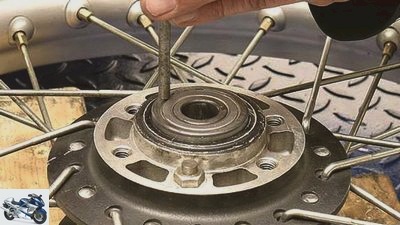
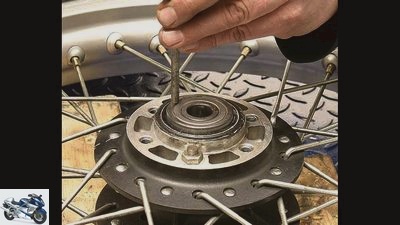
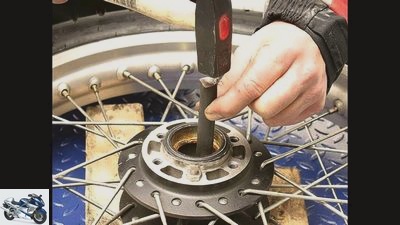
Changing the wheel bearing Step 3 – Driving out the wheel bearing: with a long mandrel “cross” work.
Schermer
5/7
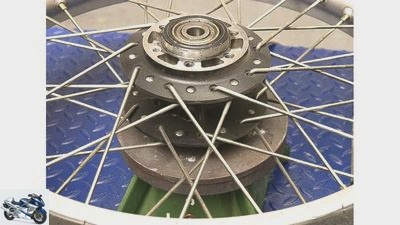
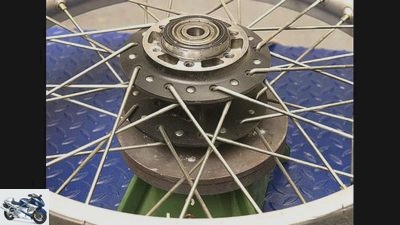
Changing the wheel bearing Step 2 – Heat the wheel hub: The temperature must not exceed 120 degrees.
Schermer
6/7
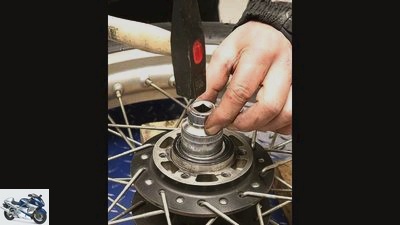
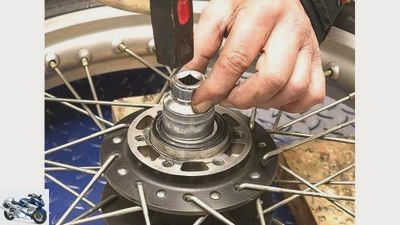
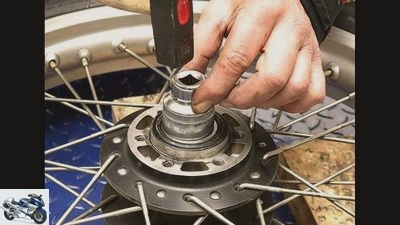
Changing the wheel bearing Step 4: Drive in the new bearing with a light hammer and a suitable socket.
Schermer
7/7
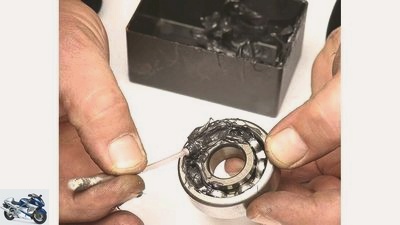
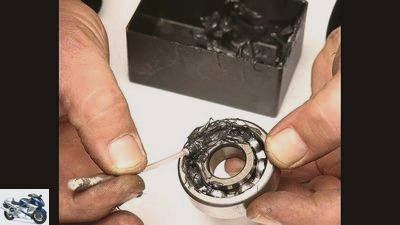
Changing the wheel bearing Step 5: Bearings that are open on one side must first be lubricated with bearing grease.
counselor
workshop
Adviser: change the wheel bearing
Adviser: change the wheel bearing
Change the wheel bearing
As the machine continues to run, there is a risk that the wheel bearings will develop play and have to be replaced. The work is manageable, but must be carried out carefully.
Franz Josef Schermer
08/16/2009
Check wheel bearings
Especially on older machines or those with high mileage, you should check the wheel bearings every time you remove a wheel. To do this, you put your index finger into the inner ring of the bearing, turn it and feel how the bearing runs: If the bearings are free of play and run without noticeable cracking and rubbing, they are okay. If the bearings are damaged, so “air” or run loud and cracking, they have to be replaced.
Buy complete article
Adviser: change the wheel bearing
Change the wheel bearing
2 pages) as PDF
€ 2.00
Buy now
Buy new wheel bearings
In principle, new original bearings are the first choice. With most machines, these are covered on both sides. This prevents the bearing grease from escaping, and the innards are also protected from dirt. Alternatively, suitable, high-quality retrofit wheel bearings from the automotive accessories trade can also be used. In any case, these should also be covered on both sides. If the bearings are only covered on one side, the open bearing side must be well filled with roller bearing grease before installation. It is essential to use high quality rolling bearing grease from the automotive sector. It should “easy” be, so no “solid” (“hard”) Use fat. Motorcycle oil and lubricant suppliers such as Bel-Ray, Castrol or Shell have such greases on offer.
Important: Do not use bearings that are open on both sides!
Bearings in the chainring pick-up
The above also applies to the ball bearing built into the chainring pick-up. In many machines this is only covered on one side, i.e. open on the inside. At this point it is better to use a bearing that is covered on both sides, it will last much longer than the one-sided. If this version is not available from the vehicle manufacturer, it is advisable to look for a suitable warehouse with a double-sided cover in a well-stocked car dealer.
Remove the brake disc
The brake disc must be removed before changing the wheel bearings.
1. The direction of rotation is indicated by an arrow on the brake disc.
2. Because the brake disc screws are glued in with Loctite, they are difficult to loosen. Therefore, heat the screws on the head with a hot air blower to 80 to 120 degrees, this loosens the bond.
3. Loosen and unscrew the screws crosswise. Remove the brake disc
Important: Use an exactly fitting Allen key to loosen the screws, otherwise the hexagon socket of the brake disc screws will screw up quickly!
Change the wheel bearing when warm
To install new wheel bearings, the wheel hub should be heated. For this you need a heating plate as well as various thorns and nuts (see photo show). If there is no heating plate available, the wheel hub can also be heated with a hot air dryer.
Under no circumstances should you change bearings when cold!
Important: Wear heat-resistant gloves!
Remove wheel bearing
1. Pull off the rear wheel chainring carrier. Remove shock absorber rubbers.
2. Lever out the oil seals with a tire lever or a wide, blunt screwdriver. Remove the driver of the speedometer drive on the front wheel.
The further steps apply to the front and rear wheels.
3. Place the wheel with the hub on the cold heating plate, set the switch to medium level (and be patient).
4th. Slowly heat the heating plate and wheel hub together to 80 to 120 degrees Celsius.
5. Take the wheel off the heating plate: The bearings now fall out almost by themselves. If this does not happen, use a thin thorn and a 100-gram hammer to help.
6th. Thoroughly clean the wheel hub and bearing seats and examine them for damage.
6.1. Remove any quirks in the bearing seat with fine emery cloth.
More about technology
PS knowledge: technology
- Motorcycle technology clearly explained on 97 pages (PDF)
- From starter to spark plug
- Simple teaching of physical principles
- Tips and tricks for practitioners
To the PDF for € 9.99
#image.jpg
Install wheel bearing
Schermer
Basic equipment: heating plate, bearing grease, hammer, mandrels.
1. Heat the wheel hub on the heating plate to a maximum of 120 ° C.
2. When installing the bearing, make sure that the label faces outwards: If you push it into the heated bearing seat, it will fall in almost by itself.
2.1. Using a suitable socket, the outer diameter of which is about one to two millimeters smaller than the diameter of the bearing (or the fitting bore) and a 100-gram hammer, tap gently step by step until the bearing is seated on the base of the fitting bore. Grease bearings with one-sided cover before inserting.
If there is no suitable socket: take the mandrel, but only place it on the bearing outer ring – NEVER on the bearing inner ring!
2.2. Turn the wheel
3. Insert wheel bearing spacer sleeve.
3.1. Slide in the bearing on the other side, if necessary tap gently on the bearing outer ring with a suitable socket and hammer or punch.
4th. Now use your finger to check whether the spacer sleeve is aligned between the bearing inner rings, does not have too much play, but is also not too tight. It must sit snugly between the inner bearing rings and only move very slightly to the side!
5. Position the new Simmerring neatly and hammer it in with a socket, the outer diameter of which is about one to two millimeters smaller than the diameter of the rings or the fitting hole.
Important: Only drive in the oil seal until its surface is flush with the wheel hub. Don’t press down on the bearing!
Mount the brake disc
1. Clean the contact surfaces of the brake disc with a cloth and the thread of the fastening screws with a brass brush. Use brake cleaner to help.
2. Apply liquid screw locking agent Loctite “medium strength” to the threads.
3. Place the brake disc the right way round (!) On the contact surfaces of the wheel hub, turn it back and forth a few times.
4th. Screw in the fastening screws and tighten them crosswise step by step to the specified torque. Obtain the torques prescribed by the manufacturer for your model from the friendly brand dealer.
Guide values: M6 fastening screws: 12 to 14 Nm; M8: 18 to 22 Nm; M10: 30 to 35 Nm
Important: Before installing the wheel, clean the brake discs with brake cleaner.
<!– ESI FOR ads.BannerGallery / irelements / esielement / eyJwYWdlIjoiL3N0YXJ0c2VpdGUvIiwibGF5b3V0IjoiYXJ0aWNsZSIsImVsZW1lbnQiOiJhZHMuQmFubmVyR2FsbGVyeSIsImlyQ29uZmlnIjoiMTQ3MDY1NDgiLCJwYXJhbXMiOnt9LCJpc01vYmlsZSI6ZmFsc2V9 –> <!– CACHEABLE –>&# 34;,&# 34; rectangle&# 34 ;: “<!–# include virtual = \&# 34 / irelements / esielement / eyJwYWdlIjoiL3N0YXJ0c2VpdGUvIiwibGF5b3V0IjoiYXJ0aWNsZSIsImVsZW1lbnQiOiJhZHMuUmVjdGFuZ2xlR2FsbGVyeSIsImlyQ29uZmlnIjoiMTQ3MDY1NDgiLCJwYXJhbXMiOnt9LCJpc01vYmlsZSI6ZmFsc2V9 \&# 34; –> <!– ESI FOR ads.RectangleGallery / irelements / esielement / eyJwYWdlIjoiL3N0YXJ0c2VpdGUvIiwibGF5b3V0IjoiYXJ0aWNsZSIsImVsZW1lbnQiOiJhZHMuUmVjdGFuZ2xlR2FsbGVyeSIsImlyQ29uZmlnIjoiMTQ3MDY1NDgiLCJwYXJhbXMiOnt9LCJpc01vYmlsZSI6ZmFsc2V9 –> <!– CACHEABLE –>&# 34;,&# 34; sky&# 34 ;: “<!–# include virtual = \&# 34 / irelements / esielement / eyJwYWdlIjoiL3N0YXJ0c2VpdGUvIiwibGF5b3V0IjoiYXJ0aWNsZSIsImVsZW1lbnQiOiJhZHMuU2t5R2FsbGVyeSIsImlyQ29uZmlnIjoiMTQ3MDY1NDgiLCJwYXJhbXMiOnt9LCJpc01vYmlsZSI6ZmFsc2V9 \&# 34; –> <!– ESI FOR ads.SkyGallery / irelements / esielement / eyJwYWdlIjoiL3N0YXJ0c2VpdGUvIiwibGF5b3V0IjoiYXJ0aWNsZSIsImVsZW1lbnQiOiJhZHMuU2t5R2FsbGVyeSIsImlyQ29uZmlnIjoiMTQ3MDY1NDgiLCJwYXJhbXMiOnt9LCJpc01vYmlsZSI6ZmFsc2V9 –> <!– CACHEABLE –>&# 34;}}” ga-track-vis =”article.gallery.inline.vis” class =”v-A_-article__inline-container”>
Schermer


7th pictures
Pictures: Guide: Changing the wheel bearing
go to Article
To home page
Schermer
Schermer
Schermer
Schermer
Schermer
Schermer
Schermer
1/7
Related articles
-
counselor workshop Change the wheel bearing Change the wheel bearing on the motorcycle With a mandrel, hot air and bearing grease Changing wheel bearings…
-
Adviser: change the steering head bearing
Schermer counselor workshop Adviser: change the steering head bearing Adviser: change the steering head bearing Check and replace steering head bearings…
-
Change the steering head bearing
counselor workshop Change the steering head bearing Change the steering head bearing Change the steering head bearing If the bearing in the steering head…
-
Cook counselor workshop Adviser: Change Simmerrings Adviser: Change Simmerrings Change the oil seals on the telescopic fork If the fork oil finds its way…
-
Schermer 8th pictures Schermer 1/8 The correct distance can be found in the manual. Use a lot of feeling when re-bending. Schermer 2/8 Above the spark of…
-
Schermer counselor workshop Advice: change fork Advice: change fork Remove and install the fork properly Simmerring leaking? Fork oil change due? Replace…
-
counselor workshop Change chain set Change chain set Replace the pinion, toothed wheel and drive chain Regular chain maintenance can delay the moment of…
-
Cook 10 pictures Cook 1/10 If you doubt your driving ability because every curve radius becomes a hexagon and the motorcycle no longer meets a line, a…
-
Change brake discs yourself – tips and tricks
Markus Jahn 9 pictures Ralf Schneider 1/9 There is a need for action here! The heat spots on the panes shown on the left can certainly no longer be…
-
Accessory wheel sets in comparison
mps photo studio accesories tire Accessory wheel sets in comparison Comparative test of accessory wheels Accessory wheels in the test Content of Lighter…