Table of contents
- How do I adjust valves? Avoid major engine damage and save money
- Stretching and sitting
- Open and close to the point
- The individual work steps in a BMW two-valve boxer
- A few words about control peripherals
Schoch
20th pictures
1/20
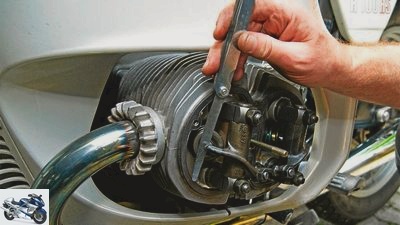
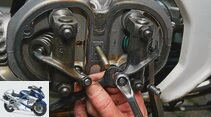
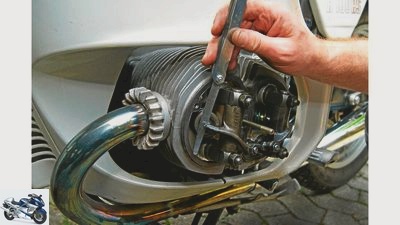
Typical BMW 2V valve train. It looks similar on many other bumper engines.
Schoch
2/20
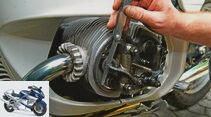
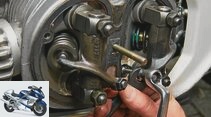
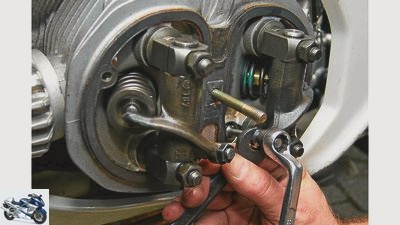
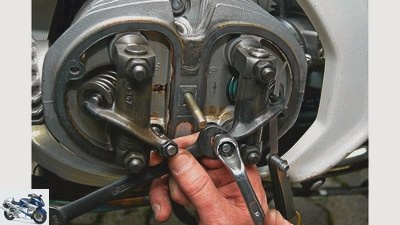
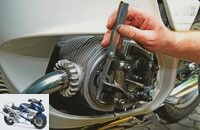
To set the correct valve clearance, the lock nut must first be opened with a tightly fitting wrench while holding the adjusting screw.
Schoch
3/20
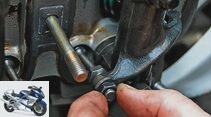
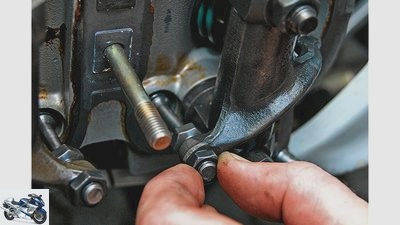
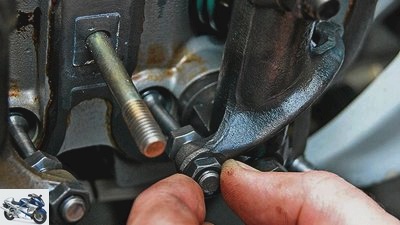
The lock nut and adjusting screw must be easy to turn with your fingers – otherwise the parts must be replaced.
Schoch
4/20
Turn the adjusting screw by hand until the feeler gauge just sticks in the gap and can be pulled through “sucking deeply”. Then tighten the lock nut while holding it against the prescribed torque.
Schoch
5/20
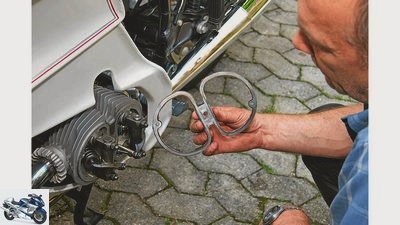
Then check the valve cover gasket. Always replace defective seals …
Schoch
6/20
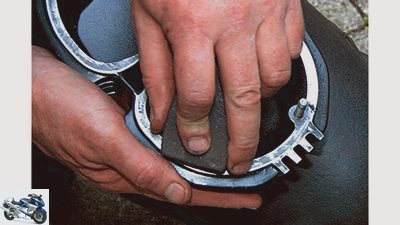
… Sealing residues can be cleaned with a fine-grained abrasive rubber. Then carefully clean the valve cover from grinding dust.
Schoch
7/20
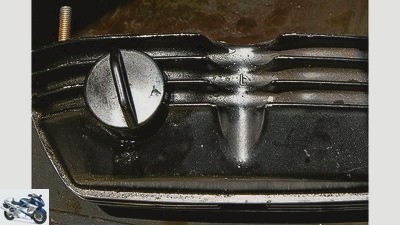
Risk of confusion: When assembling, always make sure that the correct valve covers are mounted on the respective cylinder head. At BMW these are marked with “L” and “R”.
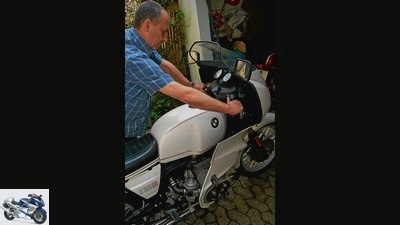
Schoch
8/20
Before screwing in the spark plugs, the engine should be turned carefully by hand to test the correct function of the valves. Professionals also briefly press the electric starter.
Schoch
9/20
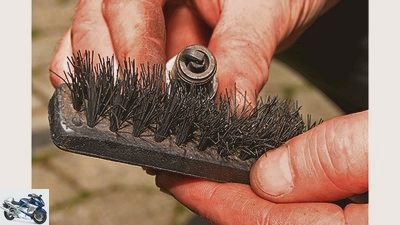
Mandatory: Checking the candle image and cleaning with a spark plug brush. Always use copper grease for assembly …
Schoch
10/20
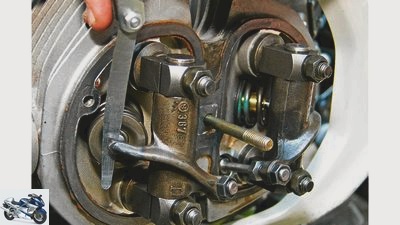
The actual condition of the inlet and outlet valve clearance is measured with the feeler gauge. If the play is too tight, the valves could already have hit their seats.
Schoch
11/20
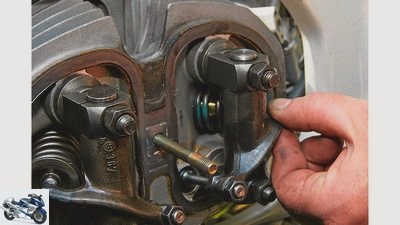
In the TDC position, the rocker arms are relieved. The radial and axial play can now be easily checked. Too much play is often the cause of rattling noises in the valve train.
Schoch
12/20
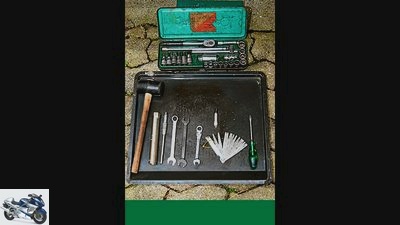
Required tools: Torque wrench, feeler gauge, oil pan, rubber mallet, various open-ended or ring spanners, Allen wrench, Phillips or slotted screwdriver (depending on the motorcycle type), flashlight, spark plug wrench.
Schoch
13/20
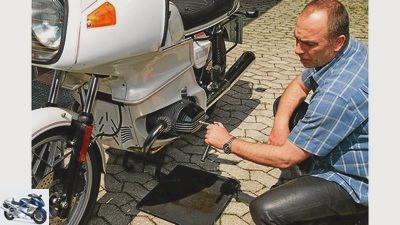
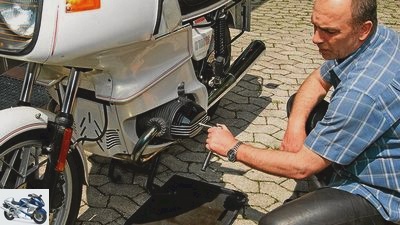
In the case of multi-cylinder motorcycles, all valve covers must first be removed and all spark plugs unscrewed. In the case of V or boxer engines, some oil will leak out, so place a drip pan underneath.
Schoch
14/20
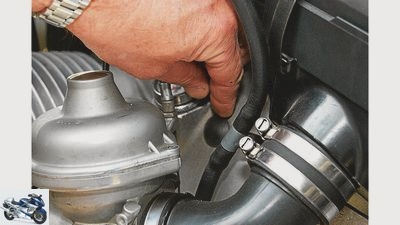
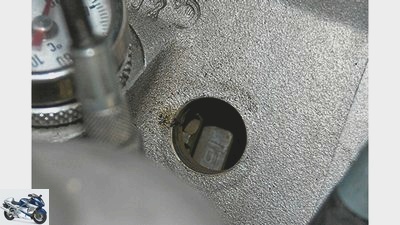
On BMW boxer engines, the TDC markings can be found on the clutch flywheel. The viewing hole is still closed with a rubber stopper, which must be removed first.
Schoch
15/20
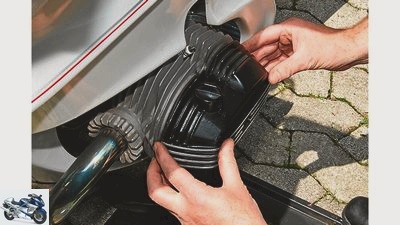
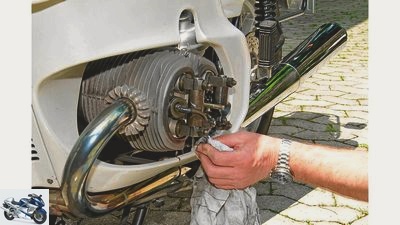
Carefully bounce stuck valve covers with a rubber mallet. Oil often leaks when the lid is removed.
Schoch
16/20
Wipe the valve train with a clean cloth.
Schoch
17/20
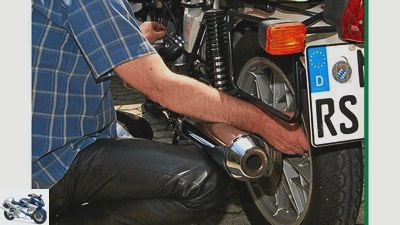
To search for TDC, select the highest gear and turn the rear wheel. This saves the dismantling of the front Lima cover.
Schoch
18/20
If the OT is found, it must be checked whether the compression OT is present.
Schoch
19/20
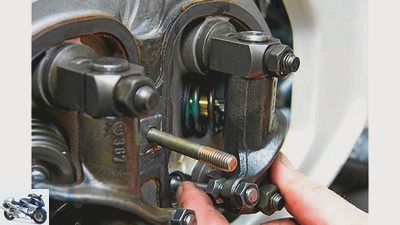
If both bumpers can be turned, the piston is in compression TDC. If you want to be on the safe side, you can try to turn the push rods on the cylinder opposite.
Schoch
20/20
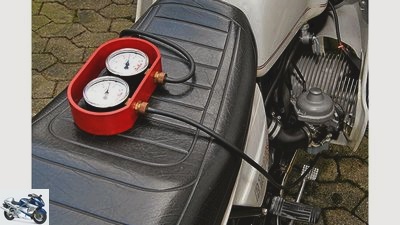
… Finally, check that the carburettors are synchronized.
counselor
workshop
Adjust valves on a motorcycle
How do I adjust valves?
Avoid major engine damage and save money
Content of
The valves are among the most stressed components in a four-stroke engine. Especially with bumper engines with short service intervals, regular maintenance helps to avoid heavy wear and tear and major engine damage. Those who can adjust the valves themselves also save a lot of money on customer service.
Marcel Schoch
08/29/2013
In many old and young timers, the valve clearance has to be checked and adjusted very often. For some Moto Guzzi models from the 1970s, the manufacturer even stipulates a regular maintenance interval of just 3000 kilometers. You need a well-filled wallet if the machine is always to be looked after by a workshop.
Buy complete article
How do I adjust valves?
Avoid major engine damage and save money
4 pages) as PDF
€ 2.00
Buy now
However, if you don’t have two left hands, you can adjust the valve clearance yourself on many motorcycle models – this is nowhere near as complicated as less experienced screwdrivers believe. Especially on the bumper engines from BMW, Ducati, Guzzi, Morini, Norton, Triumph or Yamaha, the correct play on the rocker arm can be easily adjusted with a little practice and technical expertise.
Stretching and sitting
But first a little theory: Why is the right game and therefore the setting so important? The valves are the most heavily loaded components in the engine. In addition to dynamic forces, inlet and outlet valves must above all be able to withstand the high combustion temperatures. For this reason, special metal alloys are used for valves. With the disadvantage that the expansion behavior of the valves differs from that of the other components of the engine and valve train, which are usually made of an aluminum alloy or high-quality steel, but sometimes also of exotic materials.
Since all of these materials expand differently when heated, the engine designers have provided certain tolerances to ensure that the moving parts of the engine function properly, especially during the warm-up phase. This is especially true for the valve clearance. Correction of this is important, not least with freshly assembled engines, in order to compensate for the setting of cylinder base and head gaskets. In the case of the above-mentioned bumper motors, it is adjusted by means of adjusting screws on the valve rocker arms.
Open and close to the point
The correct value, which must always be set when the engine is cold, is crucial so that the valve train has as little play as possible at operating temperature. This is the only way to ensure that tax and opening times are precisely adhered to, and that wear and tear caused by too wide or narrow play is reduced as much as possible. The correct valve clearance also ensures that the valve can rest against its seat in a gas-tight manner. The exhaust valves in particular need this contact in order to be able to dissipate the absorbed heat from the burned exhaust gases. If they stay slightly open if the valve clearance is too tight, they can burn through the valve disc, as a flame “licks” around the valve stem with every combustion cycle.
If a valve has too much play, the cam ramp, which gently lifts the valve off and touches down, is disabled. As a result, the cams, rocker arms and valve stem are hammered to pieces by high load peaks. The result: material eruptions on the surfaces and worn valve seats. Adjusting the valves is therefore the first point of maintenance before checking the ignition and the carburetor.
The individual work steps in a BMW two-valve boxer
Schoch
In the case of multi-cylinder motorcycles, all valve covers must first be removed and all spark plugs unscrewed.
In the following we show the individual work steps for a BMW two-valve boxer. First, jack up the machine on the main stand and make sure the ignition is off. Then unscrew the spark plugs and remove the two valve covers on the right and left. So that the valves can be set correctly, the piston of the relevant cylinder must be brought to TDC (top dead center) in the compression stroke. This means that the piston is at the top of the cylinder at its reversal point. It doesn’t matter which cylinder you start with on multi-cylinder motorcycles.
To determine the TDC (compression stroke), each engine has – depending on the number of cylinders and crankshaft offset – one or more TDC markings that are either placed on the clutch flywheel or on the alternator. As a rule, this must be aligned with a marking on the engine for the respective cylinder in order to achieve the exact position of the piston. In the case of multi-cylinder motorcycles, the respective TDC markings can also have letters (e.g. “L” or “R” for left or right cylinder) or numbers so that they can be assigned to the correct cylinder for easier identification.
The best way to crank the engine is to engage a high gear and turn the rear wheel by hand in the output direction. But you can also turn the crankshaft with a suitable tool on the alternator, especially on bikes without a main stand. Attention: Because of the contour of the camshaft (s), it is essential to ensure that the motor is rotating in the correct direction! With the BMW two-valve boxers, you turn clockwise when looking at the engine from the front. If you recognize the TDC marking in the viewing hole, first check whether the TDC is really in the compression cycle. In four-stroke engines, this is only the case with every second revolution of the crankshaft!
To do this, you test bumper motors like the BMW to see whether they can be turned easily. If so, the TDC must be present; otherwise, turn the crankshaft one more revolution. Then check the rocker arm play by hand. The bearing of the rocker arm must not have any radial play. Axially, on the other hand, some rocker arm designs have slight play, which is sometimes compensated for by springs or washers (Guzzi). If the contact surfaces between the rocker arm and the valve stem head are OK, the valve clearance between the valve stem head and the rocker arm is determined using a feeler gauge. BMW specifies a value of 0.15 millimeters for the inlet and 0.20 millimeters for the outlet. It is often too tight for newly installed engines, but also for those that have been running for a long time. On the one hand, this is due to the setting of the cylinder seals; on the other hand, the valve disks gradually hit the valve seats. In the case of engines that have just been installed, the cylinder head must therefore be retightened before setting (to the TDC position!).
A few words about control peripherals
Schoch
The lock nut and adjusting screw must be easy to turn with your fingers – otherwise the parts must be replaced.
Occasionally, when adjusting the valve, it can happen that the adjusting screws are very difficult to turn. Then at some point the lock nut got too tight. The overstretched adjusting screws then lock in the thread of the rocker arm. Please replace such adjusting screws immediately, as they can tear off at any time during operation.
The obligatory work around setting the valves also includes checking the timing chain or timing belt (e.g. Morini, Ducati). On some motorcycle models, the tension of the timing chain must be readjusted manually at prescribed intervals. The intervals and the allowed game are in the manual or have to be requested from the expert. If an automatic chain tensioner is installed, there is no need to readjust. Regardless of the chain tensioner system, however, a worn or stretched timing chain often makes itself felt with rattling or beating noises, especially when idling. Then it should be changed immediately, otherwise there is a risk that it will skip on the sprockets and thus adjust the valve timing. In most cases this results in major engine damage. Changing a timing chain can be very time-consuming, as the entire engine often has to be dismantled.
For motorcycles whose camshafts are driven by timing belts (toothed belts), the manufacturer specifies fixed replacement intervals that depend either on the mileage or the operating time. It is essential to adhere to these intervals, even if the toothed belt still makes a good impression during the visual inspection. Reason: The rubber of the toothed belt hardens over time and becomes brittle. Old timing belts are usually noticeable after the cold engine has started by whistling noises, which disappear after a few minutes of operation. Anyone who hears these noises from their engine should therefore urgently think about changing the timing belt.
Before final assembly of all parts, we recommend checking the spark plug pattern. Then clean the candle and lubricate its thread with conductive copper grease (!). In addition to good contact, it also ensures that the spark plug does not seize up in the thread. Finally, don’t forget to check that the carburettors are synchronized – every change in the opening times also affects the idle synchronism.
If you then measure the valve clearance again, it is usually even tighter because the seals have settled further.
The correct valve clearance can now be set according to the manufacturer’s specifications. To do this, with bumper engines like the BMW, open the lock nut on the rocker arm and turn the adjusting screw until the feeler gauge can be pulled through the gap between rocker arm and valve stem head. If the play is correct, the lock nut is tightened with the correct torque while holding the adjusting screw (20 Newton meters for the BMW two-valve models). After setting, crank the engine by hand before starting it for the first time with the valve covers still open and test the correct function of the valve drive. Then professionals check the valve clearance again to make sure that everything has been set correctly.
Related articles
-
Adjust the valve clearance on the BMW boxer
Schermer counselor workshop Adjust the valve clearance on the BMW boxer Screwdriver tip Adjust the valve clearance on the BMW boxer Thanks to the exposed…
-
Photo: fact, cook 20th pictures Cook 1/20 …which we have secured against twisting with an M4 worm screw and a fixing hole. fact 2/20 Only when the boot…
-
Guide to repairing spoked motorcycle wheels part 2
Marcel Schoch 15th pictures Marcel Schoch 1/15 The spokes, which are already slightly under tension after they have been lightened, lie firmly in the…
-
Guide to repairing spoked motorcycle wheels Part 1
Marcel Schoch 38 pictures Marcel Schoch 1/38 Preparatory work: The bike must always be removed for repairs. Damage to the tire can be an indication that…
-
Help with engine problems – When the motorcycle does not run properly
counselor workshop Help with engine problems – When the motorcycle does not run properly Error analysis in case of engine problems 50 reasons your…
-
Life: MOTORCYCLE at the enduro course
Jahn to travel Life: MOTORCYCLE at the enduro course MOTORRAD editor at the enduro course Grounded in the dirt Driving off-road properly – you should…
-
Schwab Sports & scene History of motorcycle tuning History of motorcycle tuning Tuners have never had it harder Content of About 50 years ago, motorcycle…
-
Motorcycle production at Bimota
Jahn counselor traffic & business Motorcycle production at Bimota This is how one of the smallest manufacturers in the world produces Motorcycle…
-
Tips and tricks for motorcycle care
Rolf Henniges counselor technology & future Tips and tricks for motorcycle care Tips and tricks for motorcycle care Breaking in a new engine is…
-
counselor technology & future Valves: function and designs Valves: function and designs Valves: function and designs The valves are used to ventilate a…