Table of contents
Schermer
counselor
workshop
Everything about seals – the correct installation and removal of motorcycle seals
Everything about seals
The correct installation and removal of motorcycle seals
The puddle of oil under the engine is not uncommon on older motorcycles. But where is it dripping out? And why? In this sequence we take the seal apart and fit it back in cleanly and without dripping.
Jorg Lohse
December 07, 2011
Bilski
Where is it dripping? And why? Maybe it’s wrong poetry.
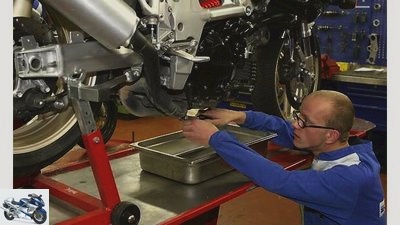
Oil everywhere, stains under the engine, how come? First, put your finger into the puddle, smell it and rub the absorbed drop between your fingers. Is It Really Oil? Oil stinks and is greasy. But it can also be coolant or brake fluid – both are “slippery”, but not “greasy”.
Determine the problem area: Clean the engine clean, NOT with a steam jet, but with your hands, hot water, motorcycle cleaner, brushes and a sponge. After washing with warm water, carefully rinse the engine with a soft jet of cold water and dry it with a soft cloth. You can also use very soft compressed air and blow dry the corners of the motor that cannot be reached with the rag.
Then push the motorcycle over a dry, clean area and place a large, clean and as light as possible cloth under it. Start the engine and let it warm up for at least ten minutes, switch it off. Now take a closer look: is oil leaking out somewhere? Does it get through housing sealing points? Does it run out of a Simmerring that is installed at the end of a shaft, e.g. behind the chain pinion on the gearbox output shaft?
Schermer
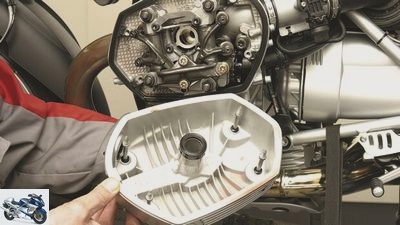
On the Boxer, the cover screws are also provided with rubber washers.
Motor housing
Horizontally split engine housings can generally be found in in-line multi-cylinder engines: The lower and upper engine housing halves are screwed together without an additional seal. During assembly, a fine bead of liquid sealant is placed on the sealing surface of one side of the housing.
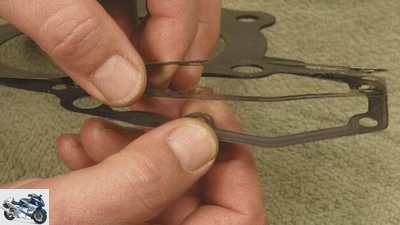
Vertically divided engine housings are common with single cylinders and rarely with two-cylinder: a molded seal is usually installed between the housing halves; it is made of a paper-like material and is therefore called “paper seal”. This engine case gasket very rarely leaks. And if so, then mostly only on a small piece.
Jahn
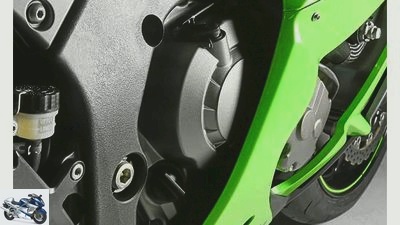
Engine housing cover Kawasaki ZX-10R.
Housing cover
Lids are screwed on to the right and left of the motor housing, such as B. over the clutch (“clutch cover”) or the alternator (“alternator cover”). In most cases, a paper seal is inserted here, which likes to stick to the cover and housing. Sensitive blows all around the lid with a rubber or plastic hammer loosen it from the seal.
Always use a new seal when reassembling. Exceptions confirm the rule: If there is no new one and the old seal is still stuck to the motor housing during dismantling and is not torn, you can put some silicone sealant on the sealing surface of the cover, let it flash off and assemble. The paper seal under the cover of the oil filter housing should always be replaced!
Schermer
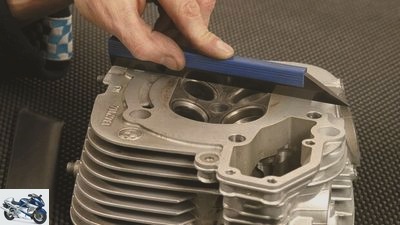
Before assembling the cylinder, the contact surface must be checked for unevenness with the straight edge.
Seals on the cylinder
The cylinder block is sealed on the engine housing with the cylinder base gasket. The cylinder head gasket is located higher up between the cylinder block and the cylinder head. Both are under high surface pressure and therefore won’t break, at least not with motorcycles from the last 20 years.
In older engines, defective seals on the cylinder base and cylinder head are normal. With older engines it is also common that the cylinder head screws (or nuts) have to be tightened regularly. If you fail to do this, you have to struggle with a blow-through seal. Of the two cylinder seals, the head gasket has to seal more than the base gasket, because cooling water and engine oil ducts are usually incorporated at the top.
The top seal on a four-stroke engine is the valve cover seal. With the single and multi-cylinders that are common today, it is designed as a rubber molded seal. It is permanently elastic and can be used for the life of the engine. When dismantling, make sure that it does not tear. With most engines, a small amount of silicone sealant has to be added to the “half-moon” of the camshaft bearing during installation so that the valve cover seal is really tight at the corners.
Schermer
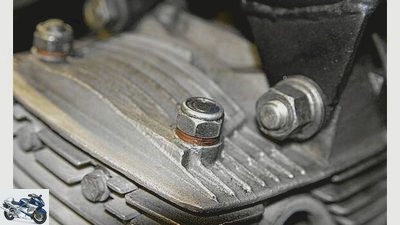
Copper sealing washer on a housing screw.
Sealing washers
If screws are screwed into through threads from the outside of the motor, sealing washers are placed underneath; these consist of aluminum, copper or a fiber material. The oil drain plug is the classic example; There are also such sealing washers on the water drain plug, on the screw plug of the oil riser duct (connection of the oil pressure gauge) and on sensors for the oil or water temperature.
You can use aluminum sealing washers two or three times, but it is better to replace them every time you install them – they cost practically nothing. If you don’t have a new sealing washer on hand, you can anneal a used copper seal and make it “soft” again: heat it to 150 degrees on a hot plate or in a gas flame and quench it under cold water.
Schermer
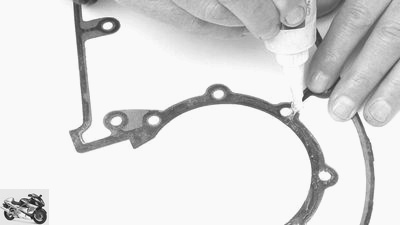
When reinstalling paper seals, apply a thin layer of silicone sealant.
Liquid sealant
Liquid sealant comes in tubes or cans. It is essential to buy petrol- and oil-resistant “motor vehicle sealant” for your motorcycle, do not use any sanitary sealant from the hardware store.
- In the case of sealants from tubes, a fine tip allows precisely dosed application to the sealing surface.
- Sealants from the can are applied to the sealing surface using a brush attached to the lid.
Please note that liquid sealant has a limited shelf life. It may only be applied very thinly to the grease-free, cleaned sealing surface and not get into the oil ducts. After application, it has to air for about ten minutes until it is “finger-tight” to dry. Only then join the components together!
Sealing agents from the can, such as “Teroson”, are also suitable to a limited extent for sealing oil leaks from the outside without dismantling the components: clean the sealing surfaces free of grease (use brake cleaner), smear a small amount of “Teroson” and allow to dry.

Schermer
Don’t just check the oil level. The O-ring on the filler neck should also be OK.
O-rings
An O-ring is a sealing ring made of a rubber or silicone material that is evenly round in cross-section. However, the overall shape of the O-ring does not have to be “round”; B. is the case with a carburetor housing gasket. O-rings rarely break unless they are squeezed during assembly.
A new O-ring must exactly match the prescribed one; the dimensional tolerance is only 1/10 mm! Otherwise it is either too thick and will be squeezed during installation. However, if it is too thin, it cannot be properly sealed. If a groove is provided, the O-ring must be inserted exactly into it and must neither protrude to the side nor bulge out of the groove. When installing, put some engine oil or light grease on the O-ring, but never use a “sticky” sealant!
Bilski
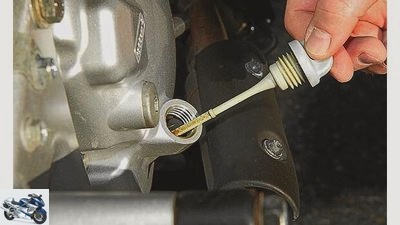
Common problem: Oil mist at the filler neck.
Oil mist at the oil filler neck
Common cause: The O-ring, which sits in its groove at the end of the thread of the sealing plug, is crushed, torn or no longer present. Then some oil is always sucked out by the passing wind while driving.
Schermer
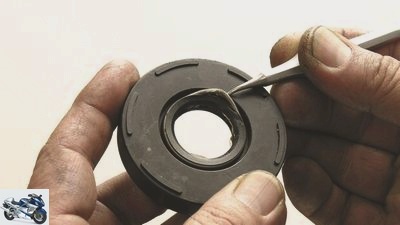
Install Simmerrings with the label facing outwards. Lubricate with roller bearing grease.
Shaft sealing ring (“Simmerring”)
With its hair-thin sealing lip, a Simmerring seals a rotating shaft against a stationary housing. Simmerrings are installed at the gearbox output behind the chain pinion, on the right and / or left of the crankshaft, on the shaft of the clutch actuation and the gearshift. A Simmerring can break if it is dirty and thus its sealing lip is destroyed. The point at the transmission output is very susceptible to this, if a lot of chain grease is thrown off over the years, which collects here mixed with road dirt.
A defective Simmerring can be levered out with a wide screwdriver. After cleaning the seat, position the new Simmerring exactly and press it in evenly – it can often be installed with a strong thumb pressure. If not, use a special “hammering tool”, a correspondingly large hexagon socket will often fit.
Related articles
-
How to change the clutch on your motorcycle
counselor workshop How to change the clutch on your motorcycle Workshop: clutch change, part 1 How to change the clutch on your motorcycle Engage first…
-
Tips for mechanics – correct motorcycle chain maintenance
Photo: Ralf Petersen 13th pictures Ralf Petersen 1/13 / 1 / A typical lack of maintenance: everything sparkling clean, even the chain. Ralf Petersen 2/13…
-
Correct cornering with the motorcycle
Jahn 28 pictures Kawasaki 1/28 Curves are the icing on the cake for motorcyclists. Without them, life on two wheels would be bland. Muller 2/28 3. Green…
-
Kawasaki 15th pictures archive 1/15 The frame is crucial for the driving behavior. archive 2/15 When designing the main frame, the following parameters,…
-
Motorcycle trip: With the motorcycle in Namibia
head 50 pictures head 1/50 Out and about with a motorcycle in Namibia. head 2/50 Out and about with a motorcycle in Namibia. head 3/50 Out and about with…
-
PS reader question about motorcycle technology crash pads
Henniges 7th pictures Wiessmann 1/7 Picture gallery, technology: Are crash pads in makes sense in each case? Katrin Sdun 2/7 These crash pads are not…
-
PS reader question about motorcycle technology – cleaning the radiator
www.factstudio.de, Joachim Schahl 7th pictures archive 1/7 Picture gallery, technical question: cleaning coolers. Werner Koch 2/7 When the delicate…
-
Kawasaki E-Boost: electric or hybrid motorcycle
Kawasaki. 29 pictures Kawasaki 1/29 Kawasaki filed another patent on hybrid motorcycles in 2021. Kawasaki 2/29 An electric motor in the transmission…
-
Guide: Injection on a motorcycle
Drawing: Schermer counselor technology & future Guide: Injection on a motorcycle Guide: Injection on a motorcycle Find and rectify faults in the…
-
Tried Kochmann Rider motorcycle boots
Jorg Kunstle clothing Boots Tried Kochmann Rider motorcycle boots Tried Kochmann Rider Motorcycle boots for retro cyclists Those who ride a motorcycle in…