Table of contents
- Screwdriver tip alternator and battery Proper care and what to look out for
- Types of motorcycle battery
- Replace a battery
- Removal and installation of the battery
- Recognize the state of charge
- Check the battery
- Bridging, pushing, jump start cables
- Power generation
- The alternator
- Checking the charging circuit and the alternator
- Mechanic courses
Ralf Petersen

18th pictures
Ralf Petersen
1/18
Ralf Petersen explains to us what to look out for with the alternator and battery and how to properly maintain the components.
Ralf Petersen
2/18
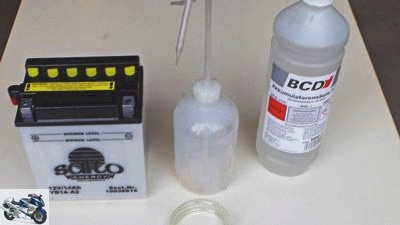
The standard acid battery is cheap but requires a lot of maintenance.
Ralf Petersen
3/18
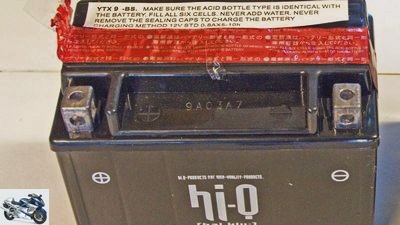
MF batteries are maintenance-free and leak-proof in the event of a fall.
Ralf Petersen
4/18
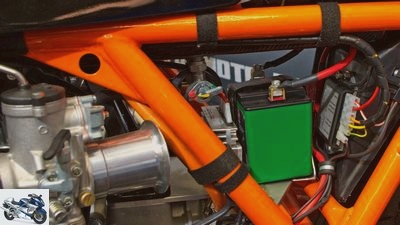
The light lithium batteries are not suitable for every bike.
Ralf Petersen
5/18
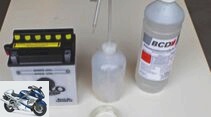
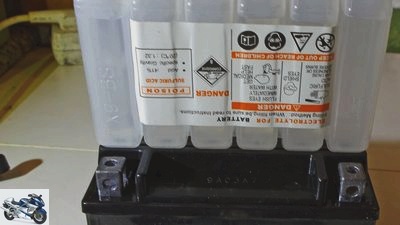
The correct acid filling of an MF battery takes time.
Ralf Petersen
6/18
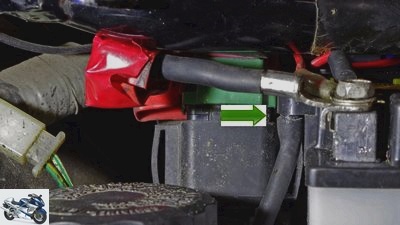
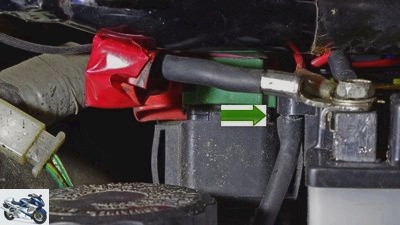
Lay the ventilation hose of the acid battery without kinks.
Ralf Petersen
7/18
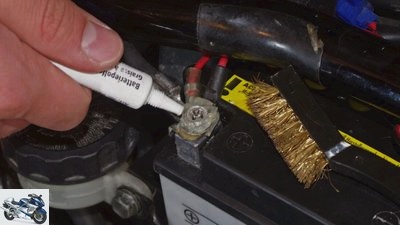
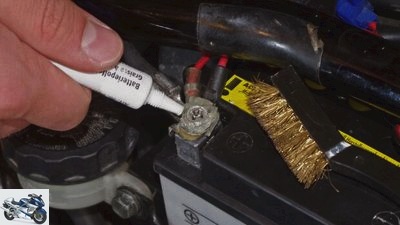
When removing, with the ignition switched off, first remove the minus, then the plus pole, then the bracket. If it is dirty on the outside, it should be cleaned as the layer of dirt can cause leakage currents.
Ralf Petersen
8/18
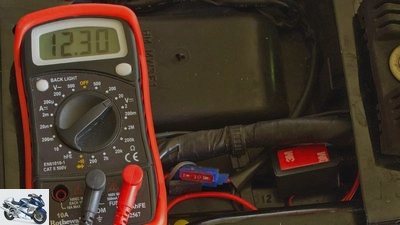
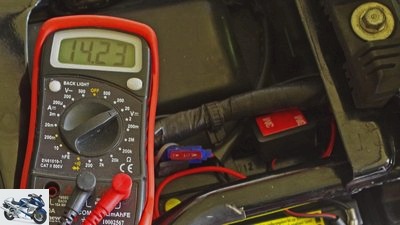
Fully charged – battery test with multimeter under load.
Ralf Petersen
9/18
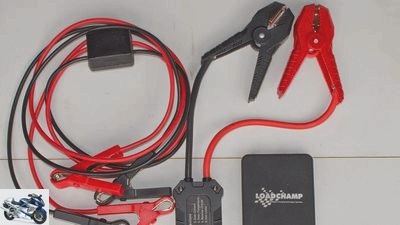
Jump-start is available via a special jump-start cable or battery booster.
Ralf Petersen
10/18
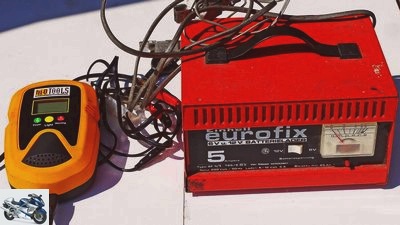
Not universal – the charger must match the battery!
Ralf Petersen
11/18
The charge current check is always carried out with the engine running.
Ralf Petersen
12/18
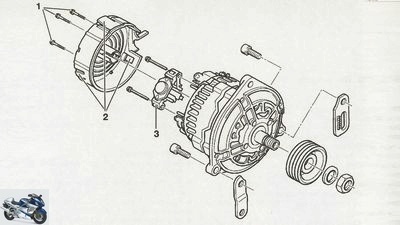
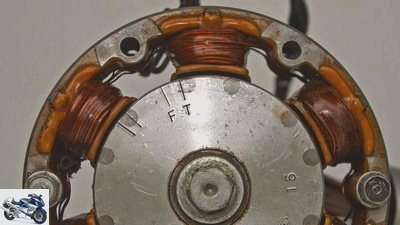
Classic design: permanent magnet on the crankshaft.
Ralf Petersen
13/18
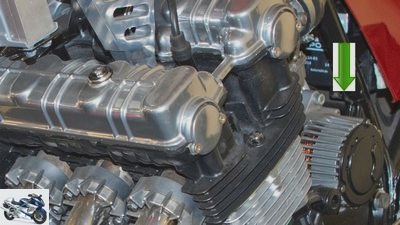
In the CBX 1000, the Lima sits behind the cylinder block.
Ralf Petersen
14/18
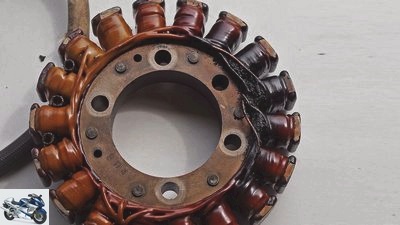
Burned out – typical overheating damage to the stator.
Ralf Petersen
15/18
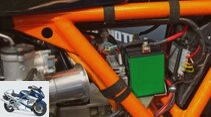
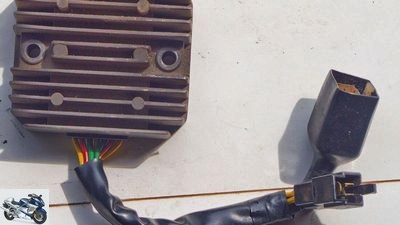
Cooling fins for dissipating heat to the rectifier / regulator.
Ralf Petersen
16/18
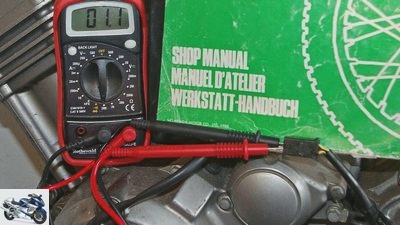
Testing of Lima, rectifier and regulator with manual.

Ralf Petersen
17/18
Repairs instead of new purchases, e.g. thanks to the experts at Motek.
Ralf Petersen
18/18
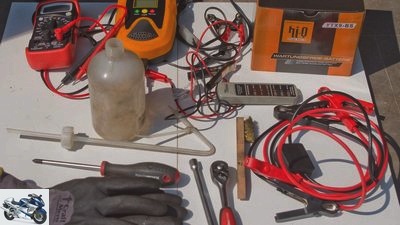
This is needed for the check: voltage tester or multimeter, new battery, tools for dismantling, brass brush, pole grease, gloves, filling aid, jumper cable, manual for the exact measured values.
counselor
workshop
Motorcycle mechanic tip Alternator and battery
Screwdriver tip alternator and battery
Proper care and what to look out for
The more modern a motorcycle is, the more dependent it is on electricity. More and more electronic components require more and more powerful alternators and larger batteries. But what do you have to pay attention to and how do you properly care for the components?
Invalid date
Numerous sensors, intelligent systems, LC displays – they all require more and more powerful alternators and larger batteries. A constant and sufficient power supply is particularly important, because the electronics cannot tolerate voltage fluctuations. When the engine is running, the required electricity is generated (or generated) by the alternator, often referred to as a generator, and stored in the battery (the term accumulator would be more precise from a technical point of view). While alternators, regulators and the like have a relatively long service life and are in principle maintenance-free, the battery is more often the cause of problems in and on the on-board electrical system due to its limited service life.
Buy complete article

Screwdriver tip alternator and battery
Alternator and battery
Pages) as PDF
€ 2.00
Buy now
Types of motorcycle battery
The best battery is the one that is fitted as standard – because the motorcycle’s electrical system is optimally matched to it. So you shouldn’t just replace it with another type.
Standard acid battery: The classic standard acid battery is mainly used in older motorcycles (up to around 1995). Their advantage is the low price, their disadvantage is the maintenance intensity: Check the acid level regularly and top up with distilled water if necessary! In addition, it is not leak-proof in the event of a fall. Since this type of battery is a gas, a long ventilation hose protruding down into the open must be attached to safely discharge acid vapors. To recharge, you always remove them, remove the battery plugs and ensure good ventilation.
Maintenance-free batteries: Maintenance-free batteries (“Maintenance free”, MF) are available in different versions. They are either sealed at the factory or are permanently closed after being filled with acid and must never be opened again! MF batteries are also acid batteries, but they are permanently closed and therefore maintenance-free and leak-proof. They also have a lower self-discharge. A standard acid battery can usually be replaced by an MF battery without any problems. Gel batteries are very powerful, therefore often much smaller than MF batteries, and can be installed in any position. However, they are usually not suitable for older machines because they need a special charging / cut-off voltage.
Lithium batteries: Lithium batteries (usually as a lithium iron phosphate version, LiFePO4 on motorbikes) are particularly small and light and are therefore often used for cafe racer conversions. But they are also expensive and can cause problems in sub-zero temperatures. They also need a special charger for charging.
Replace a battery
The service life of a battery depends on the quality, installation that is as vibration-free as possible and, of course, maintenance. If in doubt, it is better to replace them if there are clear signs of fatigue in order to prevent a total failure of the electrical system. The prices vary greatly, and new batteries can often be purchased at a very affordable price – sometimes well below 40 euros. As a rule, such a cheap battery lasts around four years before I replace it. Even with much more expensive batteries, I haven’t necessarily had better experiences. The new battery must of course match the old one in terms of installation size, voltage and amperage, as well as the position of the poles and possibly the ventilation hose. It is essential to check this before installing / filling.
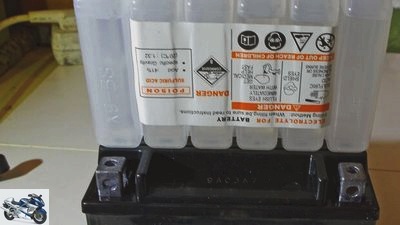
Ralf Petersen
The correct acid filling of an MF battery takes time.
Standard acid batteries and some MF batteries are supplied with an acid bottle or a suitable acid pack and must be filled before installation – read and follow the relevant instructions and safety regulations carefully! In principle, all new batteries are pre-charged, but the charge level is often significantly less than 80 percent due to the storage time. Since a careful initial charge is important for the service life of the battery, it must be checked and possibly recharged. If you do not do this out of convenience, it can be damaged and, above all, will not reach its full capacity. The old battery is usually taken back by the seller and the battery deposit is refunded.
Removal and installation of the battery
When removing a battery, with the ignition switched off, first remove the negative, then the positive, and then the holder. Then you can take them out. If it is dirty on the outside, it should be cleaned as the layer of dirt can cause leakage currents.
Ralf Petersen
When removing, with the ignition switched off, first remove the minus, then the plus pole, then the bracket. If it is soiled on the outside, it should be cleaned as the layer of dirt can cause creeping currents.
When installing, you pay attention to a tight fit in the battery compartment, there is often a strap for this. As a rule, it is also placed on a vibration-absorbing surface that cannot be removed. If there is none, you can make it yourself from a piece of rubber. The battery poles and the connections are cleaned with a brass brush, first connect the plus and then the minus cable during installation and coat them with pole grease after installation to protect against corrosion.
Ralf Petersen
Lay the ventilation hose of the acid battery without kinks.
With standard acid batteries, make sure that the ventilation hose is really firmly attached and not kinked.
Recognize the state of charge
Most batteries suffer from poor annual mileage and the often long downtimes of motorcycles and should therefore be checked regularly and recharged if necessary. Modern chargers with trickle charge can do a good job here. However, they must be suitable for the corresponding battery model. Under no circumstances should you use old car or hardware store chargers, as these often have too high a charging current and damage the motorcycle battery. If the battery is difficult to access, you can mount a suitable cable extension with an adapter. If it is not used for a long time, for example during the winter, it is best to remove it, fully charge, store it in a cool and dry place and check the charge status regularly. The Bluetooth battery monitors, which are now available in accessory stores, make this monitoring very easy thanks to the smartphone app.
Check the battery
A weak battery can usually be recognized by starting problems. You can literally feel how the electric starter cranks the engine with great difficulty. To save the battery, such starting processes should be avoided as far as possible. Whether a battery is already defective or just needs to be recharged can be determined by checking the battery voltage. The battery guard mentioned above, which displays the battery voltage via an app, is again practical. A voltage tester is used to check the battery poles. There are very simple models in which light-emitting diodes indicate the state of charge, but the best way to do this is to use a multimeter.
Ralf Petersen
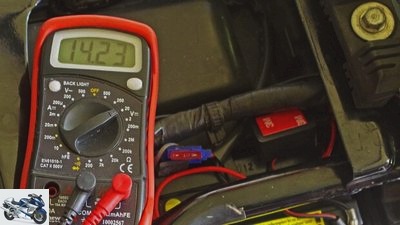
Fully charged – battery test with multimeter under load.
The voltage between the battery poles is measured on the (charged!) Battery that has been idle for at least 30 minutes (measuring range 20 V direct current). Then it applies that the voltage should be 12.4 to 12.7 volts when the ignition is switched off. If it drops by just 0.3 to 0.4 volts within 30 seconds with the ignition / light switched on, then the battery is okay; if the voltage drops by 0.5 volts or more, you have to recharge it. If the voltage drops by 2 volts, the battery is junk. Standard lead-acid batteries have a slightly lower voltage.
Bridging, pushing, jump start cables
If only the starter does not want to crank anymore because the battery is too weak, there are various options. For older motorcycles with a kick starter, a bold kick is enough, vehicles without a catalytic converter can usually be pushed with a little skill.
Ralf Petersen
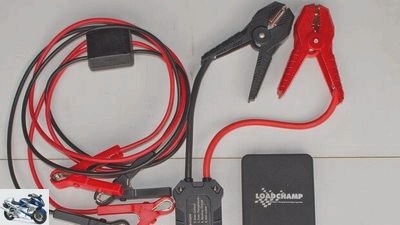
Jump-start is available via a special jump-start cable or battery booster.
For all others, you can get jump start help using a jumper cable. If you are bridging with a strong car battery, you should definitely use special jump-start cables for motorcycles (preferably with overvoltage protection). They prevent voltage peaks that could damage electrical components. The small terminals also make it easier to get to the battery poles. Another possibility is the use of so-called battery boosters – a kind of power bank with suitable battery terminals. The devices are often no bigger than a thick paperback and can also charge cell phones etc..
Power generation
The electricity required for the motorcycle is generated by induction in a generator, the so-called alternator. This electricity production depends on the speed and is usually alternating current. However, since only direct current can be stored in a battery, this alternating current is converted in the rectifier. The third component is the regulator, which controls the amount of current flowing to the battery so that it is optimally charged.
Ralf Petersen
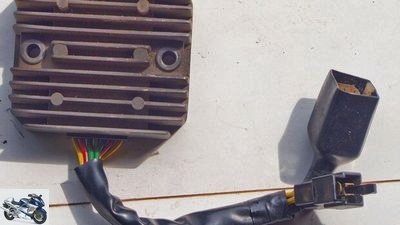
Cooling fins for dissipating heat to the rectifier / regulator.
Modern motorcycles often have a combined regulator / rectifier. In the event of malfunctions in this system, the battery is not charged or charged incorrectly or is overcharged.
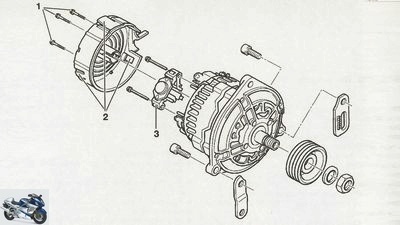
The alternator
The alternator is often located directly on the engine’s crankshaft stub and runs in the cooling oil mist of the engine lubrication.
Ralf Petersen
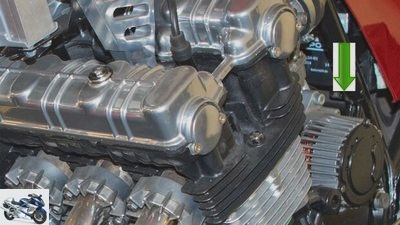
In the CBX 1000, the Lima sits behind the cylinder block.
In order to save construction width, however, it is sometimes also located behind the cylinder block and is driven by a chain, etc. This generator basically consists of a rotating part, the rotor, and a stator, which is usually built into the housing, and supplies a three-phase alternating current when the engine is running.
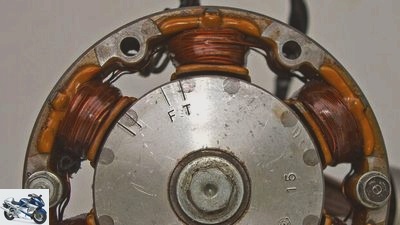
Ralf Petersen
Classic design: permanent magnet on the crankshaft.
The rotor can work either as a permanent magnet or as an electromagnet. In alternators with permanent magnets, the voltage generated by the stator is too high at high speeds – so that the battery is not overcharged, the regulator interrupts the charging process in good time. The excess voltage is then converted into heat both in the regulator and in the stator coils. In order to be able to dissipate this heat to the environment, the controller often has cooling fins that must not be covered by a tool bag or the like. Permanent overheating can destroy the insulating varnish on the stator and damage the coil windings. A permanent magnet can lose its power after years and must then be replaced.
Some motorcycles also use a rotor with an electromagnet, to which a direct current is fed from the battery via sliding contacts, so that an excitation current is generated. The rotation of the magnetized rotor then induces an alternating current in the stator coils. By constantly measuring the on-board voltage by the controller, the stator only generates a current as long as this voltage is below 14.2 volts. The controller interrupts the excitation field above 14.4 volts. There are no overheating problems with this type of construction, but the sliding contacts are a wearing part and may have to be replaced. This type of generator can sit directly on the crankshaft or elsewhere and always runs dry.
Checking the charging circuit and the alternator
Regardless of the design, similar to the battery, it is very easy to check whether the charging system is working properly.

Ralf Petersen
The charge current check is always carried out with the engine running.
To do this, the voltage at the battery terminals is measured again using a multimeter. When the engine is running (!) It must usually be between 13 and 14.7 volts. It changes depending on the speed and state of charge, and the so-called cut-off point is a maximum of 14.7 volts. If the voltage does not or only slightly increases when accelerating, or if it rises above 14.7 volts, then it must be measured and checked carefully. The values given here may differ depending on the vehicle – observe the repair manual! In the event of errors in the charging circuit, first check all lines / cables for damage, breaks and the like. All contacts and plugs should also be thoroughly inspected and any corrosion removed. If a (new!) Battery is constantly discharged after a short downtime, it may also be due to leakage currents and defects in the wiring harness. The test is carried out by measuring the current (set multimeter to amperes) between the negative pole of the battery and the unscrewed earth cable. You always feel your way down from the highest measuring range (usually 10 A). More than 0.1 mA should not flow. Caution, of course no consumer may be connected directly to the battery.
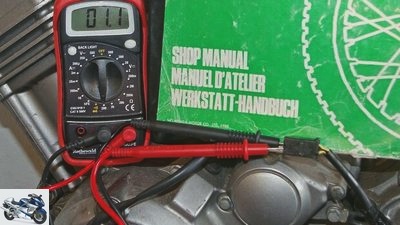
Ralf Petersen
Testing of Lima, rectifier and regulator with manual.
The procedure for testing the alternator depends on the type. With Limas with permanent magnets, the non-rectified charging voltage (usually between 50 and 70 V AC!) Can be checked relatively easily with the help of a multimeter at the connector contacts while the engine is running. If it is not in the specified range, there may be a break or short to ground in the winding, which can be checked with a resistance measurement. The exact procedure must be taken from the repair manual. If everything is OK here, it could be due to a demagnetized rotor, which in this case has to be replaced. Limas with a rotor with an electromagnet are available with both an integrated and a separate rectifier. In addition to checking the measured values in accordance with the repair instructions for checking the stator, the condition of the collector and the sliding contacts must also be checked. They can be changed if necessary. If the alternator is defective, there are several options. You can replace it with an expensive original part – sometimes there are cheap replacements in the accessories – but the installation of used parts is also an option, whereby the question of the condition arises.

Ralf Petersen
Repairs instead of new purchases, e.g. thanks to the experts at Motek.
A repair by a specialist company, e. G. B. Motek. The electrical professionals from Bielefeld are reliable contacts for electrical problems and repair almost all Limas with high-quality materials. That is often better than cheap limas from the accessories.
If the Lima is OK, the rectifier and regulator remain as sources of error. An on-board voltage that is too high is an indication of a defective regulator; in vintage cars it can sometimes even be readjusted. Modern regulators / rectifiers are checked again with a multimeter by measuring the resistance after removing the cable. As a rule, one measures the resistance between the earth cable or the positive output cable and all alternator connections. For the exact information and the procedure, please refer to the repair manual. The corresponding information often relates to a special type of measuring device (at Honda, for example, Kowa / Sanwa) and a temperature of 20 degrees. Despite apparently correct measurements, I have often had parts that were still defective. That’s why I used a lot of standard electrical components for my motorcycles, such as regulators / rectifiers, ignition coils, etc., bought on Ebay for a bargain price, tested them through installation on the motorcycle and put them on the shelf. In the event of a malfunction, the problem can be localized and eliminated by simply replacing it.
Mechanic courses
The author, Ralf Petersen, works as a further education teacher at the VHS Duisburg and has been organizing mechanics courses for 22 years. 12 to 15 practical seminars on maintenance, repair and technology are offered every year. His book was published by Delius Klasing Verlag in 2015 “Basic knowledge of motorcycle technology”. Info: www.motorrad-schrauberkurse.de Facebook: Motorrad-Technik Petersen
Related articles
-
Varta counselor workshop Adviser: the battery Adviser: the battery Everything about the battery It’s almost close, the season is about to start. In order…
-
MOTORCYCLE screwdriver tip on starting problems
Ralf Petersen 19th pictures Ralf Petersen 1/19 Starting problems on the motorcycle are tricky. They can occur without warning, whether the engine is cold…
-
Battery chargers motorcycle test
fact 17th pictures fact 1/17 In a comparison test, 15 different battery chargers competed against each other. Which product won the test?? mps studio…
-
Product test: battery chargers
fact accesories Product test: battery chargers Product test: battery chargers 17 battery chargers in comparison Anyone who only hears a gentle click of…
-
Service silent hectic alternator
Streblow 8th pictures Streblow 1/8 The assembly of the silent hectic on the BMW R 80 GS Basic. Streblow 2/8 On the left you serial parts, on the right…
-
archive counselor technology & future Motorcycle batteries Everything about batteries Lead-acid batteries, lithium-ion batteries & Co. Nothing works…
-
Diesel motorcycle meeting in Hamm-NRW
Siemer Sports & scene Events Diesel motorcycle meeting in Hamm / NRW Diesel meeting in Hamm / NRW Motorcycles with diesel engines The industry sees no…
-
Legal basis for motorcycle conversions
Fotalia 15th pictures Fotalia 1/15 Legal basis for the self-made custom bike. Ralf Petersen 2/15 First desk, then workbench. Nothing works without…
-
Sdun accesories Product test battery chargers Product test: battery chargers Battery chargers for motorcycle batteries in the test Content of In order…
-
Everything about motorcycle batteries
archive accesories Everything about motorcycle batteries Battery science for everyday life Tension issue Nothing would work without the motorcycle…