Table of contents
- Werner’s workshop projects Reconditioning Zundapp “GS 50”
- Make sure to lubricate the cutting line and saw blade
- Lighten where it can, strengthen where it has to be
- Fan grinder, lapping cloth or belt grinder
- Pack of rolling bearing grease for the wheel bearings
- Brushing and polishing with paste
Werner Koch
30th pictures
Werner Koch
1/30
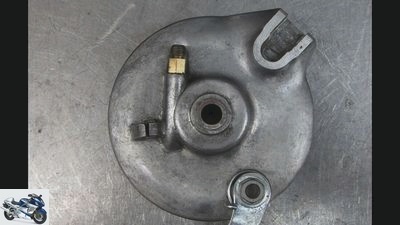
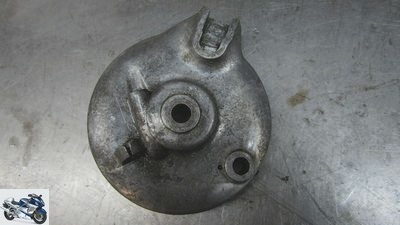
…after-comparison of the front brake anchor plate
Werner Koch
2/30
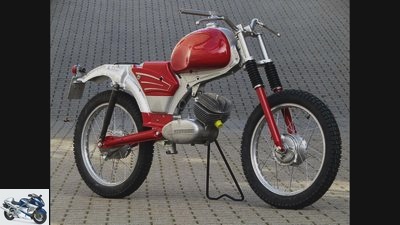
Werner works: Zundapp “GS 50”
Werner Koch
3/30
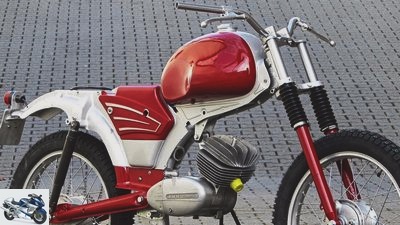
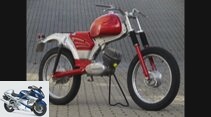
The Zundapp “GS 50” is based on a Sport Combinette, built in 1963. Condition: pathetic to impassable, so just right for a complete conversion
Werner Koch
4/30
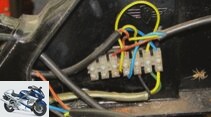
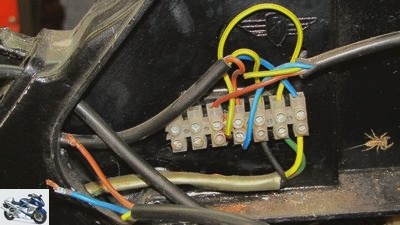
The in itself simple and clear wiring harness was screwed up. Whether the spider attacked the tangled cables?
Werner Koch
5/30
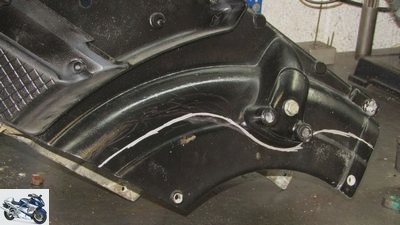
The section was first drawn on the baroque rear frame
Werner Koch
6/30
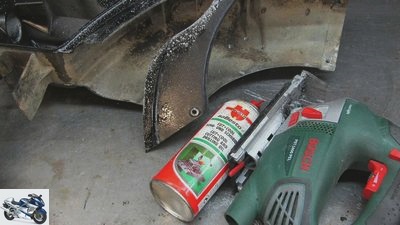
Then the rear was lightened by means of a jigsaw and cutting oil (against smearing and seizing of the saw blade in the cast aluminum) without reducing the stability of the shock absorber eye
Werner Koch
7/30
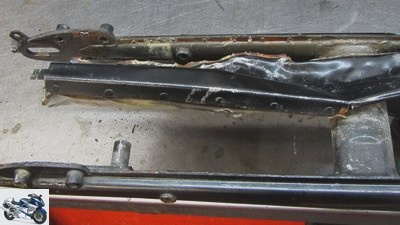
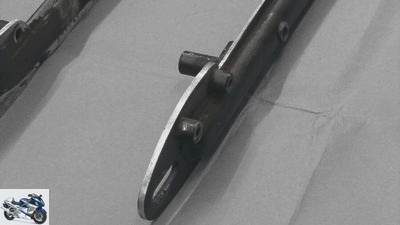
The chain case, which was attached to the left swing arm with weld spots, had to be removed with “brute force”
Werner Koch
8/30
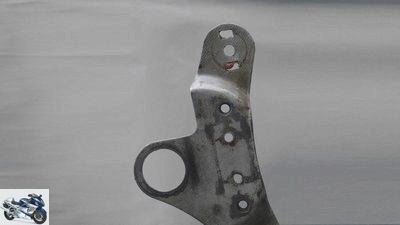
The sharp edges of the stamped and pressed sheet metal parts were first leveled with the grinding wheel, deburred and finally polished with the fan grinder
Werner Koch
9/30
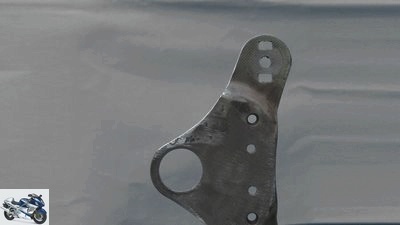
The upper fork bridge is visible in the GS project, but the recess is visually disturbing
Werner Koch
10/30
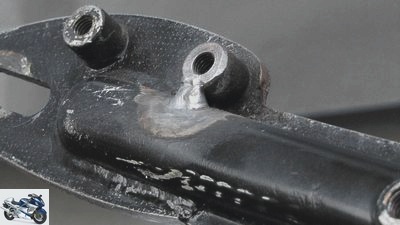
This was symmetrically padded and smoothed with a welded sheet metal
Werner Koch
11/30
The front threaded sleeve of the shock absorber mount is now supported by a strong weld point on the swing arm to withstand the higher loads in off-road use
Werner Koch
12/30
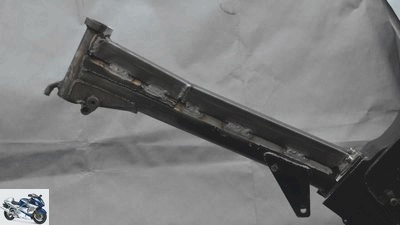
After much deliberation, the central tube, measuring just 43 millimeters, was also reinforced on the frame with a welded-on U-profile. This is supported at the front on the steering head and at the rear is intended to prevent the frame tube from bending under high load at the critical transition to the rear frame.
Werner Koch
13/30
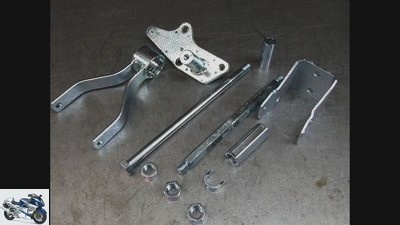
All unpainted components have been galvanized and are therefore protected against corrosion in the future
Werner Koch
14/30
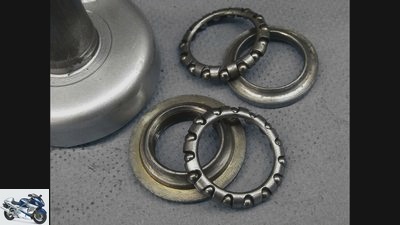
The shoulder ball bearings in the steering head were removed on the lathe and reassembled
Werner Koch
15/30
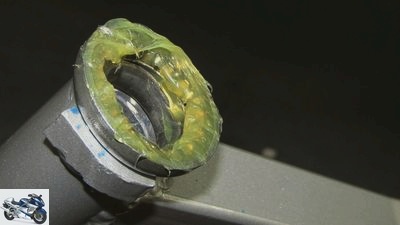
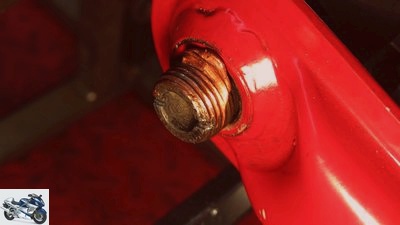
You shouldn’t skimp on fat, because an effective seal is missing
Werner Koch
16/30
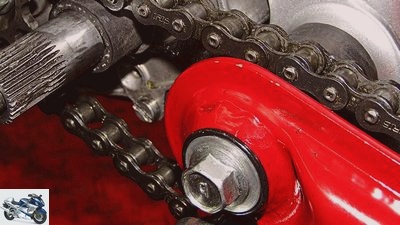
The swing arm bearings are designed as threaded sockets. They thus act both axially and radially. In order to prevent the threaded bushing from jamming when the axle is tightened, it is preloaded using two subsequently milled slots
Werner Koch
17/30
The water hoses pulled over the kickstarter shaft and swing arm protect against chain rattling, the O-ring keeps the swing arm bearing tight
Werner Koch
18/30
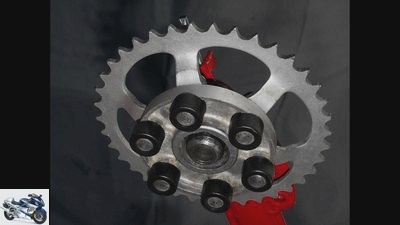
Shock absorber mounts with new rubbers, but the bearing was perfect
Werner Koch
19/30
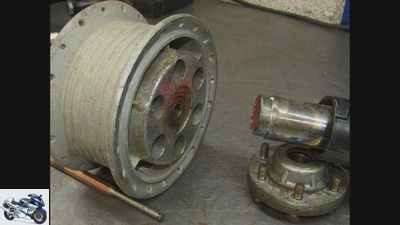
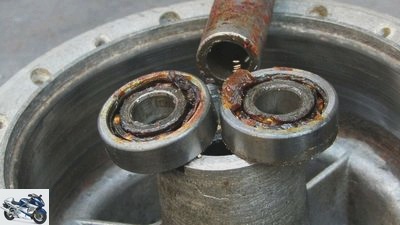
After heating up with the heat gun, the ball bearings can be gently removed from the wheel hubs
Werner Koch
20/30
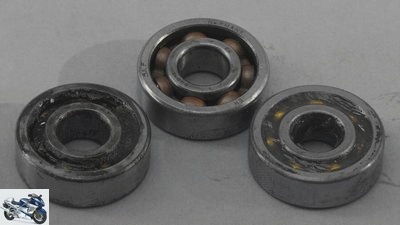
The bearing grease has turned into a resinous mush
Werner Koch
21/30
From left to right: resinous bearing, after blowing out with a compressed air gun, with fresh grease filling ready for installation
Werner Koch
22/30
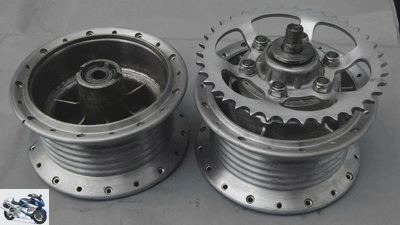
The hubs are unusually identical at the front and rear. They were pulled off with lapping lines on the lathe, and the brake ring was thoroughly cleaned
Werner Koch
23/30
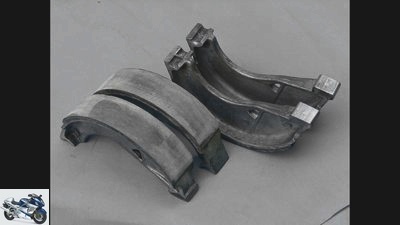
The steel plate on the cam on the original brake shoes had to be smoothed and polished, and the linings themselves had to be stripped off with lapping cloth. ATTENTION: The old coverings contain a lot of asbestos! Work only with respiratory protection and vacuum off the debris!
Werner Koch
24/30
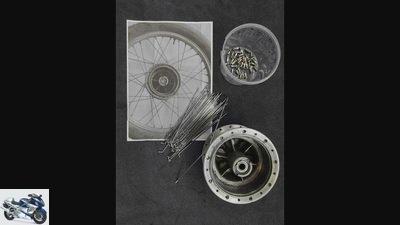
A photo of the series wheels was printed out as a template for the spoke pattern. What is unusual here is that only inner spokes with double crossings are used
Werner Koch
25/30
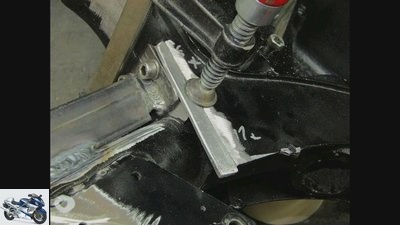
So that a seamless transition to the frame could be made after the tank was raised, a three millimeter thick aluminum sheet was adjusted, welded and finally smoothed
Werner Koch
26/30
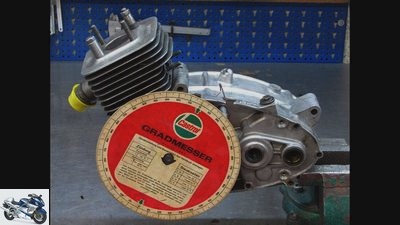
In the next part we dismantle the engine of the Zundapp Sport Combinette and set about rebuilding the drive solidly and cleanly with a few manual tricks. More power is not an issue for our moped, but a powerful start cannot hurt, especially off-road.
Werner Koch
27/30
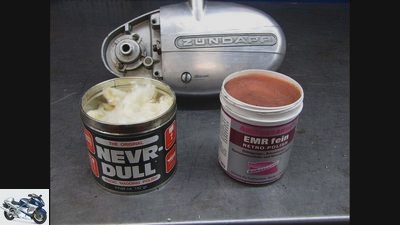
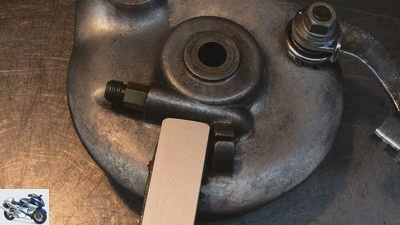
For high gloss: Nevr-Dull. Silk matt surfaces can be achieved with EMR paste
Werner Koch
28/30
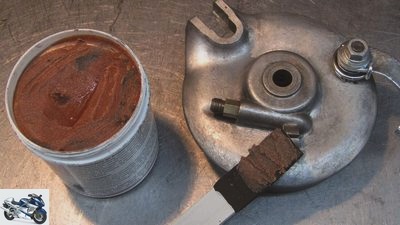
Aluminum spatula…
Werner Koch
29/30
With a self-adhesive foam rubber layer on the aluminum spatula, the paste also gets into angled corners.
Werner Koch
30/30
Before…
counselor
workshop
Reconditioning Zundapp GS 50
Werner’s workshop projects
Reconditioning Zundapp “GS 50”
Content of
The amazing thing about the MOTORRAD Classic project Zundapp “GS 50”: Many components of the 53-year-old moped were still in excellent condition. Everything about reprocessing in detail.
Werner Koch
02/03/2017
“Saw off is sawed off, “warns an old craftsman’s saying of the finality of machining operations. That is why it was important to initially set the upcoming radical cuts with care in our Zundapp “GS 50” project. Because they were indispensable in order to carve out the baroque Sport Combinette into a light and maximally reduced off-road sport moped.
Buy complete article
Werner’s workshop projects
Reconditioning Zundapp “GS 50”
6 pages) as PDF
€ 2.00
Buy now
I finally found a lot of suggestions on the net from the specialists at www.undapp.net, with neat GS 50 replicas, important information and lots of tips on the rare GS 50/75 models with which the Munich off-road athletes successfully plowed through the undergrowth in the early 1960s. Enough authentic material to build the 50s Zundapp in a contemporary style.
Make sure to lubricate the cutting line and saw blade
A whole pile of sketches and pictures was followed by the final plan, which was implemented with a jigsaw, cut-off machine and, unless otherwise possible, also with a hammer and chisel. So I had to irreparably dismantle the opulent chain case, which was fixed to the swing arm, or, better, demolish it. After the massacre, the remains of spot welds and the coarsely welded shaped sheets were smoothed and rounded with the fine grinding wheel.
The drawn cutting lines run in beautifully curved arches on the rear frame, which is remodeled with the metal jigsaw. Important: Spray the cutting line and the saw blade copiously with drilling and cutting oil to prevent the saw blade from seizing or smearing in the aluminum. The lubrication prevents the blade from jamming or tearing off, especially when cutting narrower radii, where the saw blade is actually tilted.
Lighten where it can, strengthen where it has to be
I also implemented the intention of converting or adapting as many original parts as possible to the rear fender. Where the massive rear light used to be enthroned, a short stub now acts as a mud flap, which is extended over the license plate / rear light holder made of aluminum sheet. The latter sits on a six-millimeter silent block, protected from vibration and elastic in all directions.
The triple clamps should also be taken from the Sport Combinette fund, but naked and without the heavy lamp cover. The upper bridge, made symmetrical with a welded triangle, now carries the screwed clamps for the wide enduro handlebars. The chrome-plated standpipes disappear at the top under self-made aluminum lamp holders. At the bottom, instead of the cheap sheet metal sleeves, black bellows protect against dust, water and stone chips.
In order not to break on the wild ride through difficult terrain, the main frame was given a proper bracing because I had a queasy feeling, especially when looking at the transition from the 43 millimeter thin frame tube to the sturdy die-cast frame rear. If it breaks anywhere, it will be here, said the inner voice. So I supported the welded U-profile on a plate fastened with three six-screw screws and thus massively reinforced this highly stressed area. As a result, the tank moved about ten millimeters further up. In itself no problem, only now there was an ugly, sloping gap of more than one centimeter at the transition to the aluminum frame, which had to be welded and leveled with a three millimeter thick aluminum plate. Before the frame was painted, all of the required threads had to be cut or, if necessary, replaced with a thread insert.
Fan grinder, lapping cloth or belt grinder
While the painter was trying to create a flawless look, I took care of the rest of the chassis components. All steel parts were all rusty and scarred and immediately went to galvanize. But after the first load it was clear: simply galvanizing is not possible. As with all surface coatings, the surface must first be smoothed with a fan sander, lapping cloth or belt sander and removed from quirks and scratches.
As much as I was amazed at the clever design of the swing arm bearing made of brass threaded bushing with an inserted steel inner ring, I was not astonished by the tough, sluggish response of the suspension. This was remedied by a groove milled in using a cutting disc, which makes it possible to preload the internal steel thread so that nothing can jam in the axial direction after the rocker axis has been tightened.
Pack of rolling bearing grease for the wheel bearings
Because of the small original 11-speed sprocket and the widely rebounded swing arm for more travel, the chain on my homemade GS 50 can occasionally touch the swing arm and kickstarter shaft. Two overlaid water hoses prevent loud metallic contacts. And subsequently attached O-rings between the chamfered washer and the swing arm bearings protect against the ingress of water and dust.
All wheel bearings were in astonishingly good shape. They were first freed from the old, resinous grease with a hard jet from the compressed air gun and then rinsed from the spray bottle with MoS² and lubricated with a generous pack of roller bearing grease. Experience has shown that this method is better than machine cleaning of the bearings with cold cleaner. In the process, dirt particles from the circulated cold cleaning agent are often washed into the running tracks and cages, which then cause a rough, choppy run. If nothing works despite meticulous cleaning, new bearings are added. The few euros are always worth the reliable, smooth running of the wheels to me. Especially since you can fall back on double-sided sealed bearings in a smooth-running C3 design. C3 also because, depending on the “preload”, the outer bearing rings set themselves a touch in the aluminum hub, but thanks to the larger running clearance they still guarantee perfect ease of movement.
Brushing and polishing with paste
To the mechanics and technology of the Zundapp Keeping it in the contemporary style, I didn’t want to sandblast or paint the surfaces of the metal parts. A die-cast brake anchor plate should also look like die-cast. To clean the surface, I first tried conventional means. Cold cleaners, brake cleaners, MoS² spray – unfortunately none of these agents gave the desired result. Then the EMR grob Retro Polish cleaning paste from Ambassador Chemie was used (www.ambassador-chemie.de). With that a matt-glossy, but not polished surface was achieved. In order to reach the corners and depressions, I made an auxiliary tool out of a sturdy aluminum sheet and a glued-on foam rubber. Conclusion: This makes cleaning work, but remains a time-consuming cleaning job even with the EMR paste. Compared to the proven Nevr-Dull polishing wadding (www.nevr-dull.de) the removal of the black-gray oxide layer is better. If you want a high gloss finish, Nevr-Dull is the best choice when it comes to polishing up aluminum rims and engine covers. However, scratches and flaws really come into their own on polished surfaces. That’s why I prefer the rustic GS 50 silk-matt surfaces that can be achieved with the EMR paste.
Related articles
-
Screwdriver report – GS 50 conversion with Zundapp engine
Cook 28 pictures Werner Koch 1/28 Zundapp GS 50 Werner Koch 2/28 The 2.6 HP strong base engine of the Zundapp GS 50 is fan-cooled – and a bit worn out…
-
Famel E-XF: Electric scooter with Zundapp spirit
Famel 9 pictures Famel 1/9 The Portuguese moped brand Famel is trying to make a comeback with the electric model E-XF. Famel 2/9 The design tries to…
-
Reconditioning used motorcycles winter break
Ralf Petersen 15th pictures Ralf Petersen 1/15 What is needed: repair instructions, compression meter, feeler gauge (for candles, valves), oil strainer,…
-
Honda CB 900 F conversion from NCT Motorcycles
Peter Pegam / NCT Motorcycles 18th pictures 1/18 Honda with single-sided swing arm, clearly VFR 750. Or when NCT Motorcycles installs the swing arm of a…
-
Honda CB 650 R Street Tracker from Oehlerking
Ben Ott 20th pictures Ben Ott 1/20 Dirk Oehlerking rebuilt the CB 650 R on behalf of Honda Germany. Ben Ott 2/20 It has become a street tracker with a…
-
Rizoma counselor workshop Footrests New footpegs for motorcycles Mount retrofit footrest systems They are kicked, dragged through and even beheaded in…
-
PS reader question about motorcycle technology – cleaning the radiator
www.factstudio.de, Joachim Schahl 7th pictures archive 1/7 Picture gallery, technical question: cleaning coolers. Werner Koch 2/7 When the delicate…
-
Superbike World Championship: technology of the Aprilia and Ducati factory machines
motorcycles Superbike World Championship: Technology of the Aprilia and Ducati factory machines Superbike World Championship: Technology of the Aprilia…
-
Hornig expands its product range for BMW motorcycles
Horny 10 pictures Horny 1/10 BMW R1250R conversion by Hornig Horny 2/10 BMW R1250R conversion by Hornig Horny 3/10 BMW R1250R conversion by Hornig Horny…
-
Cafe Racer conversion project Xpresso V4
Werner Koch 19th pictures Werner Koch 1/19 As a reminder: A Honda VF 1000 F2 was purchased in autumn 2015 for 680 euros… Werner Koch 2/19 So that the…