Table of contents
- Screwdriver report – GS 50 conversion with Zundapp engine Crackles, stinks and smokes
- The delicate three-speed gearbox is reminiscent of a clockwork
- Motor survived all the ordeals surprisingly well
- Does the Zundapp GS 50 also work in real life??

Cook

28 pictures

Werner Koch
1/28
Zundapp GS 50
Werner Koch
2/28
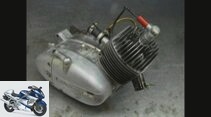
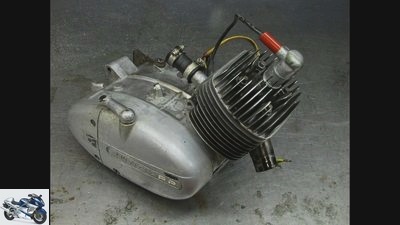
The 2.6 HP strong base engine of the Zundapp GS 50 is fan-cooled – and a bit worn out
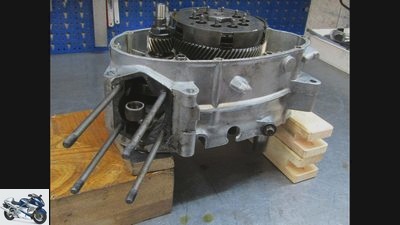
Werner Koch
3/28
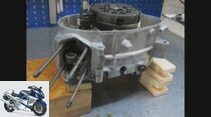
To make it easier to dismantle, the vertically split motor housing was mounted on two wooden blocks so that the shafts do not rest on them
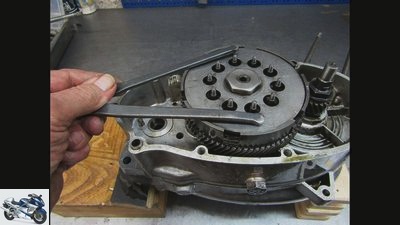
Werner Koch
4/28
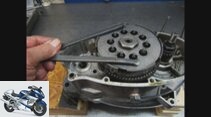
To loosen the central nut of the coupling, I countered with a pin wrench anchored in two holes
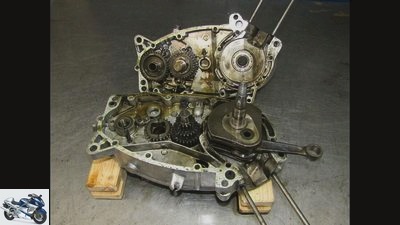
Werner Koch
5/28
When separating the housing halves, pay attention to the position and location of the spacers and gears. The engine was previously dismantled and assembled without a paper seal. So there was only a small puddle of the creamy SAE 80 gear oil left
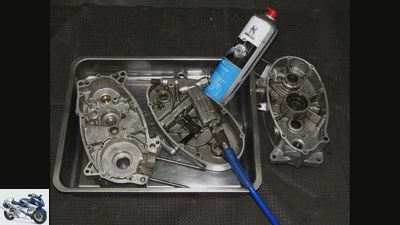
Werner Koch
6/28
Housing and ball bearings were flushed with plenty of brake cleaner and blown out with compressed air
Werner Koch
7/28
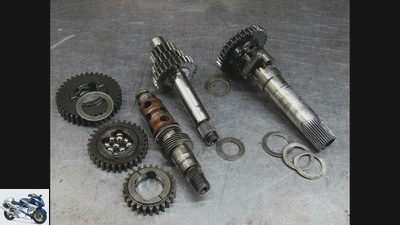
With draw key gears, the individual gears are spaced apart by thrust washers
Werner Koch
8/28
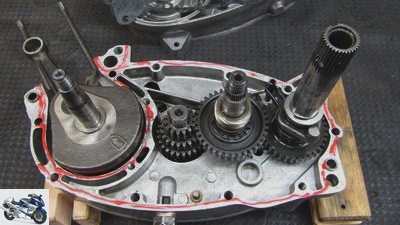
When all shafts have their place, sealant is applied to one half of the housing
Werner Koch
9/28
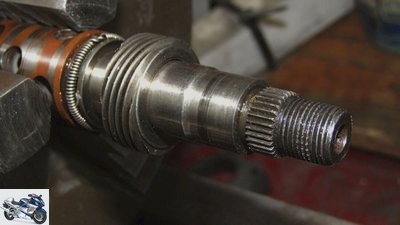
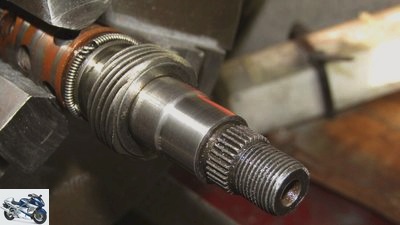
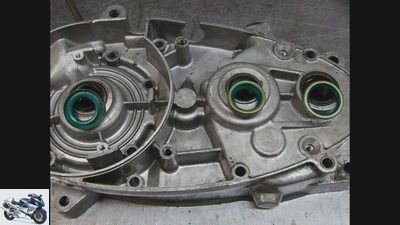
The slightly worn-in traces of friction on the Simmerrings on the gearbox output shaft were pulled off with 400 lap ropes
Werner Koch
10/28
To do this, the shafts can be carefully clamped in the three-jaw chuck of the lathe
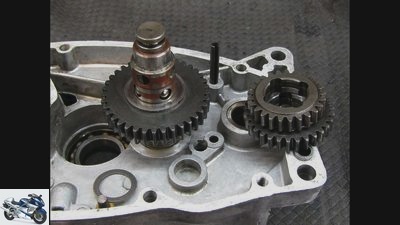
Werner Koch
11/28
The balls on the draw spline shaft are inserted with grease, the gears are marked with an arrow for the direction of rotation
Werner Koch
12/28
In order to press the Simmerrings with their stubborn steel housing into the seat, you should make a suitable mandrel
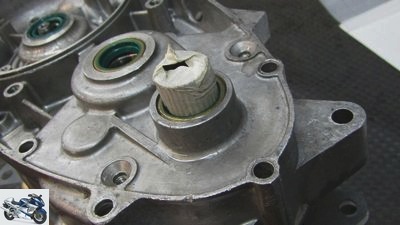
Werner Koch
13/28
In particular, the sharp-edged teeth of the kick starter shaft must be wrapped with thin adhesive tape before assembly
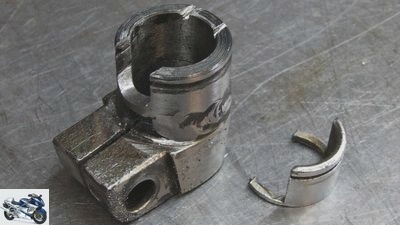
Werner Koch
14/28
I repaired the broken kickstarter mechanism with a welded-on turned part
Werner Koch
15/28
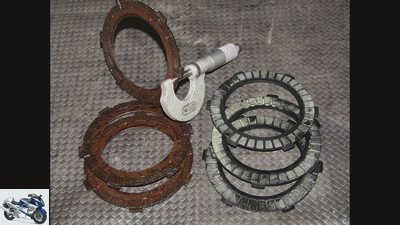
In order to do justice to the clutch use required in the field, the GS 50 was given a set of new friction linings
Werner Koch
16/28
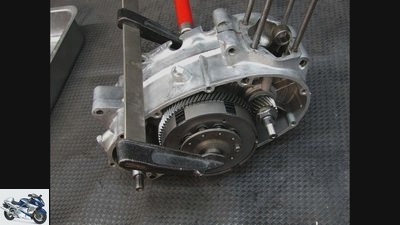
Works perfectly: screw clamp for pretensioning the clutch springs
Werner Koch
17/28
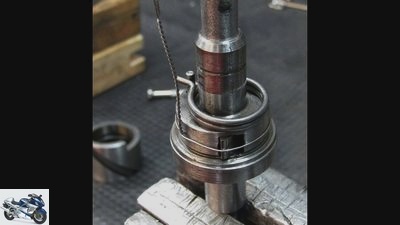
The drivers on the switching bell can be clamped together with a wire
Werner Koch
18/28
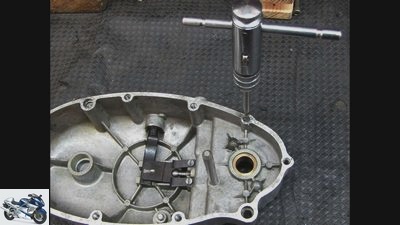
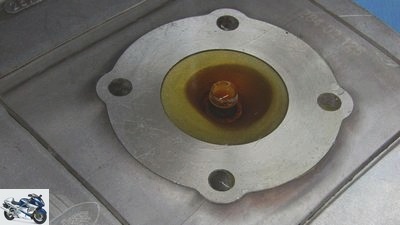
Recommended: re-cutting all threads on the clutch cover
Werner Koch
19/28
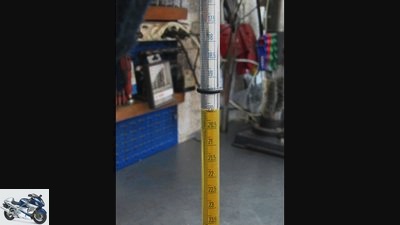
Gauging the combustion chamber from the new cylinder cover
Werner Koch
20/28
A pipette shows the volume (5.50 cm³) compared to the standard component (6.45 cm³)
Werner Koch
21/28
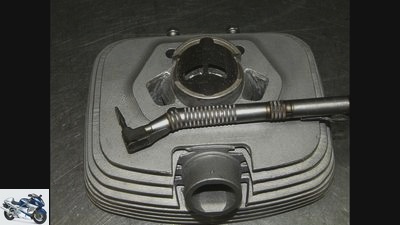
The channel edges were leveled with the angle cutter and the overflows were brought to the same height for symmetrical flushing
Werner Koch
22/28
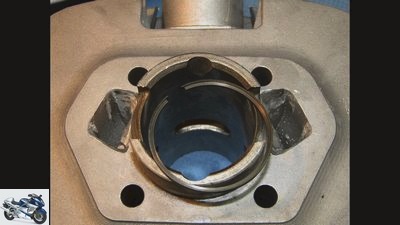
Trust is good, control is better: the joint clearance of the L piston ring has been checked for safety’s sake
Werner Koch
23/28
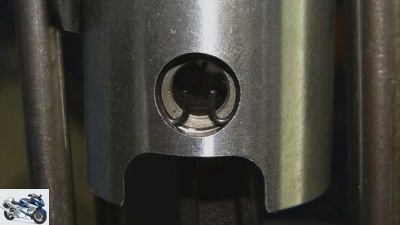
The circlips on the piston pin are to be fitted with the open end facing down or up
Werner Koch
24/28
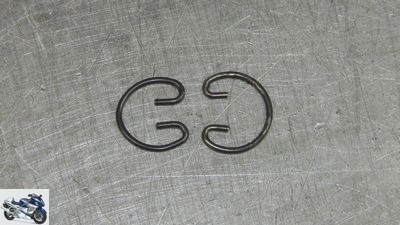
Standard safety clips were used because the retrofit parts were too tight
Werner Koch
25/28
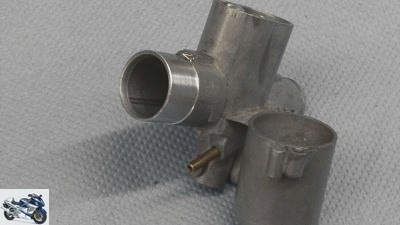
The small 16-Bing carburetor received an aluminum funnel
Werner Koch
26/28
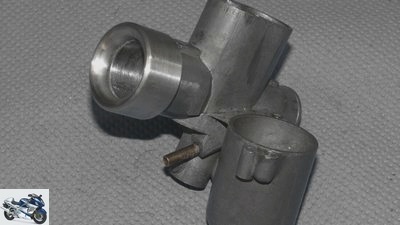
For comparison, the standard air intake, a rather angular matter
Werner Koch
27/28
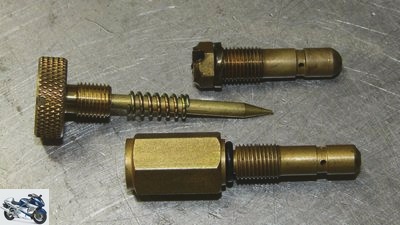
For the upcoming engine tuning, a nozzle with adjustable cross-section replaces the standard main nozzle
Werner Koch
28/28
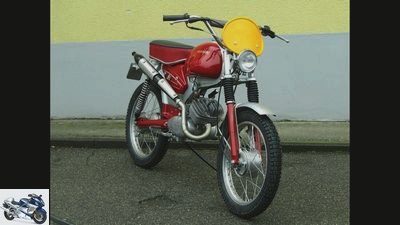
Zundapp GS 50, last stand
counselor
workshop
Screwdriver report – GS 50 conversion with Zundapp engine
Screwdriver report – GS 50 conversion with Zundapp engine
Crackles, stinks and smokes
Content of
The old, somewhat worn out Zundapp engine was still running, but a few work steps were necessary to make it fit for the GS 50 conversion. After all, the little two-stroke engine should purr like a kitten again in the future.
Werner Koch
02.03.2017
When I fumbled the oily engine out of the landing gear at the end of last year, I expected a bungled, screwed-up drive. The broken cooling fins on the cylinder head and the worn-out slotted screws already testified to haphazard emergency repairs with on-board tools. But the engine was still running, so the vital components should be functional. However, the gear oil had found its way into the open air via the housing halves, which were mounted without seals, in the sense of loss of lubrication. Fortunately, a few drops of the viscous SAE 80 paste had got stuck between the gears and protected the gears from irreparable wear. Only on the primary drive made me suspicious of a noticeably large backlash and sharp-edged tooth tips. Renew? Not for the time being, because the strategy for the conversion to the GS 50 is that as much as possible of the 53-year-old substance of the Sport Combinette is processed and taken over.
Buy complete article

Screwdriver report – GS 50 conversion with Zundapp engine
Crackles, stinks and smokes
6 pages) as PDF
€ 2.00
Buy now
The delicate three-speed gearbox is reminiscent of a clockwork
Anyone who works on old German mopeds has to be prepared for strange constructions. In the case of the type 267-002 Zundapp engine, the through housing screws also hold the clutch cover. So if you only want to change the friction linings, you have to remove almost all screws, including those under the magneto ignition system. To replace the primary drive, it is necessary to dismantle the entire gearbox, as the clutch basket is screwed onto the gearbox bearing from the inside. No wonder that even after 45 years as a mechanic you need an exploded view for orientation. To loosen the central nut on the clutch pressure plate, for lack of special tools, I drilled a second five-millimeter hole and held it in place with a pin wrench of variable width. Underlaid with matching hardwood blocks, you can work on the vertically divided motor quite reasonably. Also because all shafts are designed as smooth sliding fits and the housing halves can be loosely separated by hand without a puller.
Motor survived all the ordeals surprisingly well
Nevertheless, a workshop manual or assembly instructions can do no harm, especially since a wide range of thrust washers and spacers can be found in the gear housing as a loose puzzle when dismantling. With a little patience, the discs can also be reliably assigned using the moving image on the side and the diameters shown there. Despite the lack of oil and screwed-up screws, the Zundapp engine survived all tortures surprisingly well. All bearings, gears and the crankshaft of the innards could be reused. Which of course also has to do with the fact that the standard 2.6 HP do not bring about any material-killing speeds and loads. To be on the safe side, the crankshaft should be checked for concentricity between the centers of the lathe. The lower connecting rod bearing must not have any noticeable radial play and should be able to turn without the slightest running noise. If there are lubrication slots, the needle cage can be turned with a thin but blunt needle and checked for possible damage or traces of friction. A little tip for such old engines: Baked, hardened seals can be made supple with a hot air blower and then easily removed completely.
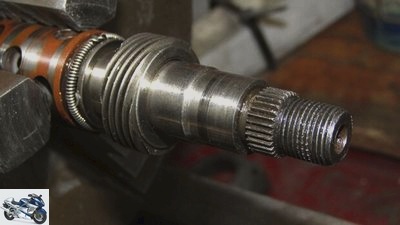
Werner Koch
The slightly worn-in traces of friction on the Simmerrings on the gearbox output shaft were pulled off with 400 lap ropes.
Using fine 400 lap line, I polished the tracks on the stub shafts to make the work of the sealing lips of the new Simmerrings easier. So that the sensitive Simmerrings are not destroyed during assembly, the partly sharp-edged kick starter and gear shafts must be masked with thin crepe or packing tape and carefully threaded through the sealing rings before assembly. I coated one side of the sealing surface on the housing with sticky sealing compound so that the paper seal would not tear in the event of a further unscheduled dismantling and could be reused. The balls of the draw-wedge circuit are inserted and fixed with grease, the gears are slipped over them in the correct direction of rotation. Now, for the sake of experimentation, the internal draw wedge, which is locked by a rubber sleeve, should be switched through. All gears and idling must click into place in a clean and clearly defined manner. Only then is the motor housing assembled. It has to be light, without tilting and with a metallic “click”. If the whole thing feels tough or tense, the proper fit of seals, shafts and fitting sleeves should be checked.
Does the Zundapp GS 50 also work in real life??
Before installing the clutch cover, it is advisable to cut all M6 threads right down to the bottom. This is because the housing screws clamp the housing halves together using a defined tightening torque. In the case of stiff threads, this preload may be too low; leaks and thus dangerous secondary air can occur in the crankcase. For a more harmonious look, I have replaced the fan-cooled cylinder with a chic counterpart with a fan head from the almost inexhaustible accessories. For around 160 euros including the piston, it was worth a try. The compression was determined with a pipette, the timing with the good old Castrol degree disc. The latter are almost identical to the standard cylinder. Good thing, because the GS shouldn’t run much faster than the permitted 45 km / h. Nevertheless, I leveled the bulge raised by the Nikasil-like coating on the canals with the 90-degree dental burr. And gave the 16-Bing carburetor a small, streamlined funnel. After checking the piston ring joint clearance, I finally replaced the clips on the piston pin that were too lashed with original parts. Whether the little Zundapp GS 50 works in real life the way we thought it would, we reveal in here.
Related articles
-
BMW R60-2 conversion: engine art for a museum
Fraser Evans 10 pictures Fraser Evans 1/10 Jay builds the Amadeus on behalf of an art museum for motorcycles. Fraser Evans 2/10 The core elements are the…
-
Driving report of the Aprilia RS4 125 – four-stroke engine
Aprilia motorcycles Driving report of the Aprilia RS4 125 – four-stroke engine Driving report: Aprilia RS4 125 Aprilia’s new four-stroke 125cc After 36…
-
motorcycles Report: BMW engine from China Report: BMW engine from China China Xcountry You don’t see it and you don’t hear it. Yeah, you don’t even feel…
-
Workshop – screwdriver tip for the inspection
Ralf Petersen 15th pictures Ralf Petersen 1/15 Every motorcycle must be serviced regularly if it is to function properly. Ralf Petersen 2/15 What is…
-
Screwdriver report – Harley-Davidson for 2000 euros
Schellhorn Photography 27 pictures Schelhorn Photography 1/27 Lutz wanted something dirty because he had planned a major overhaul anyway. And it was…
-
Buying advice screwdriver aids for conversion and tuning
Horny 33 pictures Horny 1/33 Occasional screwdriver: Do handicrafts when absolutely necessary, but do not have particularly great screwdriver ambitions….
-
Driving report: Ducati Hypermotard 796
manufacturer motorcycles Driving report: Ducati Hypermotard 796 Driving report Ducati Hypermotard 796 (2009) Sister of the 1100 with a smaller…
-
MV Agusta F3 engine: the technology
manufacturer counselor technology & future MV Agusta F3 engine: the technology Technology: MV Agusta F3 engine The engine of the super sports car from MV…
-
Werner Koch 30th pictures Werner Koch 1/30 …after-comparison of the front brake anchor plate Werner Koch 2/30 Werner works: Zundapp “GS 50” Werner Koch…
-
Famel E-XF: Electric scooter with Zundapp spirit
Famel 9 pictures Famel 1/9 The Portuguese moped brand Famel is trying to make a comeback with the electric model E-XF. Famel 2/9 The design tries to…
Wo und wie kann ich die Anleitung für den Umbau einer Combinette in Gs 50/75 kaufen?
Danke, Mario
bitte,wie können sie kontaktieren Werner Koch.