Table of contents
- Guide to repairing spoked wheels – Part 1 A professional shows how it’s done
- Required tools
- Small spoke lore
- Spoke out
- Preparations for lacing
- Attaching the key spoke
- More about technology
- Assembly of the inner spokes
- Assembly of the outer spokes
- Preparations for centering
- Our expert
Marcel Schoch
38 pictures
Marcel Schoch
1/38
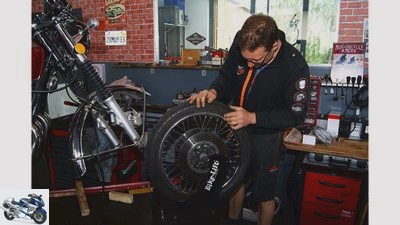
Preparatory work: The bike must always be removed for repairs. Damage to the tire can be an indication that the rim is also damaged.
Marcel Schoch
2/38
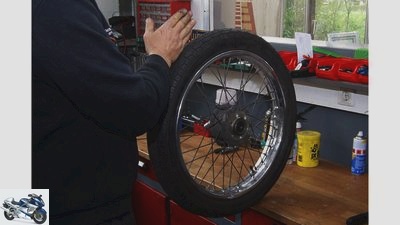
A first inspection of the horizontal wheel plane reveals how much a wheel is warped.
Marcel Schoch
3/38
Before disassembling a spoked wheel, remember the spoke pattern. Here the spokes cross twice.
Marcel Schoch
4/38
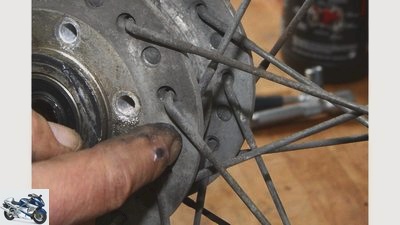
The design of the spokes is decisive for the procurement of replacements. Here it is simply butted spokes.
Marcel Schoch
5/38
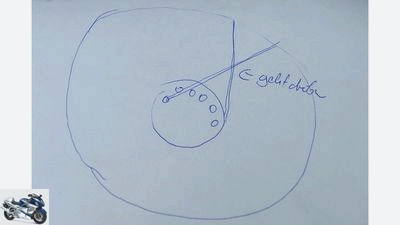
Spoke the wheel out of the spokes: it is best to record or take a photo of the spoke pattern before the first spoke out and in.
Marcel Schoch
6/38
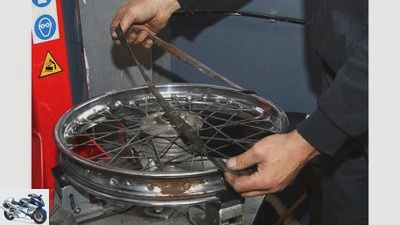
To release the spoke, the tire must be down. The rim tape will be replaced with a new one later.
Marcel Schoch
7/38
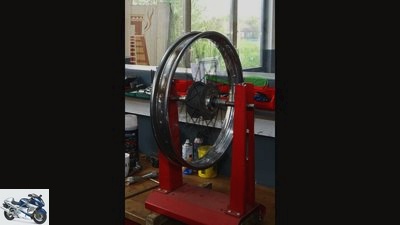
Before Wolfgang spokes out the rim, he uses the truing stand to check whether the rim is running smoothly.
Marcel Schoch
8/38
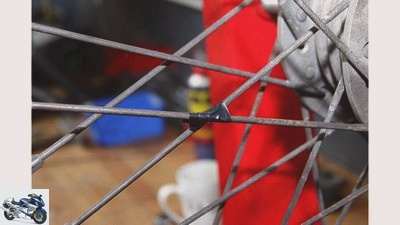
If only the rim is to be changed, the spokes are secured at the crossing points with insulating tape to preserve the spoke pattern.
Marcel Schoch
9/38
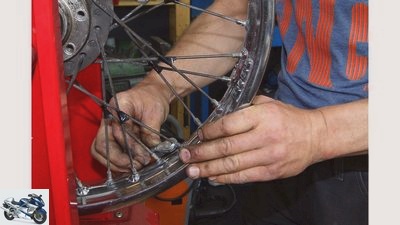
The spoke nipples should be opened gradually so that the rim does not warp when the spoke is released.
Marcel Schoch
10/38
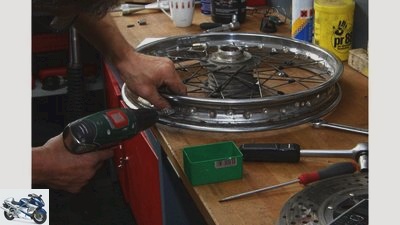
If all spoke nipples are loose, they can easily be unscrewed with a cordless screwdriver.
Marcel Schoch
11/38
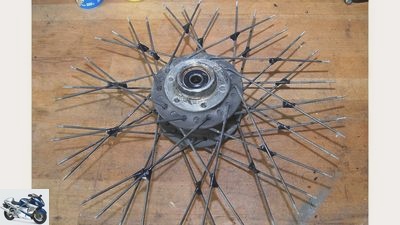
Thanks to the adhesive tape, the spoke pattern is retained after the rim has been removed.
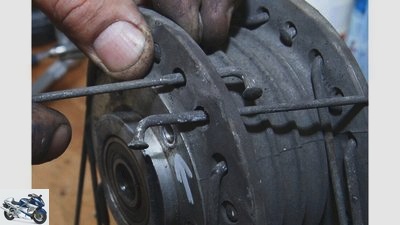
Marcel Schoch
12/38
With “following” spokes the spoke head points outwards, with “leading” spokes inwards.
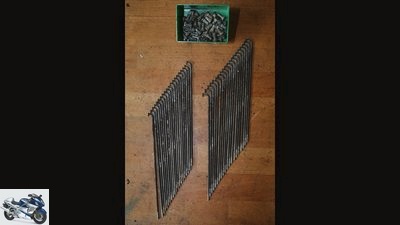
Marcel Schoch
13/38
The spokes of the machine shown are completely corroded. The entire sentence must be changed.
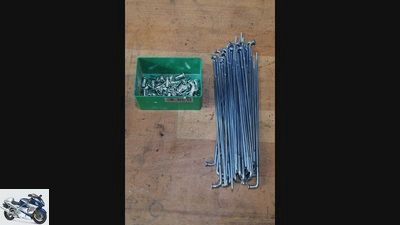
Marcel Schoch
14/38
In our photo model, a Honda CB 750 K2, the spoke set consists of 20 “leading” and 20 “following” spokes.
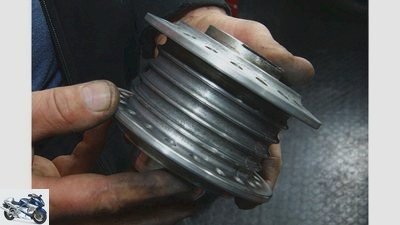
Marcel Schoch
15/38
After removing the old spokes, the condition of the hub must be checked.
Marcel Schoch
16/38
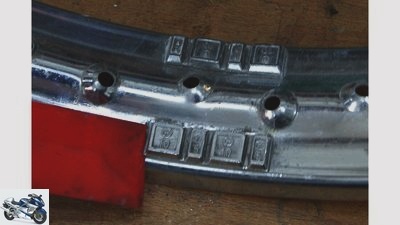
In addition, do not forget to remove the old balancing weights before installing the new spokes.
Marcel Schoch
17/38
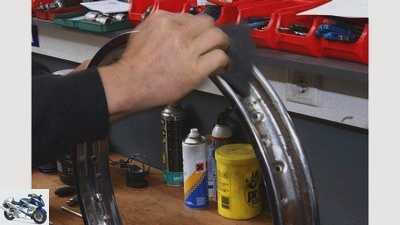
If there is only slight corrosion in the inner rim well, the rust can be removed with an abrasive fleece. If the chrome layer is badly damaged, a new rim should be used.
Marcel Schoch
18/38
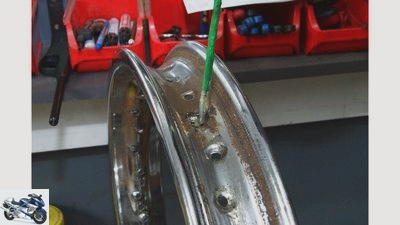
Lubricate the spoke holes for easier assembly.
Marcel Schoch
19/38
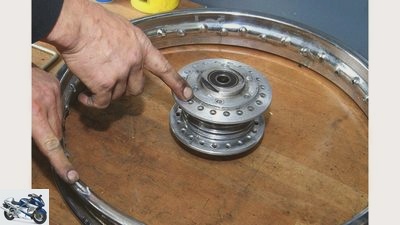
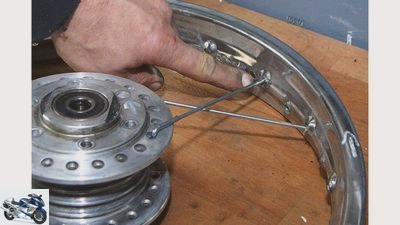
Installation of the inner spokes: For better orientation, the direction of rotation of the wheel is marked with arrows, both on the rim and on the hub.
Marcel Schoch
20/38
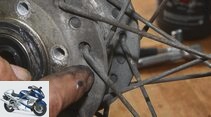
When lacing, the first spoke, also known as the key spoke, is threaded directly next to the valve hole or – depending on the type of rim – also one hole further counterclockwise.
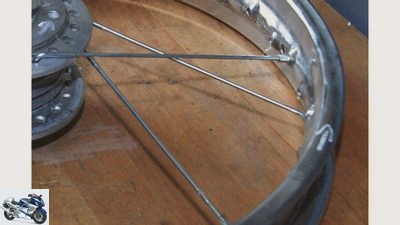
Marcel Schoch
21/38
The “following” spokes are mounted in the hub in such a way that a punch hole remains free between them.
Marcel Schoch
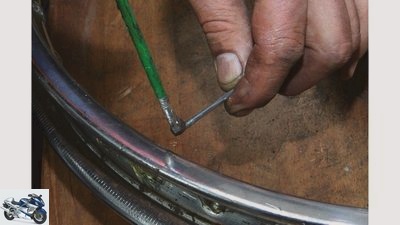
22/38
So that the spoke nipple can be turned easily, Wolfgang smears the thread of the spoke with grease.
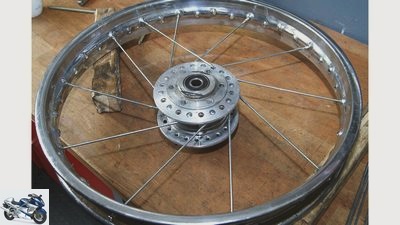
Marcel Schoch
23/38
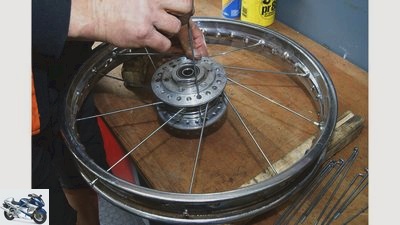
Here all ten “following” spokes on the right-hand side, also called inner spokes, are fully assembled. In the example of the Honda wheel, the key spoke is a “leading” spoke, also known as the outer spoke.
Marcel Schoch
24/38
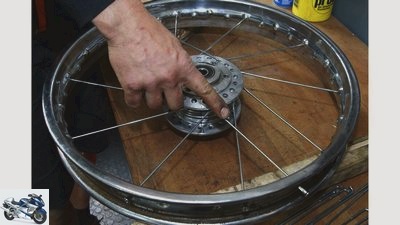
Attaching a second “leading” spoke prevents the rim from twisting towards the hub.
Marcel Schoch
25/38
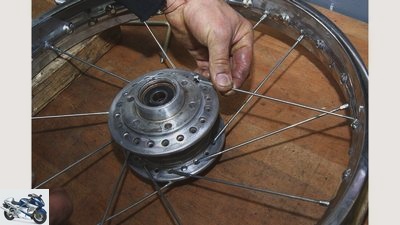
The image of the spokes can now be recognized again. The “leading” spoke crosses the “following” spokes below twice on the outside.
Marcel Schoch
26/38
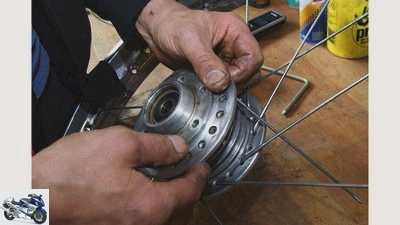
Now the wheel is turned so that the inner spokes, ie the “following” ones, can also be attached to the opposite side.
Marcel Schoch
27/38
When threading the “following” spokes, the spokes on the opposite side can be in the way.
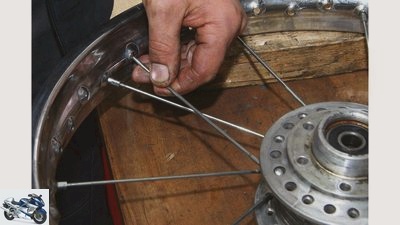
Marcel Schoch
28/38
The “following” spokes on the opposite side must be threaded into the spoke holes aligned with them in the rim rim.
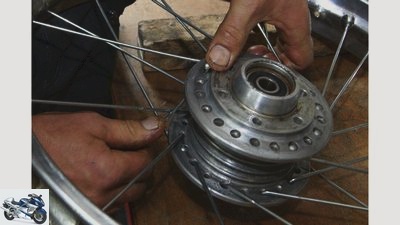
Marcel Schoch
29/38
It sometimes takes a little force to thread the spokes when the spoke head is stuck in the hub hole.
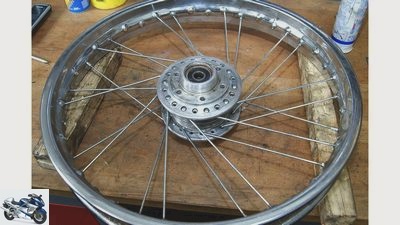
Marcel Schoch
30/38
All 20 inner spokes (“following”) are now correctly attached on both sides. The occupation of the rim holes shows that they are correctly installed.
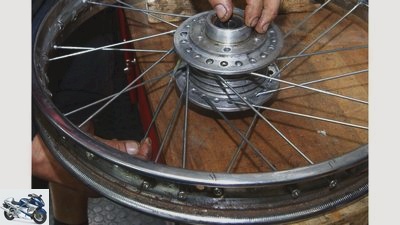
Marcel Schoch
31/38
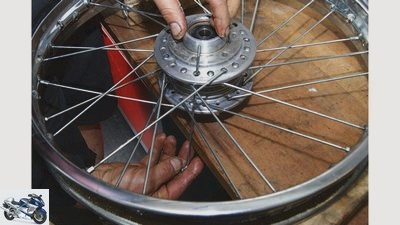
Assembly of the outer spokes: The 20 “leading” spokes are threaded in from the inside of the hub. Its spoke head points inwards, while that of the “following” spokes already attached here points outwards.
Marcel Schoch
32/38
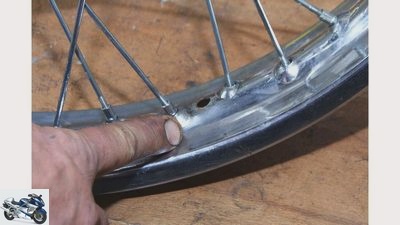
The same applies here: When threading the “leading” spokes, the previously installed “following” spokes can be in the way.
Marcel Schoch
33/38
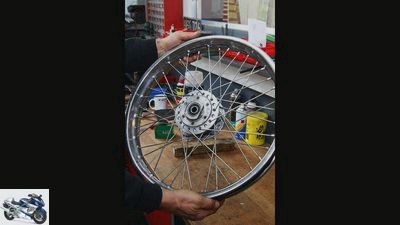
First goal achieved! The spokes in the area of the hole for the valve all point away from it. To make it easier to thread the spokes, the spoke nipples should be loose.
Marcel Schoch
34/38
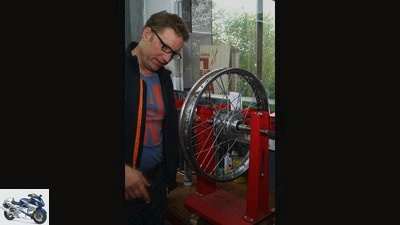
Preparation for centering: On the finished wheel, the spoke pattern must be checked again before the rim is aligned.
Marcel Schoch
35/38
The spoke nipples are all still loose. Wolfgang is already checking the alignment of the rim here.
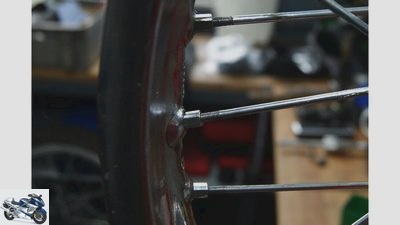
Marcel Schoch
36/38
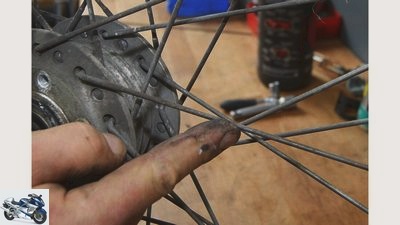
This is how it looks when the spoke nipples are not yet tightened. The thread can be clearly seen.
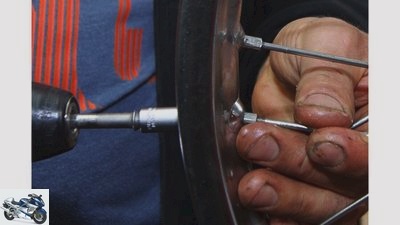
Marcel Schoch
37/38
When first tightening with the cordless screwdriver, Wolfgang leaves three threads.

Marcel Schoch
38/38
Wolfis Garage, Wolfgang Schelbert, Unterer Flurweg 12, 82402 Seeshaupt, Telephone: 0 88 01/9 15 71 47, info@wolfis-garage.de.
counselor
workshop
Guide to repairing spoked motorcycle wheels Part 1
Guide to repairing spoked wheels – Part 1
A professional shows how it’s done
Content of
Spoked wheels are a real eye-catcher. No wonder, because they shape the appearance of a motorcycle like no other component. However, spoked wheels need to be maintained and sometimes repaired. Here a professional shows us how it’s done.
Marcel Schoch
09/08/2016
What makes one worry lines is no problem for our expert Wolfgang Schelbert. “An experienced motorcycle professional can assemble a spoked wheel, including centering, within an hour,” says the two-wheel mechanic and owner of the independent motorcycle workshop “Wolfis Garage” in Seeshaupt. “If you have never done something like this before, you should plan at least one afternoon.”
Buy complete article
Guide to repairing spoked wheels – Part 1
A professional shows how it’s done
6 pages) as PDF
€ 2.00
Buy now
Centering the newly spoked wheel in particular often causes problems for less experienced people. Wolfgang shows us the spoke in and out on a front wheel with 40 spokes. This exemplary wheel is from a 1972 Honda CB 750 Four K2, on which the spokes cross twice. “However, the work steps are almost identical for bikes with more or fewer spokes,” explains the two-wheeler professional.
workshop
Guide to repairing spoked wheels – Part 2
Fix vertical and lateral blows
read more
Required tools
Before Wolfgang gets to work, he prepares the tools he needs for this. “All you need is a small slotted screwdriver, a spoke nipple wrench, a centering stand, grease and a centering gauge or a centering mandrel. A cordless screwdriver with a suitable bit can also be helpful. “
Small spoke lore
If more than two spokes have to be replaced, a completely new set of spokes should always be obtained. The number, type and length depend on the original bike. “It doesn’t make sense to combine old spokes with new ones. Often the old spokes are already damaged and then soon tear off ”, Wolfgang knows from experience.
The spare parts market today offers a wide range of wire spokes with raw, nickel-plated and chrome-plated surfaces or made of solid V2A material. They are available in all imaginable lengths, core diameters and hook angles as well as a wide variety of threads. “You shouldn’t buy V4A spokes,” advises Wolfi, “because their steel is too brittle.” They tear off very quickly during operation. Chromated, galvanized-passivated or bright galvanized wire spokes are the better choice in this regard. However, they can oxidize or rust over time. Those who value optics should use V2A spokes.
You should also pay close attention to the spoke dimensions and designs, because spokes can either have a uniform or variable (butted) diameter. Evenly shaped spokes have the same thickness over their entire length. They are therefore also referred to as “smooth spokes”. So-called single butted spokes, on the other hand, are thickened to a length of three to four centimeters towards the hub spoke hole. In the standard DIN 74371-1 (valid until July 2006) these spokes are also referred to as “ED spokes” (ED = thickening). Our Honda front wheel of the CB 750 K2 has such spokes.
Double butted spokes are still used. They are thicker at each end than in the middle. The designation DD (double thick) is also used for them. The advantage of butted spokes is that they are more durable in the more heavily stressed areas than straight spokes of the same thickness. In addition, the thinner middle section makes the spokes more flexible. The length of the spokes depends on the type of lacing. “Anyone who buys spokes should always compare the original with the new,” recommends Wolfgang. “To determine the spoke length, the straight length of the spoke up to the hook must be measured.”
One should also know that spokes have rolled and not cut threads. The purpose of the rolled threads is to avoid break marks. “So don’t be surprised if the outside diameter of the thread and thus the thread is larger than the diameter of the spoke,” explains Wolfgang. There are also differences in quality when it comes to spoke nipples. They are mostly made of nickel-plated brass. Very precise threads can be cut into this material. In addition, it is difficult for the spokes to corrode. Brass nipples are therefore always preferable to those made of steel.
As with our example bike from Honda, the rims are often made of steel. If a replacement is necessary, the rim contour (loft bed, low bed, high shoulder, etc.) is important in addition to the size information. “With exotic rims such as, for example, ‘semi-deep rim’ ‘, however, custom-made rims are possible,” says Wolfgang. “Because of the high costs, these are usually only worthwhile for high-priced young or old-timers.” When it comes to the originality of the rims, compromises are often made and newer contours are acquired.
In the case of replacement rims, the number and alignment of the so-called punch holes must always be observed. In the case of incorrectly dimpled and perforated rims, the spoke angle is usually not correct. There are also so-called A and B rims, whereby A rims are referred to as normal rims. With B-rims, however, the spoke holes are aligned and drilled in a mirror-inverted manner. Attention: If you use the wrong rims, you risk bent spokes. This inevitably leads to a broken spoke during operation. “The exact dimensions and designations are usually stamped on the right side of the rim,” says Wolfgang. “Normally, the necessary information about the rims can also be found in the workshop manual.”
Spoke out
Once the preparations have been completed and all spare parts are available, the wheel will begin to be spoked. If only a damaged rim has to be changed, Wolfgang knows a screwdriver trick that is particularly useful for hobby screwdrivers who have never changed a rim: “Before removing the spoke, wrap all the spoke crossings with adhesive tape. After loosening all spoke nipples, the hub and the spokes can then be pulled out of the rim without losing the spoke pattern. ”Then the new rim is mounted in the position and alignment of the valve hole as with the old one, and all the spokes are tightened again. Of course, the rim must then be centered and the lateral and vertical runout corrected. We will explain the correct procedure in the next issue. Warning: only use the tape trick if all of the spokes are completely in order!
Our professional cannot use it on the wheel of the Honda CB 750, as all the spokes have to be changed due to corrosion. Wolfgang therefore removes the tape and unthreads all the spokes from the hub. Before doing this you should always memorize the image of the spokes. “The best way to help is with a drawing or photos of the bike,” advises the expert. Before the spoke, the spoke threads and spoke holes (also called punch holes) of the rim should be lubricated with grease or oil. Above all, the spoke nipples must be easy to turn so that the feeling of tension is not distorted when the spokes are tightened.
Preparations for lacing
For lacing, the hub and the rim are best placed on the workbench. Pay attention to the running direction from hub to rim. This is particularly important if a wheel is spoked off-center, otherwise the alignment of the punch holes will not be correct. In order not to make any mistakes here, Wolfi marked the direction of rotation with arrows on the rim and hub during dismantling. Professionals would now start by threading all the spokes into the hub and then gradually connecting the spokes to the rim. With this method, however, the hobby screwdriver runs the risk of making mistakes when lacing. Less experienced people should therefore install one spoke at a time. It should be noted that a conventionally built spoke wheel like the one on the Honda CB 750 Four usually has two by two groups of spokes. This means that the first group of two goes on the right hub flange, the other group of two on the left. Half of the spokes in a group of two consists of so-called “following” spokes, the other half of “leading” spokes. The difference between the two spoke types: with “leading” spokes the spoke head (also called hook) is inside the hub flange, with “following” spokes it points outwards.
The “leading” spokes usually have a hook bent at around 85 degrees. They are inserted from the inside through the holes in the hub flange, while “following” spokes are inserted from the outside through the holes in the hub flange. Their hooks have a standard bend of 95 degrees. The decisive factor for the bending of a spoke hook is the design of the hub with regard to the width and slope of the flange. Therefore there are also deviations from the usual standard. Incidentally, two-wheel professionals often refer to “following” and “leading” spokes as inner spokes (for “following”) and outer spokes (for “leading”).
Attaching the key spoke
The first spoke to be attached is the most important. It is therefore called the “key spoke”, since everyone else uses it as a guide. It must be installed in the right place, otherwise the valve hole at the end could be in the wrong place (difficult to access for tire pressure measurement) and the holes in the rim do not match the angle of the spokes. In the shown wheel of the CB 750, the key spoke is a “leading” one on the right side of the rim (seen in the direction of travel). “If you continue with the ‘leading’ spokes, this makes it more difficult to pull in the ‘following’ spokes, because the ‘leading’ spokes are on the outside and are therefore in the way,” explains Wolfgang, who then first thread the “following” spokes will.
When assembling the key spoke, make sure that it is threaded into the rim from the right-hand side in an anti-clockwise direction. Either directly next to the valve hole or a punch hole further, depending on how the rim is drilled. When selecting the spoke hole closest to the valve hole, make sure that the spoke holes are not exactly in the center of the rim, but are alternately offset slightly to the left and right. On some rims, the first spoke hole after the valve hole is offset to the left (B rims), but on most rims to the right (A rims, such as CB 750). Therefore, Wolfgang can install this first spoke right next to the valve hole. “The aim is to mount the four spokes closest to the valve hole so that they point away from the valve hole in order to simplify access to the valve,” explains Wolfgang.
More about technology
PS knowledge: technology
- Motorcycle technology clearly explained on 97 pages (PDF)
- From starter to spark plug
- Simple teaching of physical principles
- Tips and tricks for practitioners
To the PDF for € 9.99
#image.jpg
Assembly of the inner spokes
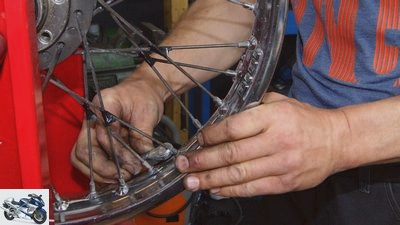
So that the key spoke can no longer slip out of its punch hole, the professional turns the spoke nipple in so far that it is held in place but is still loose. Starting next to the key spoke, he then threads the inner spokes (“following”). They are offset by two holes each, so that an empty hole remains between them in the hub. The first “following” spoke should end with a punch hole distance from the key spoke in the rim (because in our example the key spoke is a “leading” one!). All other “following” spokes are attached in such a way that there is a distance of three punch holes between them.
It continues like this until all ten spokes of the first group are built into the rim and secured with spoke nipples. In order to stabilize the axial angle, Wolfgang mounts another outer spoke (“leading”) offset by 180 degrees to the key spoke (in our example, a “leading”). In the case of a spoked wheel, the axial angle is the course of the spokes from the inside of the rim to the outside of the hub. This prevents the hub from twisting and maintains the axial angle during the spoke assembly.
Then Wolfgang turns the wheel of the Honda CB 750 in order to first assemble the inner spokes (“following”) from the second group of two. Incidentally, the holes on the left hub flange are not exactly in line with those on the right flange, but are offset. Now you begin – starting from the valve hole as well – to attach the inner spokes (“following”) in the opposite hub holes. If you have done everything correctly, the inner spokes (“following”) on the left side of the rim when viewed in the direction of travel are now inserted into the punch holes next to the inner spokes on the right side. As with the first spoke group on the right-hand side of the rim, the inner spokes (“following”) must first be fitted on the opposite side, recognizable by the spoke head pointing outwards in the hub flange.
At the end of this assembly step, the hub is connected to the rim via 20 inner spokes (“following”). That would finish the inner spoke wreath. If the work is done correctly, two spokes with two as yet unoccupied punch holes alternate.
Assembly of the outer spokes
Now the “leading” spokes, also known as outer spokes, are fitted. To do this, turn the rim again so that the right side (seen in the direction of travel) is in front of you. Then one of the outer spokes is pushed through a free hole from the inside of the hub to the outside – that is, the spoke head must be inside the flange. In order for the axial angle to be correct, it may be necessary to turn the hub (not the rim!) Clockwise by hand. After the assembly of the first outer spoke (“leading”), it crosses two inner spokes (“following”) on the same side of the hub from the outside.
“There are two possible punch holes in the rim for threading this spoke,” explains Wolfgang. “The right hole can be recognized by the fact that its angle to the hub flange side through which the spoke was inserted is correctly aligned and the length of the spoke extends exactly there.” The remaining 19 “leading” spokes are then installed according to the same pattern and each secured with a spoke nipple, but not yet tightened!
Preparations for centering
The wheel would then be spoked. In the next step, the spoke nipples are all screwed approximately the same distance onto the spokes using a screwdriver or a cordless screwdriver. It is important here that the nipples are only screwed in until all the spokes are evenly under slight tension. This is usually the case when the spoke thread just disappears in the nipple, but sometimes one to three thread turns less is enough. “For easier orientation, start by tightening the spokes at the valve hole,” advises Wolfgang. Another tip: Before tightening the spokes, press them inwards from both sides of the rim so that the spoke heads lie flat on the hub flange.
Our expert
Wolfgang Schelbert, whom everyone calls Wolfi, began working on vehicles at the age of ten. First on the self-made go-kart, later on his numerous mopeds. True to the motto “Happy is someone who drives a big machine”, he bought a Honda CB 750 Four at the age of 18. This was followed by the CBX 1000, Z 1300, Vmax and many more. Consequently, after leaving school, he trained as a two-wheel mechanic. He then worked as a journeyman in various companies before going self-employed in 1997 and together with a friend founded the Street Bike Parts company in the Euro-Industrie-Park in Munich. For ten years he sold used Japanese motorcycle spare parts there, and later in Germering. In 2007 he moved his company back to the north of Munich, where he also started a used motorcycle trade and also took over the management of a KTM specialist workshop. Back to the roots it was said in 2014, Wolfi wanted to devote more time to screwing. Without further ado, he sold his company in Munich and founded “Wolfis Garage” in Seeshaupt on Lake Starnberg. Since then, he has been offering everything that makes a biker’s heart beat faster, from repairs and conversions to restorations and used motorcycles.
Contact:
- Wolfis Garage, Wolfgang Schelbert, Unterer Flurweg 12, 82402 Seeshaupt
- Telephone: 0 88 01/9 15 71 47
- info@wolfis-garage.de
- www.wolfis-garage.de
Related articles
-
Guide to repairing spoked motorcycle wheels part 2
Marcel Schoch 15th pictures Marcel Schoch 1/15 The spokes, which are already slightly under tension after they have been lightened, lie firmly in the…
-
Motorcycle technology – maintaining drum brakes, part 1
Marcel Schoch 50 pictures Marcel Schoch 1/50 After two passes with a total of two tenths of a material removal, the brake drum is ready for use again….
-
The small ABC of motorcycle types, part 1 A ?? D.
Buell motorcycles The small ABC of motorcycle types, part 1 A ?? D. The small ABC of motorcycle types, part 1 A ?? D. ETV 1000 XB9R S4R Manufacturers…
-
Motorcycle guide traffic rules in the travel countries
Breakable counselor traffic & business Motorcycle guide traffic rules in the travel countries Traffic rules in the travel countries Watch out, trap!…
-
Chassis special part 1: motorcycle suspension
fact accesories landing gear & Spring elements Chassis special part 1: motorcycle suspension Chassis special: suspension Everything about motorcycle…
-
Guide: Braking correctly, part 1 – without ABS
jkuenstle.de 9 pictures 1/9 Braking properly without ABS: Your colleague shows you how: knees on the tank, upper body upright, view far ahead. The arms…
-
MOTORCYCLE comparison test Alpen-Masters 2014 part 2
jkuenstle.de 116 pictures fact, jkuenstle.de 1/116 The extreme seating position was also not ideal for the test track. fact, jkuenstle.de 2/116 However,…
-
Guide: Injection on a motorcycle
Drawing: Schermer counselor technology & future Guide: Injection on a motorcycle Guide: Injection on a motorcycle Find and rectify faults in the…
-
Guide to changing the brake pads on the motorcycle
Ralf Schneider counselor workshop Guide to changing the brake pads on the motorcycle Change the brake pads on the motorcycle Tips from professionals…
-
The little ABC of motorcycle types, part two, E ?? H
Harley-Davidson motorcycles The little ABC of motorcycle types, part two, E ?? H The little ABC of motorcycle types, part two, E ?? H VSOP 850 FLHRSI…