Table of contents
- Motorcycle technology – maintaining drum brakes, part 1 Braking points
- Maintenance work on the drum brake is more complex
- Remove and disassemble anchor plate
- Component must not be corroded or damaged
- Brake cam and its bearings
- Axle bearing of the brake cam cleaned with emery fleece
- Brake pads and friction surface
- Assembly and adjustment
- The brake light may come on too early or too late
- Unscrew the brake drum
Marcel Schoch
50 pictures
Marcel Schoch
1/50
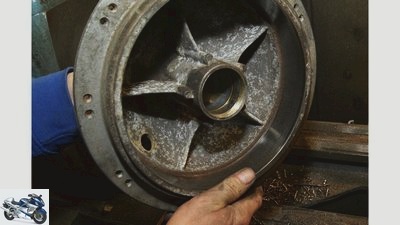
After two passes with a total of two tenths of a material removal, the brake drum is ready for use again.
Marcel Schoch
2/50
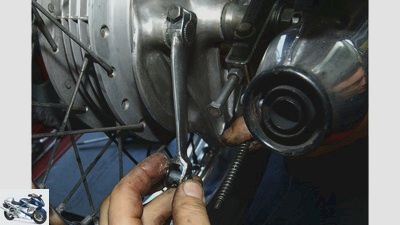
Also clean and lightly grease the adjustment thread on the brake linkage for easier adjustment.
Marcel Schoch
3/50
To prepare for assembly, Wolfgang greases the screw connection of the brake anchor strut on the brake anchor plate.
Marcel Schoch
4/50
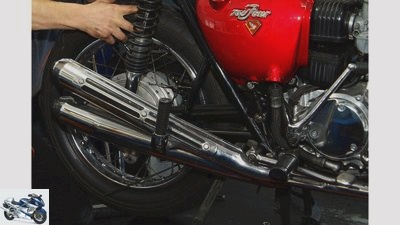
First position the rear wheel “loosely” in the swing arm, but do not tighten the axle yet.
Marcel Schoch
5/50
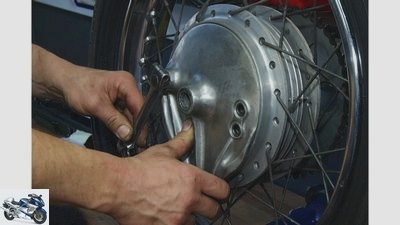
Installation and adjustment: If installed correctly, the completed brake anchor plate can be pushed into the drum without any problems.
Marcel Schoch
6/50
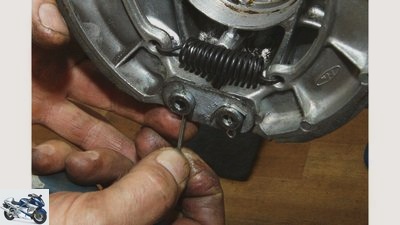
Always replace the cotter pins with new ones when assembling. False thrift is life-threatening here!
Marcel Schoch
7/50
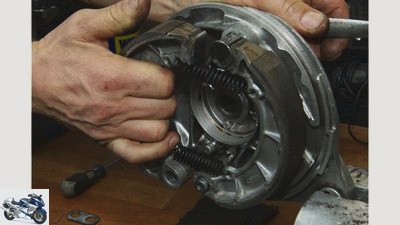
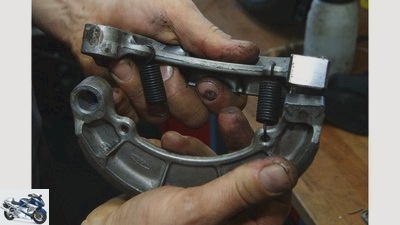
After the first brake pad has been installed, the second is pulled into position.
Marcel Schoch
8/50
When attaching the return springs, make sure that their ends point towards the brake anchor plate.
Marcel Schoch
9/50
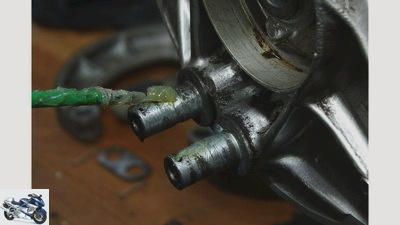
The bearings of the brake pads are also provided with heat-resistant roller bearing grease.
Marcel Schoch
10/50
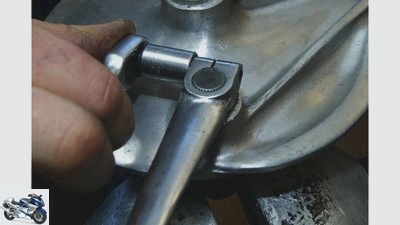
Thanks to the punch marking, the brake lever can be mounted on the cam shaft without any problems.
Marcel Schoch
11/50
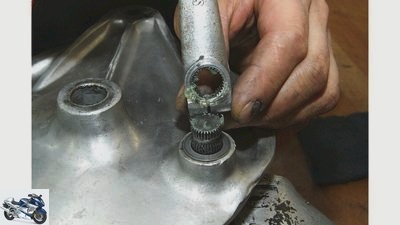
To protect the toothing of the brake cam against corrosion, it must also be provided with grease.
Marcel Schoch
12/50
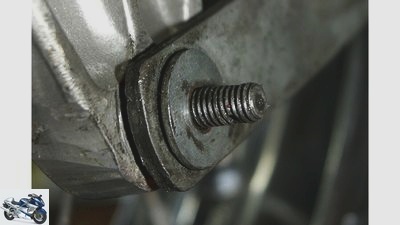
Pay attention to the washer on the screw connection of the brake anchor strut, otherwise the cotter pin cannot be securely set.
Marcel Schoch
13/50
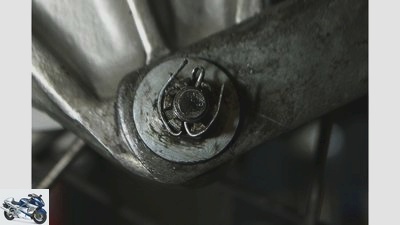
If the crown nut is correctly seated, secure it with a new cotter pin.
Marcel Schoch
14/50
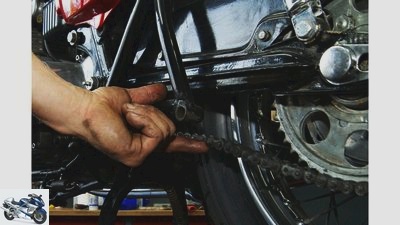
Before tightening the rear wheel axle, set the correct chain tension.
Marcel Schoch
15/50
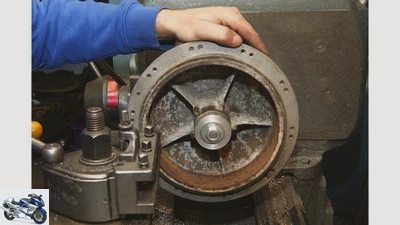
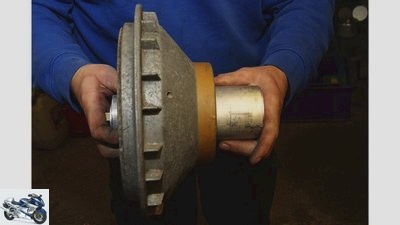
The clamped brake drum receives slight corrections of the concentricity with a copper hammer.
Marcel Schoch
16/50
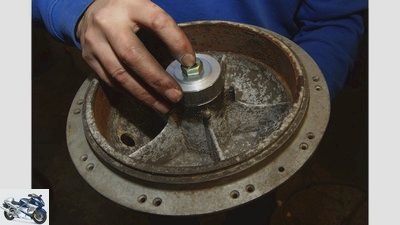
The second conical mandrel (right) centers the drum on the adapter and guarantees exact concentricity.
Marcel Schoch
17/50
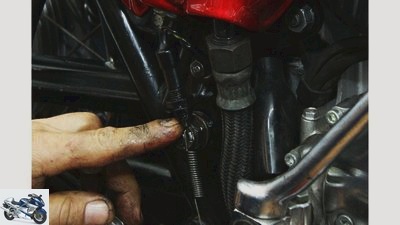
Unscrew the brake drum: An adapter is screwed to the brake drum for secure clamping in the lathe.
Marcel Schoch
18/50
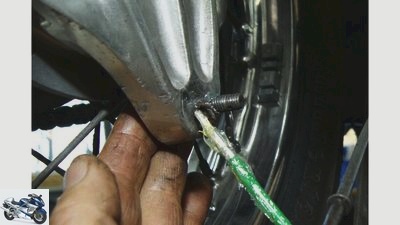
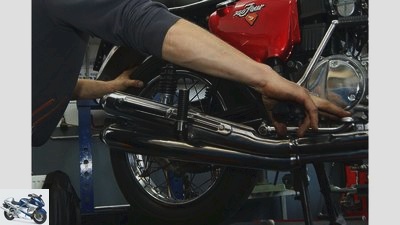
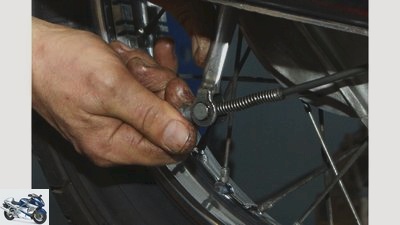
The brake light switch should be triggered when you start to brake. The setting is made using two lock nuts.
Marcel Schoch
19/50
The braking point can be found by pressing the brake while turning the rear wheel.
Marcel Schoch
20/50
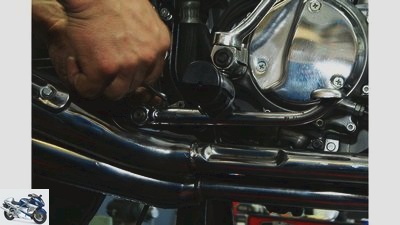
After tightening the rear wheel axle, the brake linkage is adjusted to about a third of the free travel.
Marcel Schoch
21/50
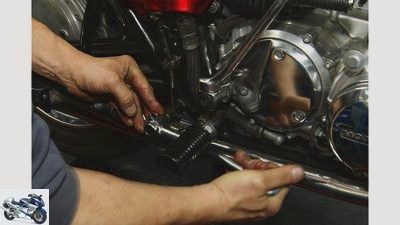
The foot brake lever is now horizontal again and hits the stop on the footrest in the rest position.
Marcel Schoch
22/50
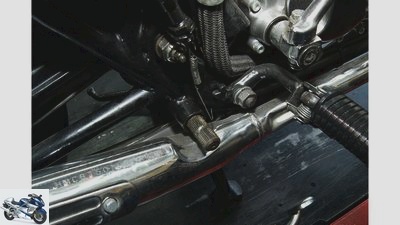
It should be pushed as high as possible onto the teeth of the drive lever.
Marcel Schoch
23/50
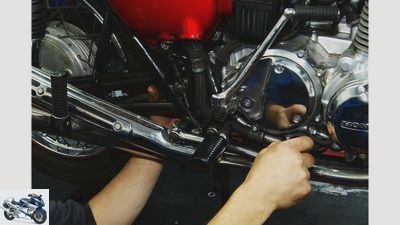
After unhooking the brake light switch and loosening the tensioning screw, the foot brake lever can be easily removed.
Marcel Schoch
24/50
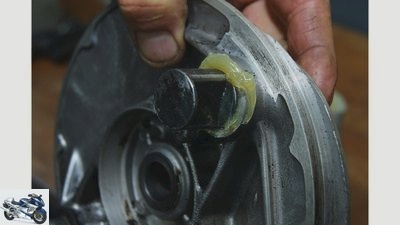
The foot brake lever is incorrectly attached here – too far down. As a result, too much lever travel is lost.
Marcel Schoch
25/50
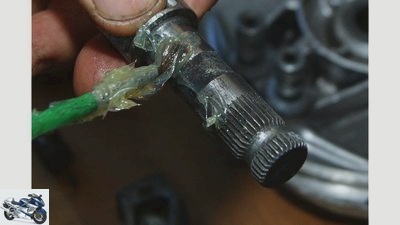
After inserting the brake cam into the bearing, be sure to remove the excess grease!
Marcel Schoch
26/50
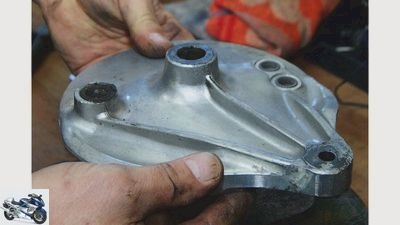
The assembly of the brake begins with the careful greasing of the brake cam.
Marcel Schoch
27/50
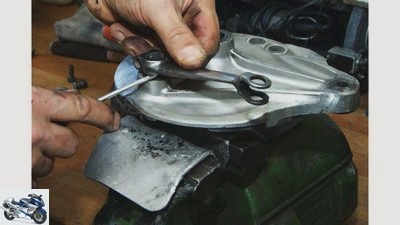
Brake cams and bearings: After pulling out the brake cam, you can see a lot of dirt and abrasion in its bearings.
Marcel Schoch
28/50
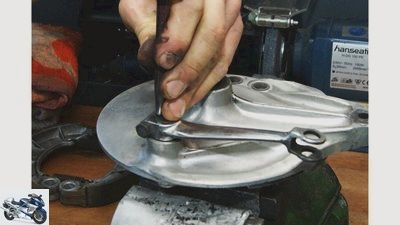
After loosening the clamping screw, the brake lever can be levered off the toothing of the cam with a screwdriver.
Marcel Schoch
29/50
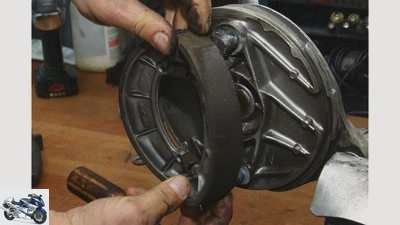
Wolfgang marks the exact position of the brake lever on the cam with a center punch.
Marcel Schoch
30/50
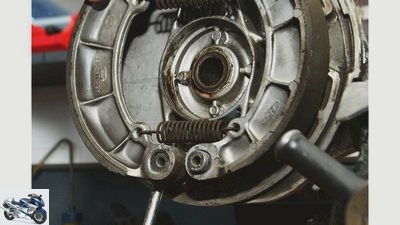
The brake pads are under tension because of the return springs. That’s why Wolfgang folds it away to the side.
Marcel Schoch
31/50
The brake pads can now be levered off their bearing bolts with a screwdriver.
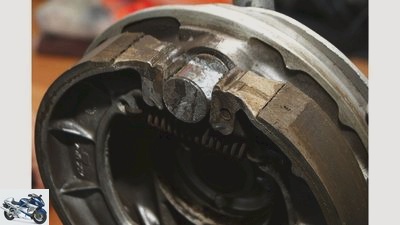
Marcel Schoch
32/50
In order to be able to pull off the linings, the brake cam must be turned by 90 degrees.
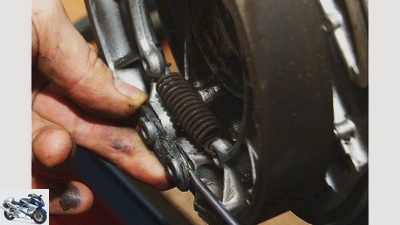
Marcel Schoch
33/50
There is a spacer plate behind the two locking pins. This also has to go down.
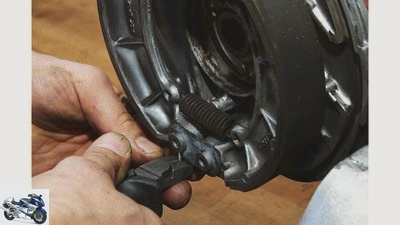
Marcel Schoch
34/50
To remove the brake pads, first remove the cotter pins from the brake pad bearing bolts.
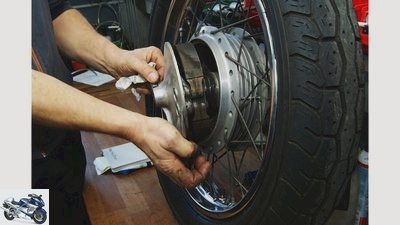
Marcel Schoch
35/50
The brake anchor plate with the brake pads mounted on it can easily be pulled out of the brake drum.
Marcel Schoch
36/50
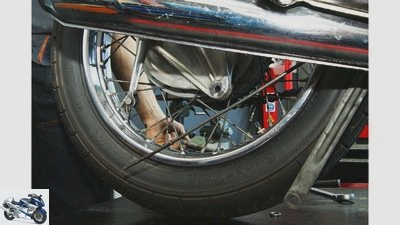
Then separate the brace of the brake anchor plate from the latter. The rear wheel can now be easily removed.
Marcel Schoch
37/50
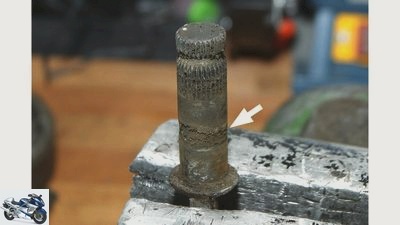
A lot of rust dust and road dirt has also accumulated in the grease recesses of the cam (arrow).
Marcel Schoch
38/50
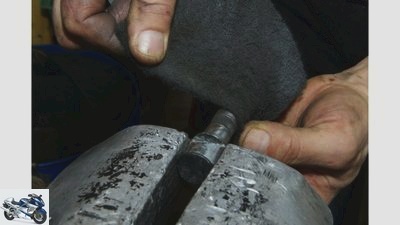
Wolfgang pulls the brake cam clamped in a vice by hand with an emery fleece.
Marcel Schoch
39/50
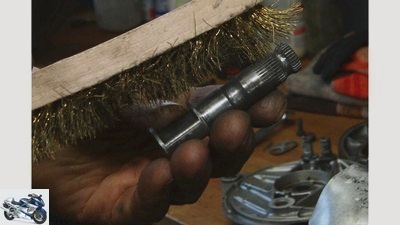
The toothing must also be cleaned, preferably with a copper wire brush in the longitudinal direction.
Marcel Schoch
40/50
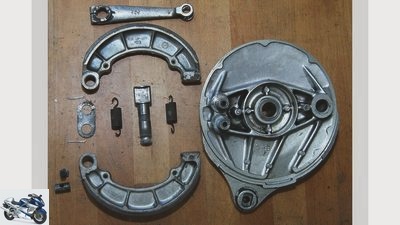
Assembly: Here you can see the complete braking mechanism of the rear stopper of the Honda. Their simplex drum brake consists of just twelve components.
Marcel Schoch
41/50
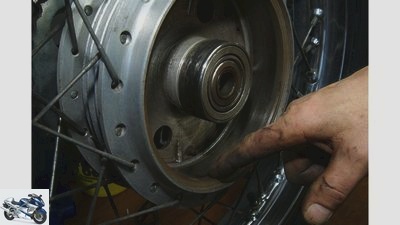
On this Honda CB 750 Four K2, the friction surface in the brake drum is almost as good as new.
Marcel Schoch
42/50
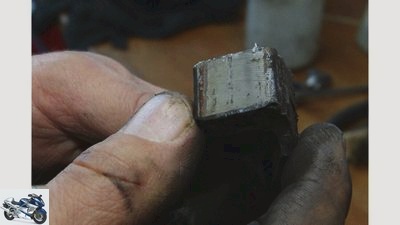
The brake cam abutment must not have any damage or dents on the brake disk.
Marcel Schoch
43/50
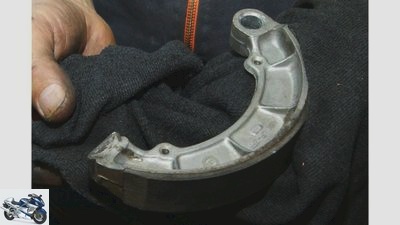
For cleaning, the brake pads can be wiped off thoroughly with a grease-free cleaning rag.
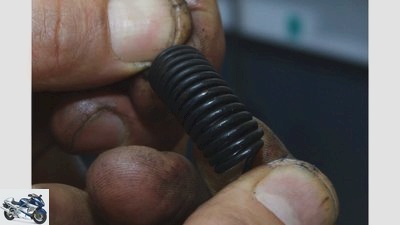
Marcel Schoch
44/50
When cleaning, remove rust and dirt from the spaces between the springs.
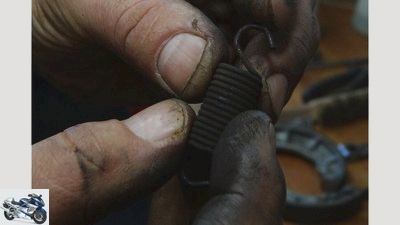
Marcel Schoch
45/50
The spring hooks must not be bent or damaged. These are fine and can still be used.
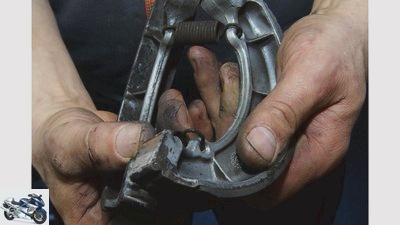
Marcel Schoch
46/50
Brake pads and friction surfaces: The return springs of the brake pads can best be unhooked when the pads are at an angle of 90 degrees to each other.
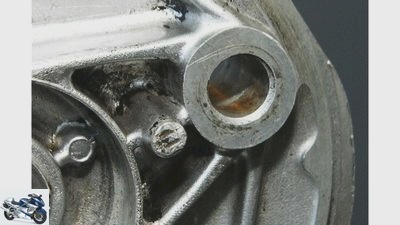
Marcel Schoch
47/50
Result: Here the warehouse is still in good condition, further use is possible without hesitation.
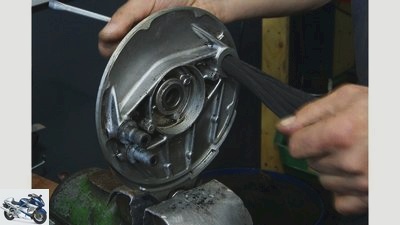
Marcel Schoch
48/50
Wolfgang cleans the bore of the brake cam bearing with a twisted emery fleece soaked in cleaner.
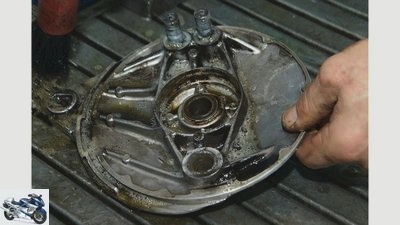
Marcel Schoch
49/50
Only after thorough cleaning can you really judge whether the brake cam bearing is still functional.
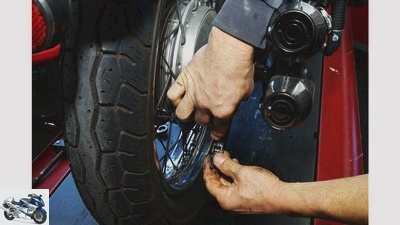
Marcel Schoch
50/50
Disassembling the brake: Before removing the rear wheel, first loosen the brake linkage from the rear brake lever.
counselor
technology & future
Motorcycle technology – maintaining drum brakes, part 1
Motorcycle technology – maintaining drum brakes, part 1
Braking points
Content of
Although disc brakes prevailed in the 1970s, many classic motorcycles with drum brakes still slow down. We show what is important when it comes to maintenance so that the stoppers work perfectly.
Marcel Schoch
05/06/2016
Even cast-iron classic fans will not deny that disc brakes in the sum of their properties are superior to time-honored drum brakes today. And yet, for many, the latter are simply part of the appearance of an old motorcycle.
Buy complete article
Motorcycle technology – maintaining drum brakes, part 1
Braking points
6 pages) as PDF
€ 2.00
Buy now
Even with modern machines, drum brakes are not extinct. There are good reasons for this, as confirmed by Wolfgang Schelbert, two-wheel mechanic and owner of the independent motorcycle workshop “Wolfis Garage” in Seeshaupt (www.wolfis-garage.de). “Especially with light motorcycles, where low production costs are also important, their braking performance, especially on the rear wheel, is completely sufficient and even quite comparable to disc brakes. Provided, of course, that they are technically flawless and well adjusted. ”Then drum brakes even have certain advantages over disc brakes.
Maintenance work on the drum brake is more complex
For example when it is wet, thanks to the closed construction. It also takes longer for a drum brake to overheat and fade. This is due to the larger friction surface and the higher mass of the active brake components. But there are also disadvantages. Brake debris remains in the brake drum, which as powdery dust can significantly reduce the coefficient of friction of the brake linings. “Furthermore, maintenance work, such as checking or changing the pads, is much more time-consuming than with disc brakes,” says Wolfgang. Using the rear simplex drum of a Honda CB 750 K2 from 1972, he demonstrates to us what is important when it comes to maintenance.
“The customer told me that some time ago he only had to step lightly on the foot brake lever to lock the rear wheel. Now he can fully stand on it without the Honda noticeably slowing down. ”In order to investigate the cause, Wolfgang therefore has to completely dismantle the Honda drum.
Remove and disassemble anchor plate
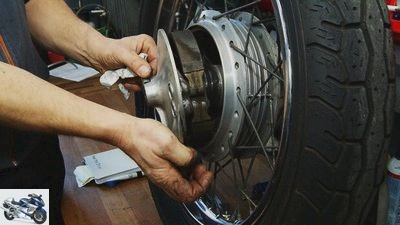
Marcel Schoch
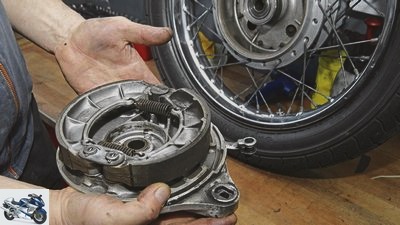
The brake anchor plate with the brake pads mounted on it can easily be pulled out of the brake drum.
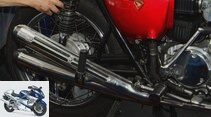
The effort is quite considerable. In order to get to the inside of the drum brake, the rear wheel has to be removed. On the Honda, the two left mufflers have to be dismantled beforehand. After pulling the cotter pin, Wolfgang loosens the rear axle nut, takes it off and loosens the chain tensioner. Then he dismantles the rear brake linkage by pushing the brake lever forward a little with his hand so that the adjusting nut on the brake linkage can easily be unscrewed from the abutment without any pressure. Before removing the rear axle, the brake anchor strut (also known as the brake support) must be loosened. Their screw connection is also secured with a split pin.
Attention: This must not be missing or forgotten during later assembly! When disassembling the brake anchor screw connection, pay attention to how it is suspended. “Some brake anchors are supported on the frame of the machine,” explains Wolfgang. “If this is the case, the mount on the brake anchor plate must be rotatably mounted, otherwise the brake anchor would block the deflection of the swing arm.” Important: Carefully check the condition of the screw connection in the brake anchor bearing. Rusted brake anchor bearings lead to a bucking rear wheel, as the damping is strongly influenced. “In the worst case, a fixed brake anchor bearing can lead to breakage of the brake anchor strut,” warns Wolfgang, “as the swing movement then constantly bends the strut.” The screw and bearing must also be free of play and well greased.
Component must not be corroded or damaged
With the Honda, the brake armature is supported directly on the swing arm, so its bearing does not have to compensate for any rotational movement of the swing arm. Nevertheless, Wolfgang takes a very close look at the screw connection here as well. After all, it is a safety-relevant component that must not be corroded or damaged. After the brake anchor is free, you can pull out the rear axle and thread the rear wheel out to the side after lifting the chain. Now the real work on the drum brake can begin.
Wolfgang puts the heavy rear wheel on the workbench, pulls the brake anchor plate and the pads mounted on it out of the brake drum and examines all the components. “Here the inside of the brake drum and pads, springs and the bearing bolts of the pads are noticeably clean. The inadequate braking effect cannot be due to abrasion. ”To find the reason, he has to dismantle the entire mechanism. To do this, he clamps the brake anchor plate in the vice and first removes the cotter pins from the brake pad bearings and the spacers underneath. To pull off the pads, Wolfgang turns the brake cam 90 degrees. “On the CB 750 this has a guide burr that prevents the pads from moving sideways from the cam,” says Wolfgang. “If the cam is in the ‘operating position’, they cannot be pulled vertically from the brake pad bearing.”
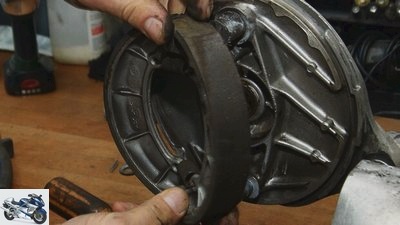
Marcel Schoch
The brake pads are under tension because of the return springs. That’s why Wolfgang folds it away to the side.
Since he needs a screwdriver for this, our expert already suspects here that the brake is not working properly due to insufficient lubrication. “Usually the coverings can be easily removed. Here, however, they really stick to the axles. ”After levering it off, Wolfgang’s assumption is confirmed, because both axles are completely dry. The brake cam also runs stiffly in its bearing.
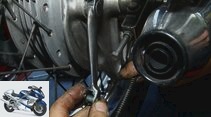
To remove the brake anchor plate, he unscrews the brake lever and pulls it off the toothing of the cam. Before doing this, he marks the exact position on the axis with a pop-up dot. “This makes it easier to adjust the brake precisely during the subsequent assembly,” says the experienced screwdriver.
Brake cam and its bearings
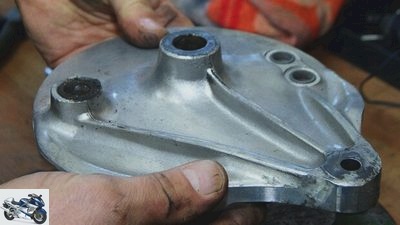
Marcel Schoch
After pulling out the brake cam you can see a lot of dirt and abrasion in its bearing.
Pulling out the brake cam is difficult, it is firmly seated in its bearing. As an experienced mechanic, however, Wolfgang knows the tricks to break unruly connections. He clamps the cam in the vice and jerks the anchor plate off the axis of the brake cam by oscillating movements. Both the cam and its guide bearing in the anchor plate are completely dry. Rust dust and dirt from the road have even collected in the grease depressions. “This tough dust prevents the axis of the brake cam from rotating cleanly,” says Wolfgang. “This means that a lot of braking power is lost.” In order to be able to better assess the condition of the individual assemblies, Wolfgang washes all parts in a special cleaning machine with a cleaning solution. “Brake parts must never be cleaned dry, especially not with compressed air,” warns Wolfgang.
“Brake dust is respirable and therefore extremely harmful to health.” Our two-wheeler professional thinks primarily of asbestos-containing brake pads. Although they have been banned for many years, they are still used in many classic cars. Since you can never be sure about the composition of the pads, you should rather exercise caution here and, if possible, not stir up brake dust when working and cleaning. “If you don’t have a parts washing system, you should work with a motorcycle cleaner,” recommends Wolfgang. “Despite its name, brake cleaner is unsuitable for this. It simply evaporates too quickly and does not bind dust. “
Axle bearing of the brake cam cleaned with emery fleece
After thorough cleaning of all parts, Wolfgang clamps the brake cam in the vice and removes its axis by hand with an emery fleece. After a few minutes, the surface is completely free of rust and is almost as new. He also cleans the toothing for the brake lever with a copper wire brush.
He also cleans the axle bearing of the brake cam with the emery fleece by twisting it into a roll and pulling it through the hole. Then he puts both parts together and checks the game. Here everything is true to size, the brake cam can be used without hesitation.
Brake pads and friction surface
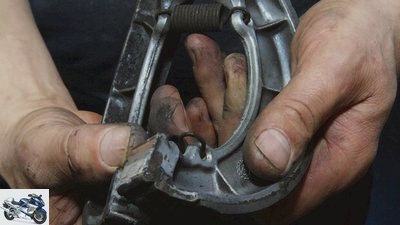
Marcel Schoch
Brake pads and friction surfaces: The return springs of the brake pads can best be unhooked when the pads are at an angle of 90 degrees to each other.
The next test point applies to the brake pads. Those of the CB 750 are almost as good as new in terms of pad thickness. The friction surfaces also show no breakouts or glazed areas. The latter would be an indication of overheating of the pads. Only the two return springs show slight corrosion, which Wolfgang removes in his parts washer. To check it, he then bends the springs in all directions. This shows whether there is still corrosion or dirt between the spring coils. The result is convincing in this case, both springs are completely clean. Only one end of the spring is slightly bent. “The spring hook was probably bent a bit during assembly.” Wolfgang can straighten that out with needle-nose pliers.
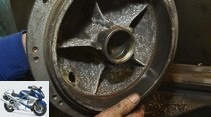
Then he wipes the dirt off the brake pads with a damp cloth and checks the condition of the brake drum. “Here it is important to ensure that the friction surface of the brake drum does not have any grooves, depressions, edges or corrosion,” says Wolfgang and runs his finger over the friction surface to check it. However, the brake drum is exemplary in our photo model. Since there is no further damage, the professional can start reassembling the brake.
Assembly and adjustment
Marcel Schoch
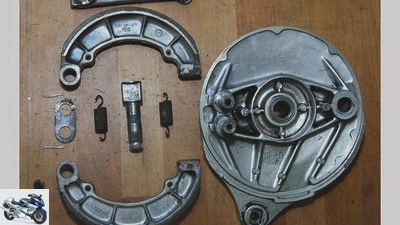
Here you can see the complete braking mechanism of the rear stopper of the Honda. Their simplex drum brake consists of just twelve components.
The assembly is carried out in reverse order. Wolfgang makes sure that all moving components of the brake are carefully lubricated. “You should never use too much grease when lubricating,” he warns. “Anything that is excess or oozes out of the respective lubrication points must be completely removed.” Otherwise there is a risk of grease getting onto the brake linings when the brake becomes hot.
After assembling the drum brake and installing the rear wheel (see photos), the last step is to find the right setting. Before doing this, however, the chain must be tensioned, otherwise the brake setting may change again when the chain is tensioned.
The brake light may come on too early or too late
When adjusting, make sure that the foot brake lever has a maximum actuation path. “To do this, set the lever so that it is initially horizontal and rests against the upper stop,” explains Wolfgang. “However, many people adjust the foot brake lever so that it is tilted slightly downwards so that the foot does not accidentally rest on it when driving.” This is wrong, however, because it means that a lot of lever travel is lost. The brake lever on the Honda was also incorrectly adjusted. Wolfgang therefore dismantled it and then reassembled it horizontally on the cleaned and lubricated drive toothing of the lever linkage. During assembly, make sure that the driver lever for the brake linkage is also on the maximum actuation path – i.e. at the upper stop.
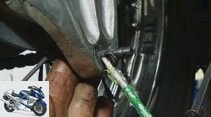
Then the brake linkage is attached to the brake lever of the anchor plate at the rear and the adjusting screw is put on. For easier adjustment, the drive pin and the thread of the rod should be lightly greased. Since the maximum lever path is available when the foot brake lever is correctly installed, the brake linkage can be set so that the brake responds from about a third of the lever path. This setting can also be used to prevent the rear brake from being applied should the driver’s foot accidentally rest on the foot brake lever.
Marcel Schoch
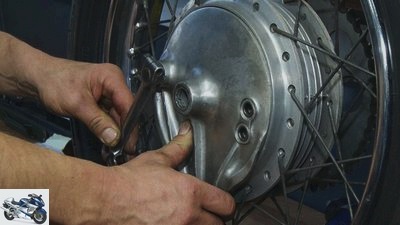
If installed correctly, the completed brake anchor plate can be pushed into the drum without any problems.
“After the correct adjustment of the foot brake lever and linkage, you must of course not forget to reset the brake light switch as well,” says Wolfgang. “Otherwise the brake light may come on too early or too late.” The Honda switch can be adjusted by setting it higher or lower using its thread on the frame mount and then tightening the two lock nuts again. The brake light switch should now close exactly when the braking effect occurs. To find this point, turn the rear wheel and lightly press the brake lever until the brake linings touch the friction surface of the drum. The brake light switch is then adjusted to this point.
Caution: If the brace of the brake anchor is supported on the swing arm, you must finally check whether the setting of the foot brake is still correct when the machine is jacked off and the driver is sitting on it. To do this, sit on the motorcycle and test the lever travel of the brake. The compensation for the rotary movement of the swing arm must be within the free travel of the brake lever (first third!). Otherwise the brake will be actuated involuntarily with every compression!
Unscrew the brake drum
Marcel Schoch
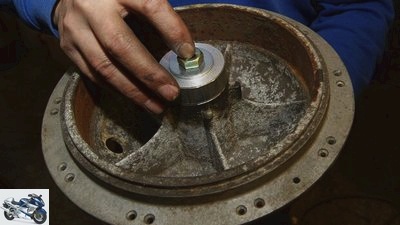
An adapter is screwed to the brake drum for secure clamping in the lathe.
If there is heavy rust, scoring or worn-in friction surfaces, the brake drum must usually be replaced. “In principle, however, turning is also possible,” says Peter Steger, motorcycle specialist and co-managing director at R & R in uberacker. However, only if the drum has not already been turned off before. Otherwise the diameter would increase so much through repeated turning that the stroke of the brake cam is no longer sufficient to spread the brake linings wide enough. So the first thing is meticulously measured.
If there is enough material in the case of spoked wheels, Peter spokes out the drum so that it can be clamped in the lathe. Alternative for cast wheels: Clamp the wheel in a milling machine and let the rotating milling head work. Here, however, we show the former variant using the example of a 1973 triumph “Hurricane” with a massively corroded drum. “There is enough material available, but the problem is the strong rust scars in the friction surface. It’s hard to estimate how deep they are. ”To unscrew it, Peter first screws an adapter onto the drum, which is precisely positioned in the wheel bearing seat and centers the drum. The hub is then clamped into the lathe chuck with the adapter and the exact centering is checked by hand. “The brake drum is actually centered thanks to the adapter clamped in the drill chuck,” says Peter. “But it could be that the wheel bearing seat is drilled a few tenths away from the friction surface of the brake drum.
Then the brake drum has to be centered again in the lathe, this time in relation to the friction surface of the brake drum. ”After central clamping, the turning process begins in small steps. “At first I only have the lathe chisel removed by a tenth to remove the rust.” This is followed by a check.
The rust is gone, except for a larger scar. And so the turning tool goes into the drum again, now taking two tenths off. Result: rust scar disappeared, friction surface with even contact pattern. What the final measurement confirms. Then Peter gives the drum to the glass bead blasting before he spokes the hub again.
Related articles
-
jkuenstle.de counselor workshop Working on the drum brake Working on the drum brake Not only a disc brake needs care You are completely isolated from the…
-
Guide to repairing spoked motorcycle wheels Part 1
Marcel Schoch 38 pictures Marcel Schoch 1/38 Preparatory work: The bike must always be removed for repairs. Damage to the tire can be an indication that…
-
Guide to repairing spoked motorcycle wheels part 2
Marcel Schoch 15th pictures Marcel Schoch 1/15 The spokes, which are already slightly under tension after they have been lightened, lie firmly in the…
-
Everything about motorcycle brakes
fact counselor workshop Everything about motorcycle brakes Everything about motorcycle brakes Brake system report Progress through perfect standstill….
-
Restoration of the BMW R 80 G-S, part 5 chassis and brakes
Cook 19th pictures Cook 1/19 Cook 2/19 On the left the new, on the right the plate-shaped, warped coupling base plate. Cook 3/19 Clutch removal, act…
-
Technology: The load change on a motorcycle
Drawing: archive counselor technology & future Technology: The load change on a motorcycle Technology: motors / drive The load change on a motorcycle…
-
Chassis special part 1: motorcycle suspension
fact accesories landing gear & Spring elements Chassis special part 1: motorcycle suspension Chassis special: suspension Everything about motorcycle…
-
The little ABC of motorcycle types, part two, E ?? H
Harley-Davidson motorcycles The little ABC of motorcycle types, part two, E ?? H The little ABC of motorcycle types, part two, E ?? H VSOP 850 FLHRSI…
-
Bikes for 999 euros and the consequences ?? part 3
fact counselor Used purchase Bikes for 999 euros and the consequences ?? part 3 Bikes for 999 euros and the consequences ?? part 3 Light and shadow While…
-
PS reader question on motorcycle technology – tire wear on the racetrack
jkuenstle.de 5 pictures markus-jahn.com 1/5 “What is the reason for the flaky, frayed way in which racing tires are destroyed??”, asks us reader Holger…