Table of contents
- Advice: check and adjust steering head bearings Steering head bearing: the fulcrum
- More about technology
Cook
9 pictures
Cook
1/9
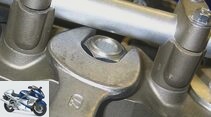
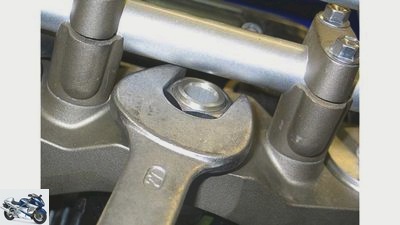
Checking and adjusting the steering head bearing – Step 2: Loosen the central nut on the steering shaft. Only use a nut and a ratchet when handling sensitive aluminum nuts.
Cook
2/9
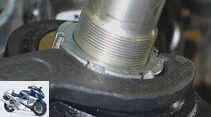
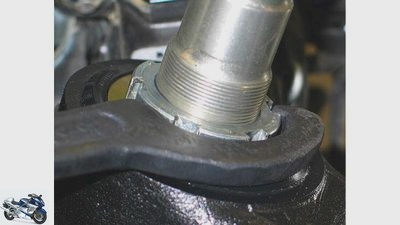
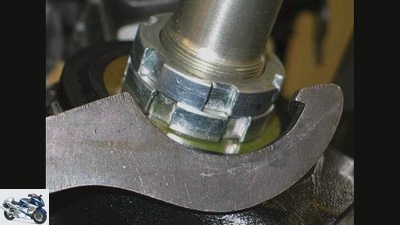
Check and adjust the steering head bearing – Step 8: Tighten the locknut hand-tight after assembly and then open a sixth of a turn to adjust the bearing play.
Cook
3/9
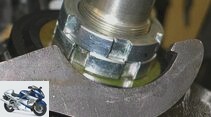
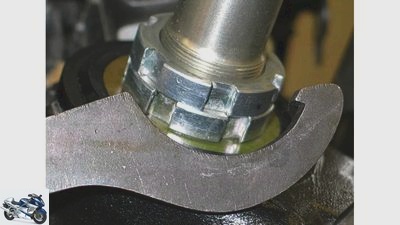
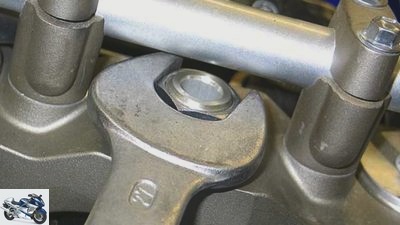
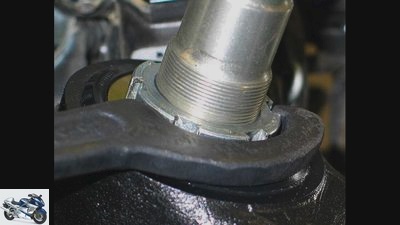
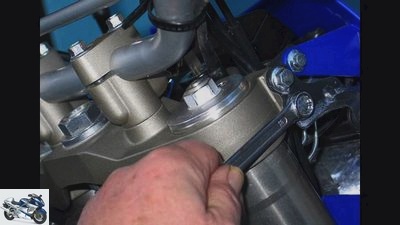
Checking and adjusting the steering head bearings – Step 4: Loosen and lock the locknuts with two suitable hook wrenches, only use water pump pliers in an emergency.
Cook
4/9
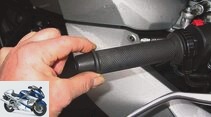
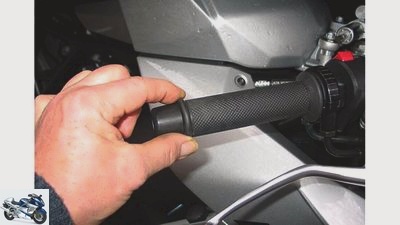
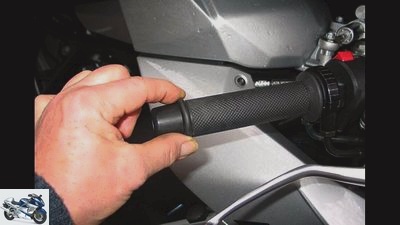
Check and adjust the steering head bearings – Step 1: Completely relieve the load on the front, set the steering straight ahead and check the bearings for play and freedom of movement with slight rotary movements of around 30 millimeters at the end of the handlebar.
Cook
5/9
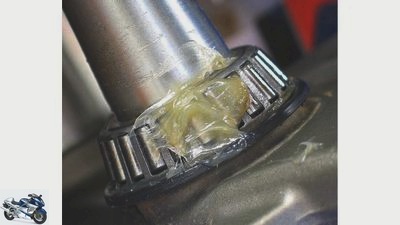
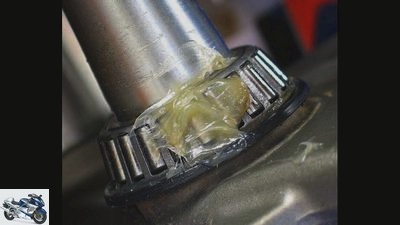
Checking and adjusting the steering head bearing – Step 5: When the front is relieved, the lower steering head bearing can also be inspected and, if necessary, re-greased.
Cook
6/9
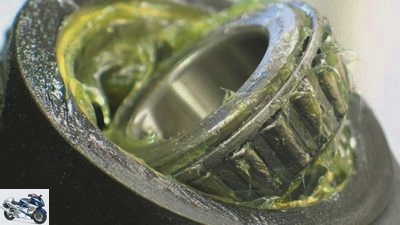
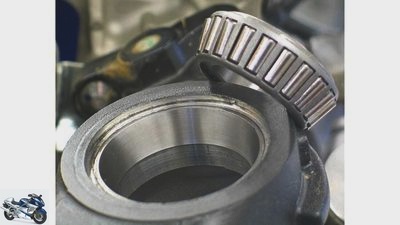
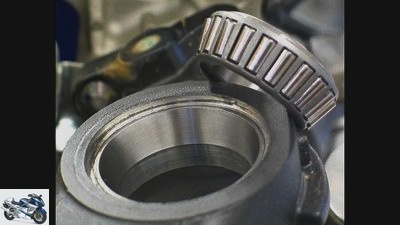
Check and adjust the steering head bearings – Step 6: Flawless bearing shell without traces of corrosion and pressure points, which usually occur in a longitudinally loaded direction.
Cook
7/9
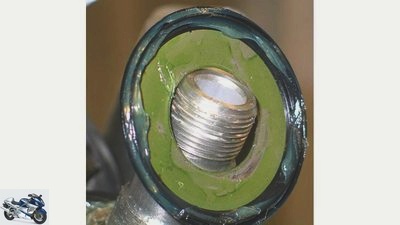
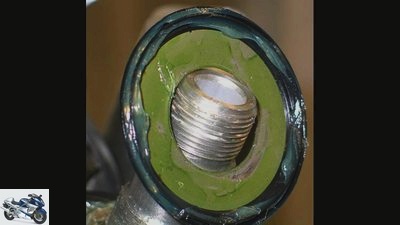
Check and adjust steering head bearings – Step 7: Thoroughly grease cover disks and sealing lips with large diameters to minimize friction.
Cook
8/9
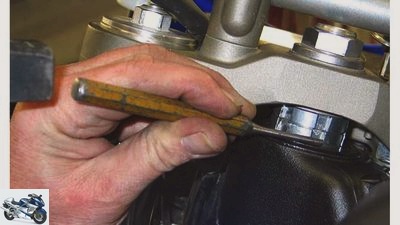
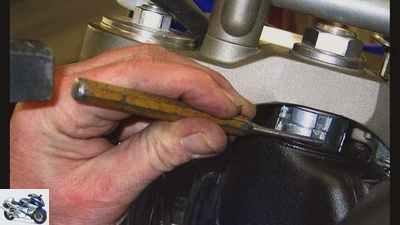
Check and adjust the steering head bearings – only as a provisional solution for on the move: readjust the bearing play with a punch and gentle hammer blows.
Cook
9/9
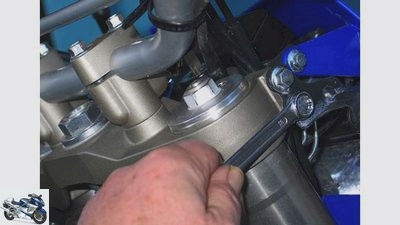
Checking and adjusting the steering head bearings – Step 3: Loosen the triple clamps each time you readjust the bearing play in order to avoid tension.
counselor
workshop
Advice: check and adjust steering head bearings
Advice: check and adjust steering head bearings
Steering head bearing: the fulcrum
The setting and condition of the steering head bearings have a decisive influence on the steering and driving behavior of all motorcycles. Because if the adjustment is incorrect, fun on the bend quickly has a hole.
Werner Koch
05/17/2010
A tough job: when braking, up to a ton of bending load is exerted on the lower steering head bearing via the lever arm of the fork, and every pothole slams mercilessly into the small rolling elements. Under such conditions, it is no wonder that the bearings often open up after 20,000 kilometers. Then you have to replace it, because only an absolutely smooth, low-friction bearing guarantees neutral steering behavior. If the rolling elements of the ball or tapered roller bearings have worked their way into the surface of the bearing shells, the steering hooks slightly in the straight ahead position and can no longer swing. But this commuting is crucial. The steering is turned towards the inside of the curve every time you turn a corner. While this angle takes up the entire steering angle when maneuvering in the city, it is only about one to two degrees at higher speeds and at a great lean angle. This is around six millimeters per degree of steering angle measured at the end of the handlebar. And it is precisely over this small area that the steering must be able to adapt extremely sensitively and without resistance. If the rolling elements that have run in or are adjusted too tightly jam, the driver has to keep the machines on the line in an inclined position by making permanent steering corrections, which usually leads to wobbly, uneven driving behavior. As wear and tear is slowly emerging, the driver is often not consciously aware of the negative steering properties and is only surprised that it is difficult to find the right curve even on the home route.
Do you have doubts about your driving skills? Then just check the steering head bearings. Another indication of a defective or incorrectly set bearing: When driving slowly, the machine tilts like a steering damper that is too tightly adjusted; when rolling out hands-free, the driver has to acrobatically balance the machine with the upper body. If the steering head bearing has too much play, the engine vibrations in the handlebars usually increase, and the directional stability also suffers. The dreaded handlebar slap, or kickback, can start earlier and more intensely due to the reduced bearing friction. The wear on the rolling elements and bearing shells increases as they are exposed to increased impacts and vibrations.
- The check is carried out when the vehicle is stationary with the front wheel unloaded. To do this, the machine can be carefully tilted to the left over the side stand. Now the handlebars are moved about 30 millimeters to the left and right with two fingers (see photo show) and light steering movements from the straight-ahead position. If a grid position can be felt, the bearings must be replaced.
- If the steering only turns with a noticeable resistance and does not fall to the side by itself, the bearing is preloaded too much and must be adjusted with more play. When performing this test, make sure that no strained cables or cables impair the freedom of movement of the steering.
- In the case of motorcycles with a steering damper, this must be removed for inspection. ATTENTION: Never drive in this state – risk of falling due to the locked steering!
- If the bearing play is set too loosely, it can be determined by pushing the motorcycle vigorously with the front brake on and immersing it. If a slight click can be heard or felt, the thumb is placed against the upper bearing during this process in such a way that any play can be felt in a jerky shift between the steering head and the steerer tube / adjusting nuts. NOTE: Floating brake disks or brake pads can also cause clacking noises.
- If the bearing has to be readjusted, we recommend dismantling the upper triple clamp and performing a visual inspection. As a provisional solution for when you are out and about, the locknuts can also be readjusted when the fork bridge and central nut are installed but loosened. A slim punch or mandrel is required for this, with which the locked locknuts can be turned in the desired direction with light hammer blows (see photo show). Before doing any work on the steering head, the tank should be covered with an impact-resistant textile blanket or foam to avoid damage such as dents or scratches.
- When the front is relieved, the upper central nut on the steering shaft is removed, the fork bridge clamp is loosened and the fork bridge is pulled off evenly upwards without tilting. The bearings are located under the locked locknuts and the sealing ring, the outer rings of which are checked for solid grease filling and, above all, for damage and breakouts. If there are no findings, the parts are cleaned and reinserted freshly greased. The sealing ring also gets its grease off so that the sealing lips build up as little friction as possible and provide better protection against water and dust.
- After assembly, the lower locknut is tightened against the bearings with a torque of 10 Nm so that they are pressed tightly into the seat. Then the adjusting nut is carefully opened again by a sixth turn and locked with a hook wrench.
- On some Yamaha models, a rubber ring is inserted between the locknuts, against which the nuts are braced and secured with a sheet metal strap. A controversial solution, as the locknuts press against the rubber ring under load, thus increasing the play.
- If the nuts are locked, the play is checked and, if necessary, readjusted absolutely free of play, but smoothly.
Even specialists often only work out the correct play in the steering head bearing after several attempts. If the fork bridge is mounted and the clamps are tightened, the play must be checked again, as the locknuts can settle under the high tightening torque of the central nut. After a subsequent test drive with a dozen hard brake applications, check the play and freedom of movement again. Everything great? Well then, have fun with the carefree cornering break.
<!– ESI FOR ads.BannerGallery / irelements / esielement / eyJwYWdlIjoiL3N0YXJ0c2VpdGUvIiwibGF5b3V0IjoiYXJ0aWNsZSIsImVsZW1lbnQiOiJhZHMuQmFubmVyR2FsbGVyeSIsImlyQ29uZmlnIjoiMTQ3MDY1MjAiLCJwYXJhbXMiOnt9LCJpc01vYmlsZSI6ZmFsc2V9 –> <!– CACHEABLE –>&# 34;,&# 34; rectangle&# 34 ;: “<!–# include virtual = \&# 34 / irelements / esielement / eyJwYWdlIjoiL3N0YXJ0c2VpdGUvIiwibGF5b3V0IjoiYXJ0aWNsZSIsImVsZW1lbnQiOiJhZHMuUmVjdGFuZ2xlR2FsbGVyeSIsImlyQ29uZmlnIjoiMTQ3MDY1MjAiLCJwYXJhbXMiOnt9LCJpc01vYmlsZSI6ZmFsc2V9 \&# 34; –> <!– ESI FOR ads.RectangleGallery / irelements / esielement / eyJwYWdlIjoiL3N0YXJ0c2VpdGUvIiwibGF5b3V0IjoiYXJ0aWNsZSIsImVsZW1lbnQiOiJhZHMuUmVjdGFuZ2xlR2FsbGVyeSIsImlyQ29uZmlnIjoiMTQ3MDY1MjAiLCJwYXJhbXMiOnt9LCJpc01vYmlsZSI6ZmFsc2V9 –> <!– CACHEABLE –>&# 34;,&# 34; sky&# 34 ;: “<!–# include virtual = \&# 34 / irelements / esielement / eyJwYWdlIjoiL3N0YXJ0c2VpdGUvIiwibGF5b3V0IjoiYXJ0aWNsZSIsImVsZW1lbnQiOiJhZHMuU2t5R2FsbGVyeSIsImlyQ29uZmlnIjoiMTQ3MDY1MjAiLCJwYXJhbXMiOnt9LCJpc01vYmlsZSI6ZmFsc2V9 \&# 34; –> <!– ESI FOR ads.SkyGallery / irelements / esielement / eyJwYWdlIjoiL3N0YXJ0c2VpdGUvIiwibGF5b3V0IjoiYXJ0aWNsZSIsImVsZW1lbnQiOiJhZHMuU2t5R2FsbGVyeSIsImlyQ29uZmlnIjoiMTQ3MDY1MjAiLCJwYXJhbXMiOnt9LCJpc01vYmlsZSI6ZmFsc2V9 –> <!– CACHEABLE –>&# 34;}}” ga-track-vis =”article.gallery.inline.vis” class =”v-A_-article__inline-container”>
Cook


9 pictures
Pictures: Advice: Check and adjust steering head bearings
go to Article
To home page
Cook
Cook
Cook
Cook
Cook
Cook
Cook
Cook
Cook
1/9
More about technology
PS knowledge: technology
- Motorcycle technology clearly explained on 97 pages (PDF)
- From starter to spark plug
- Simple teaching of physical principles
- Tips and tricks for practitioners
To the PDF for € 9.99
#image.jpg
Related articles
-
Adviser: change the steering head bearing
Schermer counselor workshop Adviser: change the steering head bearing Adviser: change the steering head bearing Check and replace steering head bearings…
-
Change the steering head bearing
counselor workshop Change the steering head bearing Change the steering head bearing Change the steering head bearing If the bearing in the steering head…
-
Advisor This is how the steering head bearing stays fit
counselor workshop Advisor This is how the steering head bearing stays fit So the steering head bearing stays fit Screwdriver tip part 2 The second part…
-
Advice: adjust springs and dampers
Schermer counselor workshop Advice: adjust springs and dampers Advice: adjust springs and dampers Tips for adjusting the suspension and damping On modern…
-
Second hand advice Yamaha Vmax
fact counselor Used purchase Second hand advice Yamaha Vmax Second hand advice Yamaha Vmax Max the last In 18 years of sales, the Vmax mutated into a…
-
Cook 10 pictures Cook 1/10 If you doubt your driving ability because every curve radius becomes a hexagon and the motorcycle no longer meets a line, a…
-
Purchase advice – Nine current superbikes in a bargain check
fact / sorcerer11 – Fotolia 37 pictures fact 1/37 Sports fans were supplied with fresh material in 2015 – predecessors have to be removed and innovations…
-
Second hand advice Yamaha XJ 600 N-S
Bilski counselor Used purchase Second hand advice Yamaha XJ 600 N / S Second hand advice Yamaha XJ 600 N / S All-round talent With their wide range of…
-
Adjust the valve clearance on the BMW boxer
Schermer counselor workshop Adjust the valve clearance on the BMW boxer Screwdriver tip Adjust the valve clearance on the BMW boxer Thanks to the exposed…
-
Cook 8th pictures Cook 1/8 Solid screwdrivers with a handy shaft are preferable to tools with bits. Cook 2/8 The standard on-board tools are replaced by…