Table of contents
fact
accesories
landing gear & Spring elements
Chassis special part 1: motorcycle suspension
Chassis special: suspension
Everything about motorcycle suspension
Content of
Part one of the big chassis special is all about the suspension. Nothing works without her, voting always begins with her. A subject where there is still a lot of misbelief.
Volkmar Jacob
10/17/2012
Our great-grandfathers were still cruising around on rigid-frame motorcycles. Quite a bumpy affair, with every fissure in the ground maltreating the driver and the machine. We can now look forward to modern, high-quality spring elements that offer a range of adjustment options – including the suspension.
But why hire? Because these curved wire structures at the front and rear carry a large part of the vehicle’s weight including the passenger (s) and luggage, and the chassis with all its components can only develop its full potential if it is correctly adjusted. It is important that the spring stiffness of the fork and monoshock match the rider’s weight, driving style and intended use. The technical jargon also speaks of spring rate when referring to the hardness of the spring.
If the respective spring stiffness is correct, everything is fine. If the fork springs are too hard, a trick can help: oil flows inside the fork, which not only takes over the damping, but also influences the spring work. The fork is not completely filled with oil. There is a space below the upper fork plug, the air cushion. During compression, this air is compressed, which progressively “hardens” the suspension as the fork is more and more immersed. If the springs are too hard, it can help to enlarge the air cushion, i.e. to draw off some oil. This reduces the forces required for compression, as a large air cushion can be compressed more easily than a small one. However, there are limits to the trick of varying the air cushion. This measure should not compensate for more than five to a maximum of ten percent of the spring hardness.
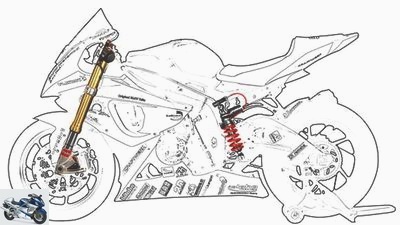
The good news: The method also works the other way around. In other words, if the springs are too soft, a smaller air cushion, i.e. a little more oil volume, helps so that the fork does not dip as far and later or not at all. Here, too, there are limits to compensating for the spring rates. The more oil and the less air there is in the fork, the more overpressure builds up inside the fork during compression, which can lead to leaks in the fork. A too small air cushion also has a negative effect on the response of the fork, since the progression of the spring force increases with increasing oil level. The graphic below on page 69 illustrates this principle. In addition, with a highly compressed air cushion, the friction of the sealing lips on the Simmerrings increases, which increases the breakaway force (“slipstick effect”) of the fork and thus also worsens the response. To measure the air cushion or the oil level, the fork springs must be removed. That requires a certain amount of screwdriver knowledge. Anyone who dares to do this work should proceed in small steps and correct the oil level by no more than ten millimeters at a time.
This trick does not work with the shock absorber, because there is simply no air cushion there that supports the effect of the spring as directly as with the fork. If it turns out to be too soft, a slightly stronger pretension can compensate for this deficiency to a certain extent. An example: A “hundred nibs” (technical jargon) means a spring hardness of 100 N / mm. This means that a force of 100 Newtons (N) has to act on the spring in order to compress it by one millimeter (mm). 100 Newtons roughly correspond to a weight of 10 (exactly: 10.2) kilograms. If you pretension a spring of this hardness ten millimeters, a force of around 100 kilograms or 1000 Newtons acts. In our example, the strut, when installed, supports the weight of the machine and driver with this force. If that is not enough, the stern deflects too far, and further pre-tensioning lifts the stern that is too low. This happens because the increased preload pulls the shock absorber further apart (less negative spring travel, more positive spring travel) and thus the so-called spring base and thus the rear frame shift upwards. Disadvantage: The stronger the preload, the more uncomfortable the monoshock is in the initial range of its spring travel. This is noticeable, for example, when braking hard, when asphalt furrows stir up the suspension when the rear end is extended. Even on bumpy terrain, where the bike often rebounds a long way, a heavily pre-tensioned shock absorber is initially insensitive.
Conversely, less preload “defuses” a spring that is too hard in the initial area. But here, too, this only works to a limited extent, because all interventions affect the spring base mentioned at the beginning and thus also the balance, geometry and handling of the bike.
archive
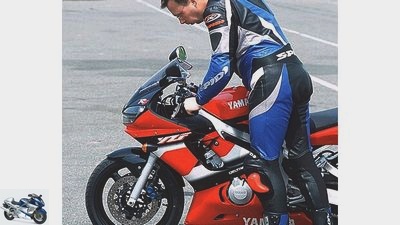
Adjusting the chassis can improve lap times enormously.
An example with the fork illustrates this fact. It also reacts to springs that are pretensioned to different degrees. More preload increases the front of the vehicle, making the bike more unwieldy and making more curves. In addition, this condition favors the dreaded handlebar slap. On the other hand, springs that are not preloaded lower the front, making the bike seem nervous and unstable. In addition, the fork runs earlier – against its mechanical or hydraulic stop. The colloquial language calls this state “walking on the block”. If this is the case, the springs no longer absorb energy. The front tire now has to do that. But he is quickly overwhelmed and blocked – ouch! Not every bike has springs with the perfect spring rate as standard, sometimes they are too soft. Especially with a very sporty pace – keyword racetrack – a real dilemma. It is therefore always advisable to use the appropriate spring rates.
Racing theme. Professional racing teams like the Alpha Technik-Van Zon-Kraftwerk-BMW-Team in the International German Motorcycle Championship (IDM) work with ingenious relationships between spring stiffness and preload, which they often readjust for the respective route. Basically, rather hard springs are used for compasses. This alleviates annoying pitching movements and the associated changes in geometry – the racer remains stable in the desired position. If there is a lot of water on the slopes during rain races, teams use softer springs (spring rate around minus ten percent) and adjust the damping accordingly. Often they even build specially designed spring elements into the bike.
For most hobby pilots this effort is too great and too costly. But even they should at least soften the setup in the rain – less spring preload and damping – because on a wet track, a gentle response behavior of the spring elements is crucial. Another tip for hobbyists: if you adjust the secondary transmission (pinion, chain wheel), you automatically change the position of the rear wheel in the swing arm – it either moves further forwards or backwards. In both cases, the leverage and force acting on the suspension vary. In the case of larger shifts, the recreational athlete should therefore check whether the spring stiffness used is still appropriate.
In parallel to the reports in the magazine, we are also posting a video for the chassis special on www.ps-onlinde.de that illustrates the setup steps described. The first film is already running – have fun watching it. In the next issue we will deal with damping. It is inextricably linked to the suspension. In general, it is worth investing time and money in the chassis. Because to burn with a perfectly coordinated chassis is great fun. And damn fast!
jkuenstle.de
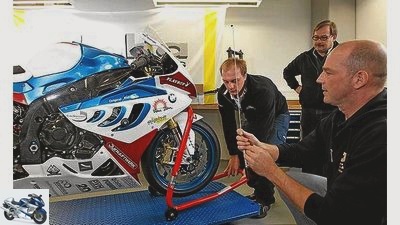
Relieve the front wheel.
A certain ratio of positive to negative spring travel, i.e. of the compression to the rebound travel, is important for the spring work. To ensure this relationship, one first checks the so-called static negative spring deflection (English: sag). This is the amount by which the spring elements compress due to the weight of the motorcycle – i.e. without the driver. Sporty street motorcycles usually have a total suspension travel of around 120 millimeters for both the fork and the shock absorber. With the fork, the “sag” is 25 to 35 millimeters. To check it, the first thing to do is to take the load off the front wheel.
Jkuenstle.de
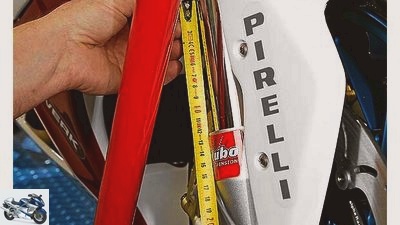
Now measure the distance of the inner tube between the dust cap (above) and the fork base.
If you don’t have a special or main stand, you need a helper to pull the bike over the side stand. Now measure the distance of the inner tube between the dust cap (above) and the fork base in which the inner tube is inserted.
jkuenstle.de
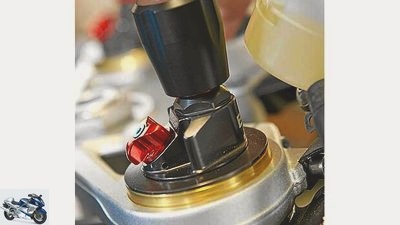
Adjust the fork plug accordingly
Make a note of this measurement. Then take the bike off the stand and bend it a few times. Then measure again between these two points. Due to the weight of the machine, the suspension should yield by the specified value. If it doesn’t, adjust the spring accordingly using the pretensioning device at the top of the fork plug.
jkuenstle.de
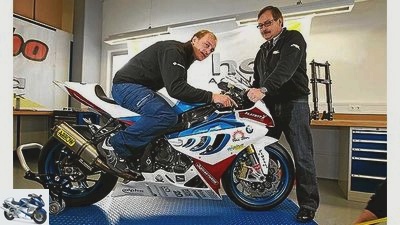
In the driver’s position on the bike.
If the static negative spring travel is correctly set, the pilot sits on the bike in the driver’s position, the machine remains jacked off.
Now the fork should dip another ten millimeters. This condition is called “negative spring deflection loaded” or “negative spring deflection with rider”. If the fork continues to sink in, the spring is too soft for this pilot, it gives less, too hard. Negative spring travel is necessary so that the fork or monoshock do not immediately reach their upper limit during the rebound movement.
jkuenstle.de
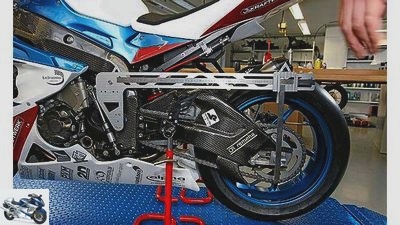
The monoshock must also be completely relieved for the check. A footrest stand, for example, is suitable for this.
Like the fork, the shock absorber also needs negative suspension travel. With a total spring travel of the usual 120 millimeters, it is around ten millimeters. The monoshock must also be completely relieved for the check. A footrest stand, for example, is suitable for this.
jkuenstle.de
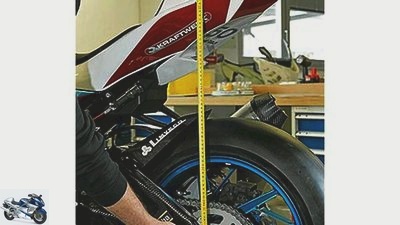
Now measure the distance between the wheel axle and a point above the rear of the frame.
Otherwise the rear wheel has to be relieved again via the side or main stand. Now measure the distance between the wheel axle and a point above the rear of the frame and note this dimension.
jkuenstle.de
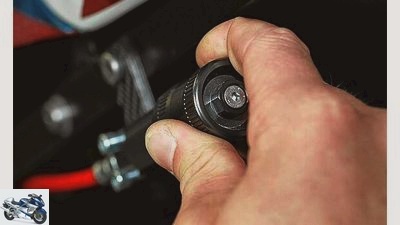
Well-equipped suspension struts offer a hydraulic system for this.
Then place the bike with both wheels on the ground, bend the rear a few times and measure again at the same (!) Points. If the static negative spring deflection deviates from the target, adjust the preload accordingly. Well-equipped suspension struts offer a hydraulic system for this.
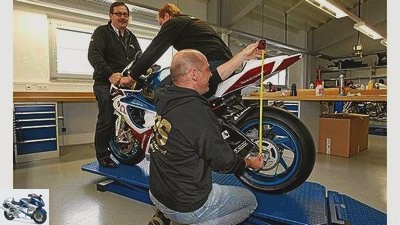
jkuenstle.de
Pilot in driver’s position on the machine.
With all other models, castle nuts vary the preload via a thread or a grid. The pilot then sits down on the machine in the driver’s position. Now measure the distance between the known points again.
jkuenstle.de
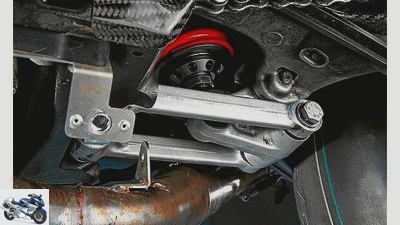
Reversing lever.
Due to the weight of the driver, the spring should yield another 15 (racing) to 25 millimeters (sedan chair). The total negative spring travel when the machine is loaded is therefore approximately between 25 and 35 millimeters. Thanks to the ingenious interaction between the deflection lever, the tension struts and their pivot points, the suspension “hardens” the more the monoshock compresses. This “deflection” ensures that the shock absorber does not suddenly hit its stop under high loads. In order to avoid a sudden increase in the spring force, manufacturers today work with rather small progressions. Also worth knowing when working with the suspension: The swing arm angle and the distance of the wheel axle from the rear wheel to the swing arm pivot point mean that the compression travel directly on the shock absorber and the travel on the rear frame deviate from each other. The gear ratio is approximately 1: 2. In other words, if the monoshock compresses 40 millimeters, for example, the travel at the rear of the frame is around 80 millimeters.
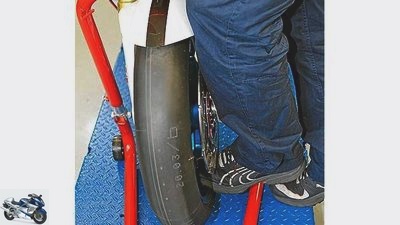
jkuenstle.de
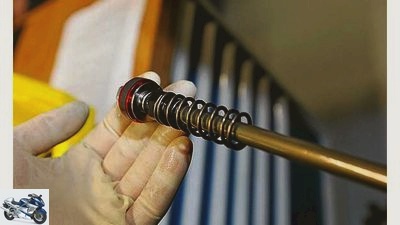
When the machine is jacked up and the front wheel is unloaded, you can feel the springs when you gently downward pressure on the wheel.
Standard for forks: top-out springs. The comparatively small additional springs prevent the fork from slamming brutally against its mechanical stop during the rebound movement. When the machine is jacked up and the front wheel is unloaded, you can feel the springs when you gently downward pressure on the wheel.
jkuenstle.de
Damper rod of the moving piston.
A top-out spring works per fork leg. In our example it sits on the damper rod of the moving piston.
jkuenstle.de
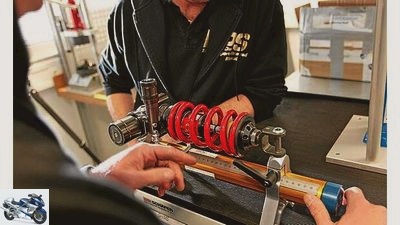
Special devices to determine the maximum length of the monoshock.
A top-out spring basically works against the force of the main spring, both influence each other. A successful spring setup requires suitable spring rates and a suitable preload for both types. Top-out springs are preferably used in suspension struts in racing. Because they have a very high spring rate, racing teams use special devices to determine the maximum length of the monoshock. Small, hard, short: this is what a typical topout spring for a racing shock absorber looks like.
Related articles
-
Suspension guide – correctly adjusting the damping, part 1
Photos: fact accesories landing gear & Spring elements Adjusting suspension / damping correctly, part 1 Guide: Adjusting the suspension / damping…
-
Chassis special: Part 6 – Troubleshooting the front of the vehicle
archive accesories landing gear & Spring elements Chassis special: Part 6 – Troubleshooting the front of the vehicle Suspension special: troubleshooting…
-
Suspension special: Part 7 – rear
archive accesories landing gear & Spring elements Suspension special: Part 7 – rear Suspension special: rear Does the motorcycle drive strange lines?…
-
Chassis Special: Part 5 – Troubleshooting and Basics
Jahn accesories landing gear & Spring elements Suspension special: Part 5 – Troubleshooting and basics Suspension special: troubleshooting and basics…
-
Suspension special: Part 3 – Strut damping
triumph accesories landing gear & Spring elements Suspension special: Part 3 – Strut damping Suspension special: shock absorber The right set-up for the…
-
accesories landing gear & Spring elements Basic chassis set-up Basic chassis set-up Basic chassis set-up The chassis tuning begins with the inspection of…
-
Restoration of the BMW R 80 G-S, part 5 chassis and brakes
Cook 19th pictures Cook 1/19 Cook 2/19 On the left the new, on the right the plate-shaped, warped coupling base plate. Cook 3/19 Clutch removal, act…
-
Suspension special: Part 9 – Strut tuning
Jahn accesories landing gear & Spring elements Suspension special: Part 9 – Strut tuning Suspension special: strut tuning What good is the conversion of…
-
The technology of the chassis and suspension
Bilski counselor technology & future The technology of the chassis and suspension Technology: rear wheel The technology of the chassis and suspension…
-
Suspension guide – correctly adjusting the damping, part 2
Cook counselor workshop Adjusting suspension / damping correctly, part 2 Guide: correctly adjusting the suspension / damping, part 2 A mystery for many:…