Table of contents
- Restoration of the BMW R 80 G / S Part 3 structure, carburetor, electrics
- A good shot of MoS2 spray
- Now the carburettors are flooded
- Check the ignition timing on the flywheel
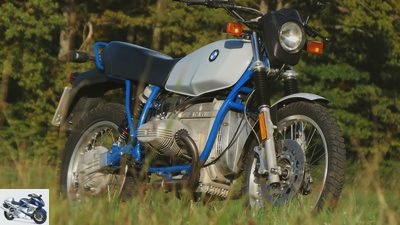
Photo: Koch

10 pictures

Cook
1/10
There are reasons why the R 80 G / S is back in the workshop after just a few hours. More about this in the MOTORRAD Classic issue 3/2015, available in stores since February 6th.
Cook
2/10
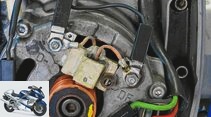
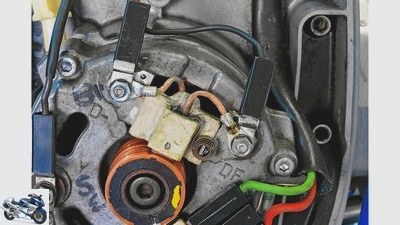
As standard, the copper cables of the carbon brushes are firmly soldered to the small holes. We preferred to solder a ring connector to each carbon and screw it to the connector. This means that the wearing parts can be exchanged quickly and without a soldering iron.
Cook
3/10
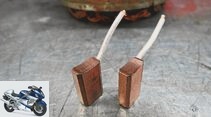
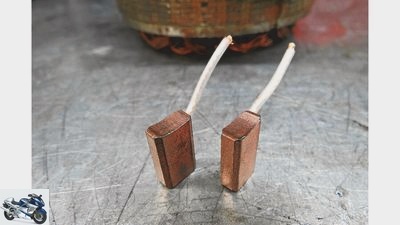
New coals and finely twisted brass treads on the armature ensure a perfect flow of electricity from the alternator.
Cook
4/10
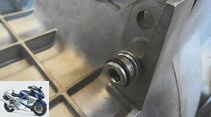
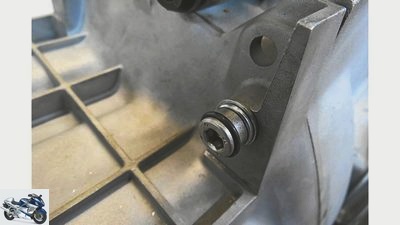
The aluminum housing is only pushed onto the front of an Allen screw with a screwed-in groove for an O-ring. The original holes must be “drilled open” eccentrically with the round file.
Cook
5/10
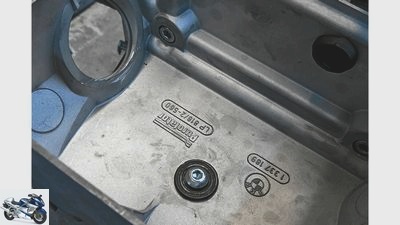
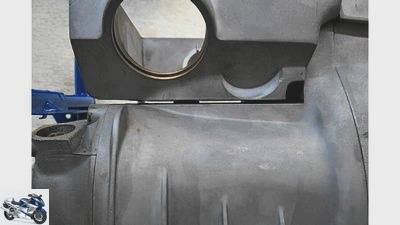
The air filter housing is screwed onto two of these 6-mm washers, which are normally used to clamp valve covers on Japanese engines. Please glue in place, the screw is under the air filter!
Cook
6/10
The metallic contact between the air filter chamber and the hot gear is interrupted by the air gap with plastic-coated washers and eccentrically expanded front mounting holes.
Cook
7/10
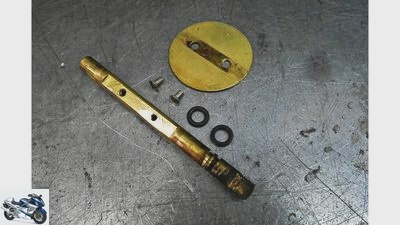
The shafts of the throttle valves received new O-rings to ensure that no secondary air creeps in and ruins the clean engine running.
Cook
8/10
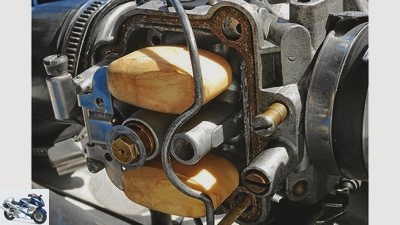
Easily accessible and simply constructed, the Bing constant pressure carburetors cause few problems. However, the engine reacts sensitively to the correct spraying.
Cook
9/10
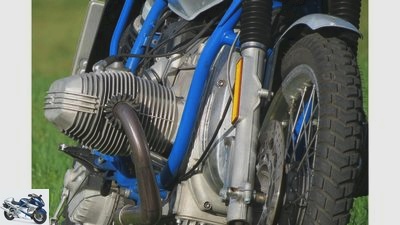
Engine in, gearbox on and the cardan rotates. Before the BMW R 80 G / S starts humming, a few things have to be carefully regulated.
Cook
10/10
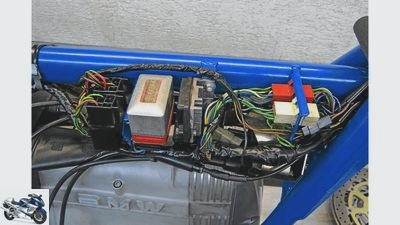
The complete wiring harness has been rewound. Before doing this, all cables should be checked for chafe marks, scorched insulation or broken cables. The old throttle cable was cleaned and relocated. It wasn’t worth it, the gas is too difficult, new trains have to be added.
counselor
workshop
Restoration of the BMW R 80 G / S, part 3 structure, carburetor, electrics
Restoration of the BMW R 80 G / S
Part 3 structure, carburetor, electrics
Content of
Engine in, gearbox on and the cardan is already turning. But before the BMW R 80 G / S starts humming, a few things have to be carefully regulated. The fun should be permanent.
Werner Koch
05.12.2014
Impatience is an ornament, but you can be faster without it. In a modification of the important wisdom of life, you actually have to slow down when it comes to bringing the newly renovated motorcycle to life. Of course, in your impatience you could blindly trust that the oil pressure arrives where it is needed, that the carburetor bores are not clogged, that the ignition timing is correct and that the alternator delivers its electricity in abundance. And if not? Exactly, then the first trip ends with the freshly built motorcycle on the trailer. Either because of a technical triviality – or a major engine failure. So the time has to be.
Buy complete article

Restoration of the BMW R 80 G / S
Part 3 structure, carburetor, electrics
4 pages) as PDF
€ 2.00
Buy now
If so, then, before cleaning the carburetor, we dismantle the throttle valve shafts, the M3 screws of which are caulked at the end of the thread. We remove the protrusion with a key file, the screws are replaced with new ones. Only then can the throttle valves be pulled out of the slotted shaft. A new sealing ring is donated to each shaft, which ensures that the engine does not draw any additional air and run on while idling. To be sure that the butterfly valves are reassembled correctly, the position and installation position should be marked with a felt pen before dismantling. Before tightening the new M3 screws, which are used with a medium-strength screw locking device, the throttle valve shaft must be closed so that the beveled flaps in the carburetor bore are absolutely tight. The axial play must also be checked with the mounted throttle control levers.
A good shot of MoS2 spray
Before we plug the Bing carburettors into the suction rubbers, we dismantle them down to the foundation walls and clean them by hand without an ultrasonic bath. White nests of corrosion, for example in the float chambers, can be removed without leaving any residue using a small, soft brass brush and a good shot of MoS2 spray (Caramba, WD 40, or similar). With brake cleaner, which primarily has a grease-dissolving effect, nothing can be done with corroded carburetor components. The same applies to slightly oxidized nozzles and all brass components which, when placed in a MoS2 bath, quickly strip off their light verdigris.
Blown through vigorously with compressed air, all nozzles are reinserted. Don’t forget: The riser of the overflow hole in the float chamber must also be free. The engine also runs with a clogged overflow pipe, but if the float valve leaks, the fuel presses through the nozzle assembly into the inlet duct and ultimately into the combustion chamber. In the worst case, there will be a blockage in the combustion chamber when trying to start and, if things go wrong, a bent connecting rod due to the “gasoline hit”.

workshop
Restoration of the BMW R 80 G / S
Part 1, engine
read more

workshop
Restoration of the BMW R 80 G / S
Part 2, drive
read more
Now the carburettors are flooded
We also check the float level and use new cork seals. Tip: Sealant is applied to the top to adhere the seal to the housing. Loosely inserted seals can fall down and tear if they are carelessly dismantled.
When assembling the air filter housing, we asked ourselves whether the intake air had to rush through the aluminum housing heated by the engine. The answer was no, the solution: isolate. Two plastic-coated washers (formerly used on Japanese valve covers) and an O-ring suspension on the front of the gearbox screws ensure that there is no longer any metallic contact with the hot engine / gearbox housing, the resulting air gap also inhibits heat transfer. Will it help? We’ll measure it. In any case, the technical conscience is reassured.
Before starting the engine, it is turned with the E-Starer with the valve covers open and the carburettors empty until the golden lubricant has reached the rocker arm shafts via the risers of the cylinder studs. Now the carburettors are flooded. But before the engine is started on its own, the fire extinguisher is ready. It wouldn’t be the first time that a brand-new engine had kicked back the first time it tried to start and could catch fire over the carburettors. Secondary air or an incorrect ignition setting can be the cause.
Check the ignition timing on the flywheel
But our boxer purrs perfectly after a few seconds and hangs neatly on the gas. The voltmeter already connected to the battery gives the all-clear, and the alternator also delivers the correct power to the battery with just under 14 volts. The new coals on the alternator and the brass running surfaces of the alternator armature, which were removed with fine chips on the lathe, are therefore effective. Instead of soldering the coals firmly to the Lima, the copper lines were provided with two ring connections to make changing them easier.
The ignition point on the flywheel is checked with a stroboscopic flash lamp. Finished. The helmet is ready for the maiden voyage. Ready to go. There are reasons why the R 80 G / S is back in the workshop after just a few hours. More about this in the MOTORRAD Classic issue 3/2015.
Related articles
-
Restoration of the BMW R 80 G-S part 4 engine and carburetor adjustment
Cook 23 pictures Cook 1/23 Small and big changes make the almost 70 hp of the renovated R 80 G / S. Cook 2/23 The new, original air filter sits on this…
-
Restoration of the BMW R 80 G-S, part 1 engine
Cook 21 pictures Cook 1/21 The good news first: It’s working. Velvety soft, with an impeccable chassis and really amazing qualities. A classic for every…
-
Restoration of the BMW R 80 G-S, part 6 – overview of costs and effort
Cook 9 pictures Cook 1/9 The good news first: It’s working. Velvety soft, with an impeccable chassis and really amazing qualities. A classic for every…
-
Restoration of the BMW R 80 G-S, part 5 chassis and brakes
Cook 19th pictures Cook 1/19 Cook 2/19 On the left the new, on the right the plate-shaped, warped coupling base plate. Cook 3/19 Clutch removal, act…
-
Schoch 49 pictures Schoch 1/49 If the engine does not immediately idle when you let go of the throttle grip, the ability of the throttle cable to operate…
-
Carburetor functionality in the video
Smartereveryday 49 pictures Schoch 1/49 If the engine does not immediately idle when you let go of the throttle grip, the ability of the throttle cable…
-
Advisory: synchronize the carburetor
Schermer 5 pictures Schermer 1/5 Step 1: Preliminary work: To adjust the carburettors, they must be freely accessible. So down with the tank… Schermer…
-
Restoration of the BMW R 80 G-S
Cook counselor workshop Restoration of the BMW R 80 G / S Restoration of the BMW R 80 G / S 160 working hours at a glance Content of All parts of the…
-
Restoration of the BMW R 80 G-S
fact 17th pictures Cook 1/17 Single-arm swing arm with the 50 millimeter long aluminum milled part between the flange (arrow). Due to the longer lever…
-
archive counselor workshop Advisory: clean the carburetor Advice: clean the carburetor Clean the carburetor More than 90 percent of the motorcycles…