Table of contents
- Fix carburetor problems Strike in the gas works
- Problem zone air filter
- The filter can also be oily
- Problem zone intake manifold
- Trouble with outside air in the carburetor
- Check the needle tips and threads of the adjusting screws
- Debris Problems
- Corrosion problems
- Coat the carburetor with penetrating oil
- Problems with the swimmer
- Check the setting of the float
- Problem areas of the constant pressure carburetor
- Wear on slide and nozzle needle
- Bottlenecks in the fuel supply
- Dropouts due to water in the fuel
- Seal or clogging?
- More tips and pictures
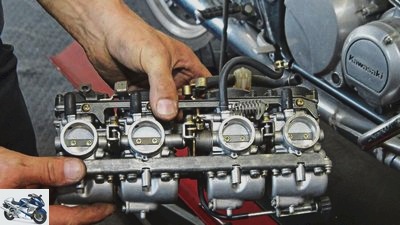
Schoch

49 pictures
Schoch
1/49
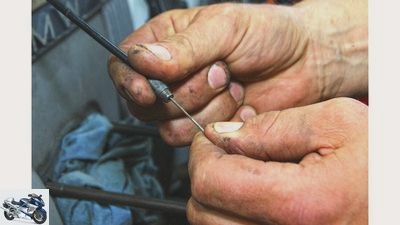
If the engine does not immediately idle when you let go of the throttle grip, the ability of the throttle cable to operate could also be impaired.
Schoch
2/49
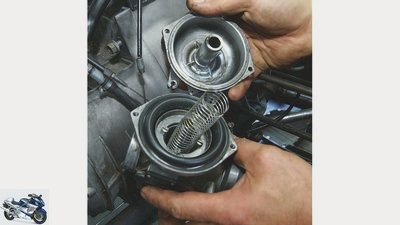
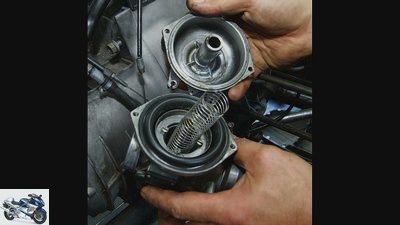
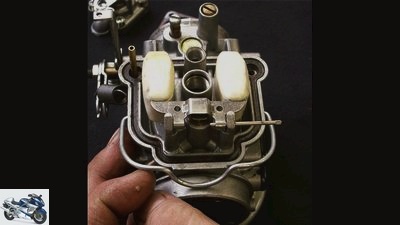
To dismantle the slide, the carburetor dome must first be dismantled in the case of constant pressure carburetors.
Schoch
3/49
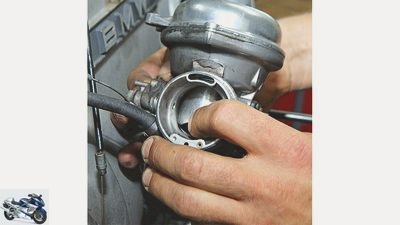
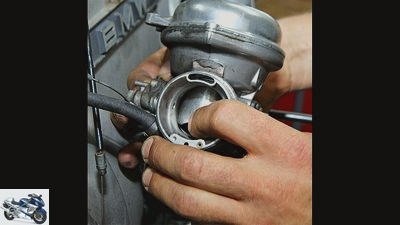
Checking the slide play with your finger is only possible with the carburettors removed.
Schoch
4/49
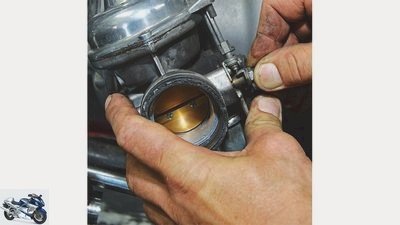
A loose throttle valve is noticeable by an unstable idle gas. Your two fastening screws must be secured. A worn out throttle valve axis lets the engine draw in outside air and run too lean.
Schoch
5/49
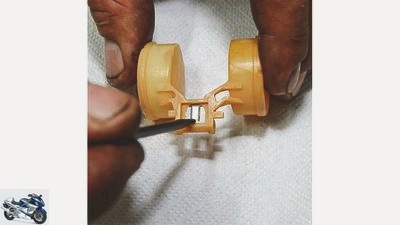
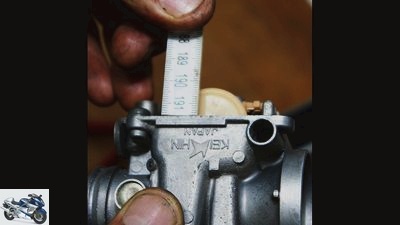
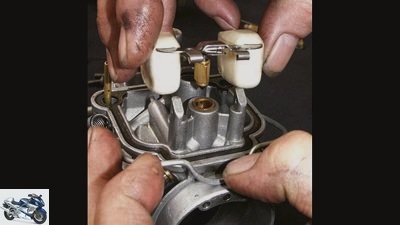
To adjust the float level, carefully bend the suspension of the float needle valve.
Schoch
6/49
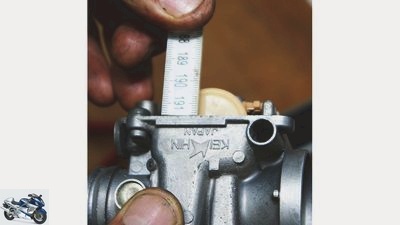
The reference mark when measuring the float level is usually the sealing surface of the carburetor housing.
Schoch
7/49
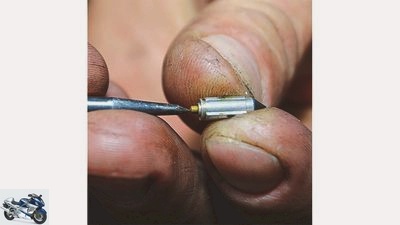
Make sure that the small compensating spring mechanism on the float needle valve works.
Schoch
8/49
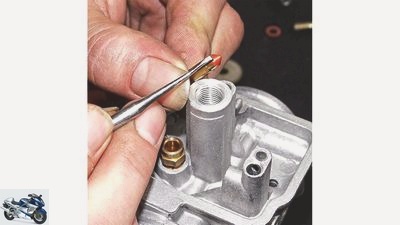
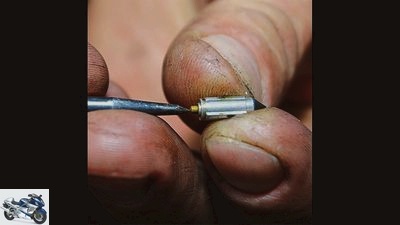
The tip of the float needle valve must be in perfect condition. Otherwise gasoline will flow all the time.
Schoch
9/49
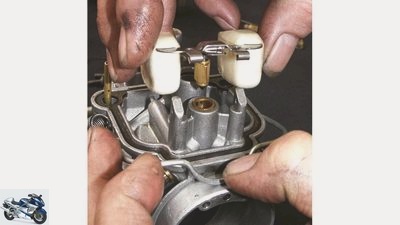
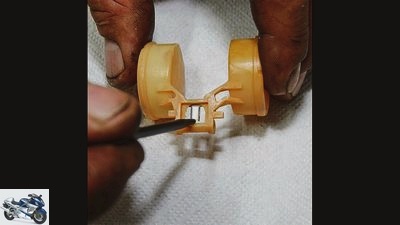
No hassle when the swimmer takes off, because the sensitive float needle valve is attached to it.
Schoch
10/49
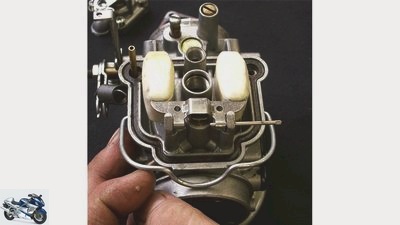
To remove the float, carefully pull out its only plugged-in axis.
Schoch
11/49
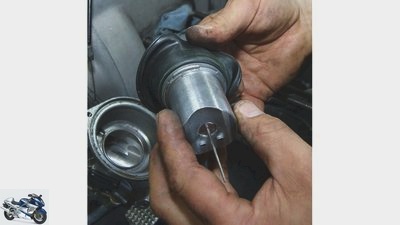
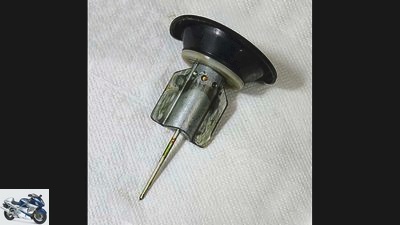
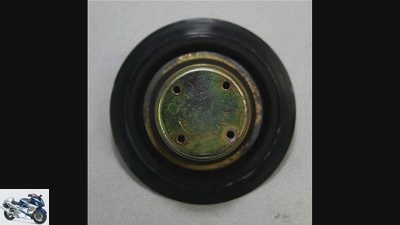
Here the surface of the slide and the condition of the vacuum membrane are perfect.
Schoch
12/49
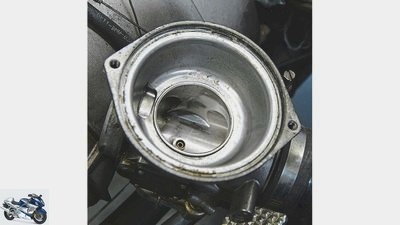
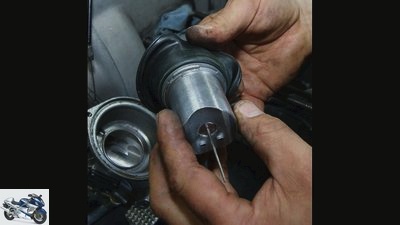
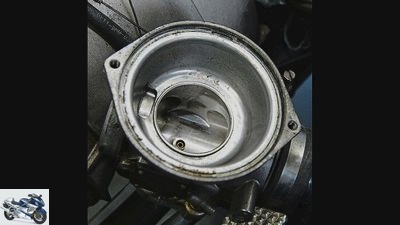
The slide shaft must not have any grooves or scratches in the carburetor housing either.
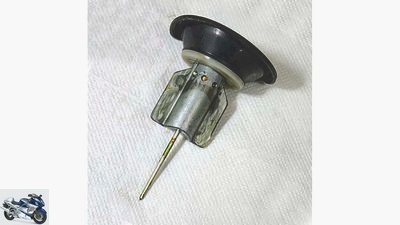
Schoch
13/49
This slide is ripe for the scrap! The wear created excessive play in a Keihin carburetor.
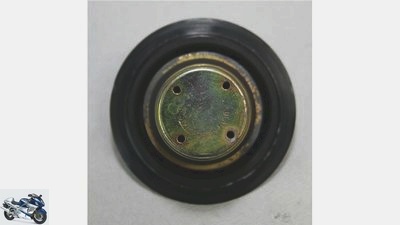
Schoch
14/49
If the tank ventilation is clogged (here in the tank cap), a vacuum builds up in the tank over time.
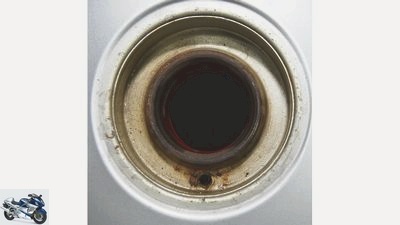
Schoch
15/49
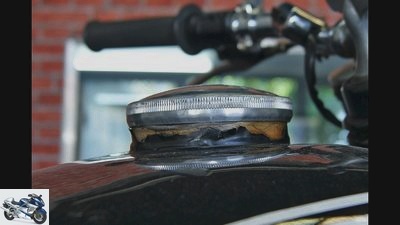
If the tank cap water drain is blocked or rusted through, water will get into the tank.
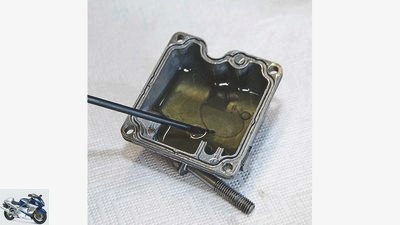
Schoch
16/49
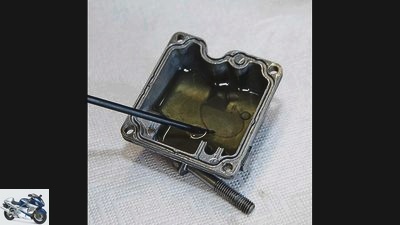
Here, water in the gasoline has collected into a clearly visible bubble that clogs the nozzles as soon as it is sucked in.
Schoch
17/49
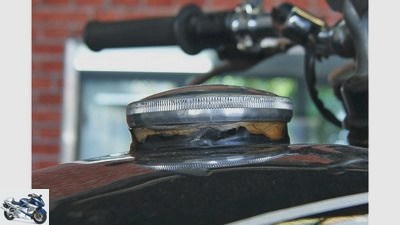
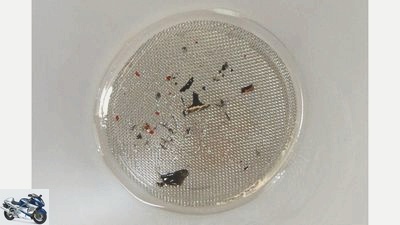
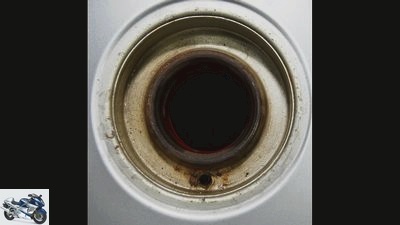
When the tank cap is opened, splinters of paint and rust often get into the tank from the filler neck.
Schoch
18/49
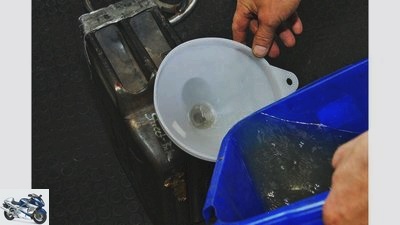
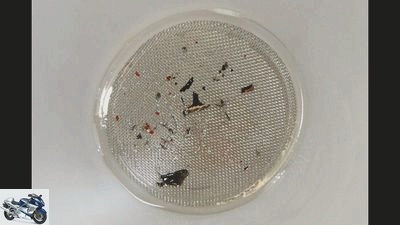
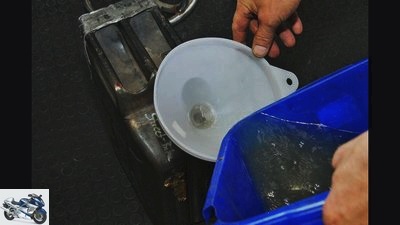
… If it only picks up dirt particles, it can be used again as long as it is carefully filtered.
Schoch
19/49
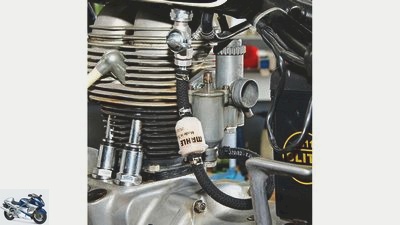
If there is dirt or water in the carburetor, the gasoline must be drained from the tank. Is the gasoline not stale and showing …
Schoch
20/49
Intermediate filters are only an emergency solution. Better to clean and de-rust the tank.
Schoch
21/49
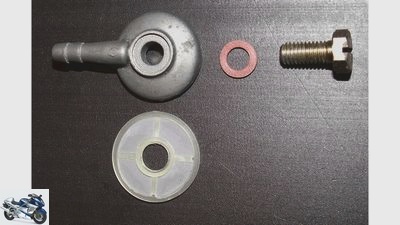
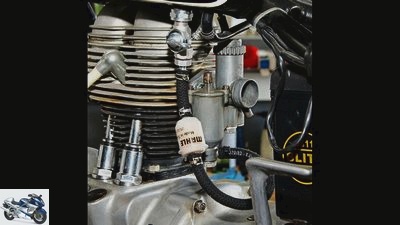
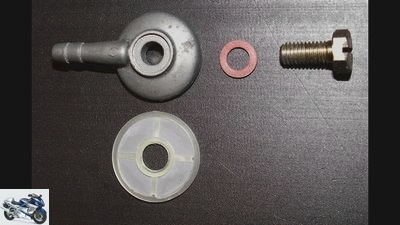
Some carburetors have a gasoline filter directly on the carburetor housing. This must be cleaned regularly.
Schoch
22/49
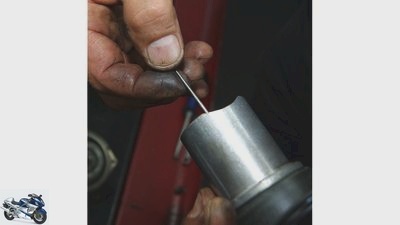
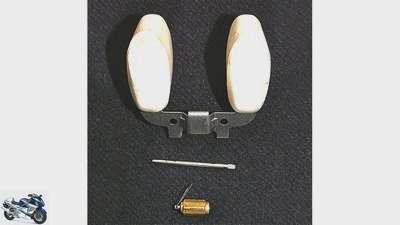
The nozzle needle must neither have excessive play in the slide nor any grooves on the surface.
Schoch
23/49
The float and float needle valve are responsible for the correct fuel level in the carburetor.
Schoch
24/49
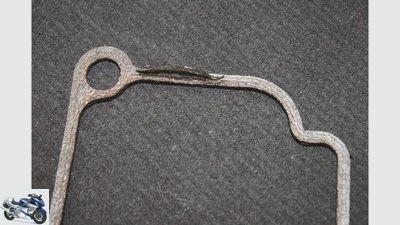
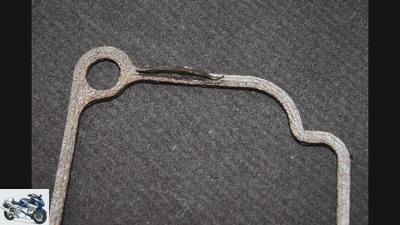
The float can get caught because of such a squashed float chamber seal.
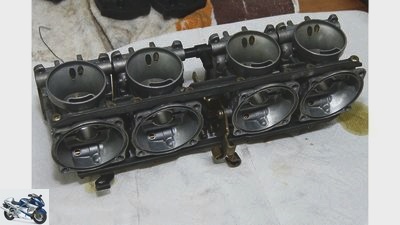
Schoch
25/49
Before long downtimes, it is advisable to preserve the carburettor by dismantling it and painting it with a thin layer of engine oil.
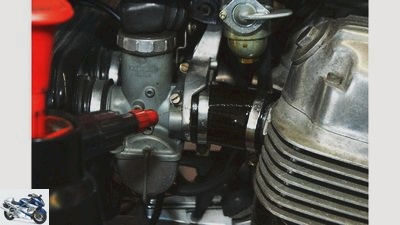
Schoch
26/49
With the engine running, the air intake system can be checked for leaks with a starter spray or engine cleaner.
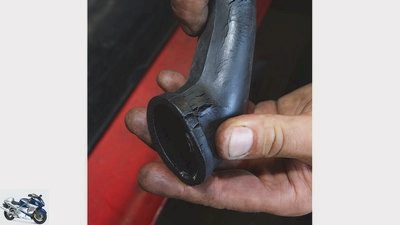
Schoch
27/49
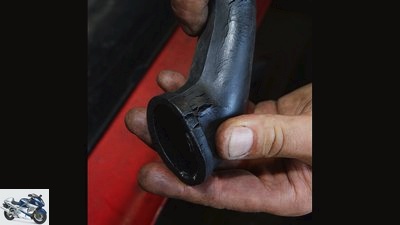
No way! Porous or brittle intake ports must be replaced immediately.
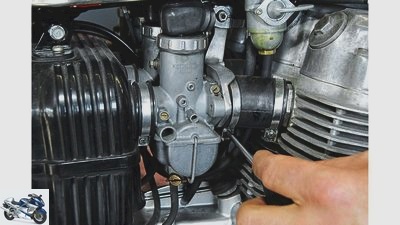
Schoch
28/49
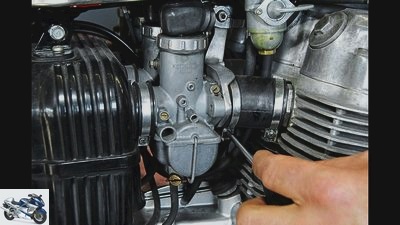
Tighten the hose clamps on the intake manifold fully, but not too tightly, otherwise cracks may form. Every hose clamp must be checked, especially the one after the carburetor.
Schoch
29/49
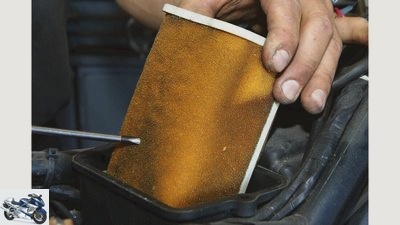
Foam filters can be washed out with mild, soapy water .
Schoch
30/49
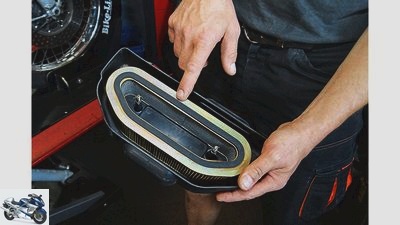
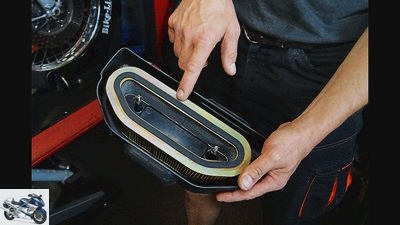
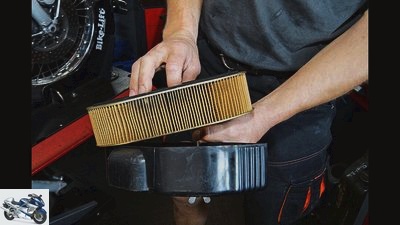
A seal on the air filter element ensures that no unfiltered air flows past it.
Schoch
31/49
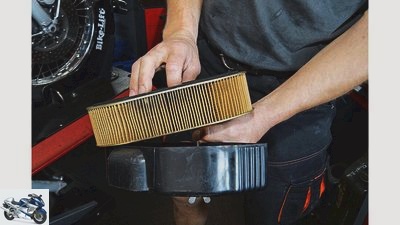
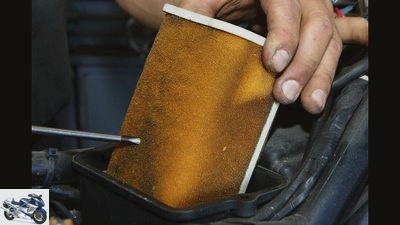
When checking the air filter element, pay attention to the gaps between the fins, because this is where the dirt is located.
Schoch
32/49
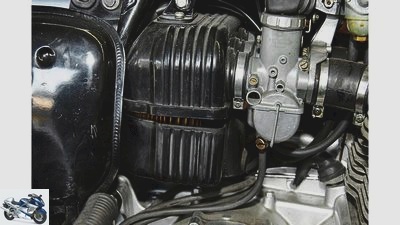
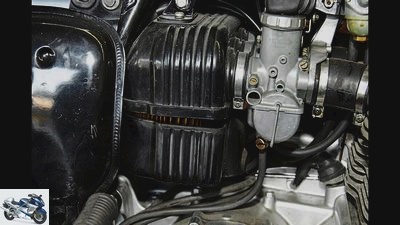
The air filter housing and its seals must not be damaged.
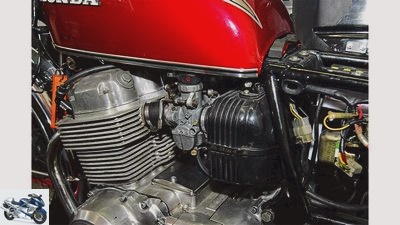
Schoch
33/49
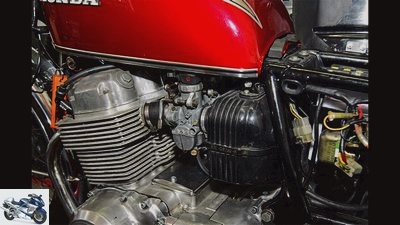
If the engine doesn’t run smoothly, it doesn’t always have to be due to the carburetors. Therefore, first rule out other possible sources of error before removing and dismantling the carburetor.

Schoch
34/49
However, before professionals like Wolfgang Schelbert from Seeshaupt (www.wolfis-garage.de) tackle the carburetor, they first rule out other causes. “Only when you can rule out faults in the ignition, fuel supply, electrics or valve clearance, the carburetor or their peripherals come into consideration as the cause.”
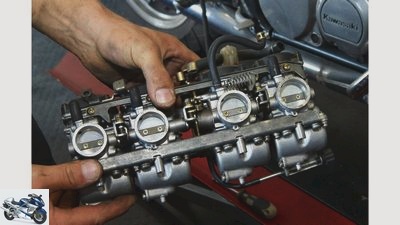
Schoch
35/49
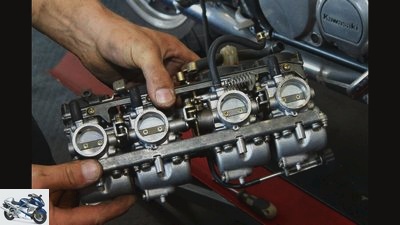
When the engine is beating, there is no need for serious misery. Often only the carburettors are the reason. We show how to find out about mistakes.
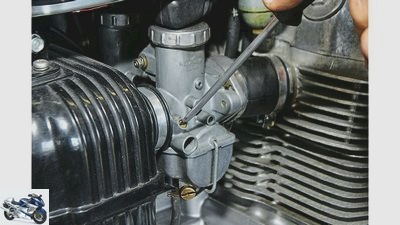
Schoch
36/49
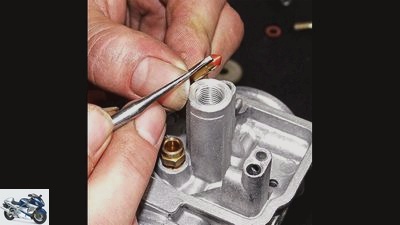
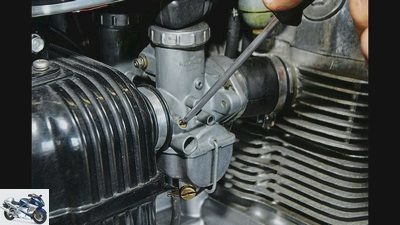
Before removing the gas mixture screw, screw it all the way in and count the number of turns exactly. This “basic setting” makes subsequent assembly and coordination considerably easier.
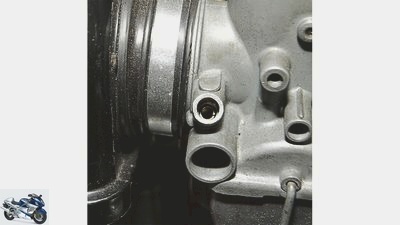
Schoch
37/49
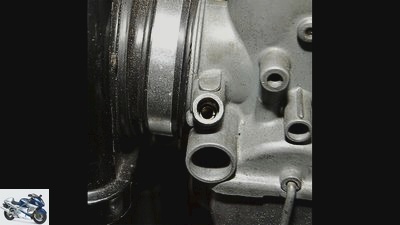
If the O-ring of the gas mixture screw is missing or damaged, the carburetor draws in external air at this point.
Schoch
38/49
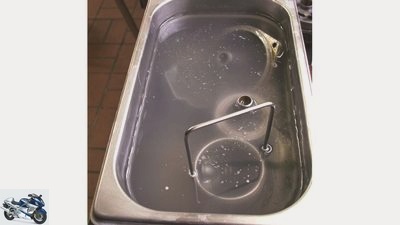
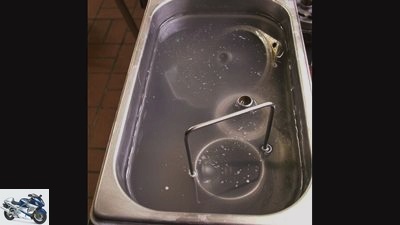
For heavily soiled carburetors, the ultrasonic bath is often the last resort.
Schoch
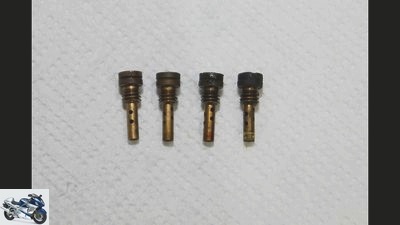
39/49
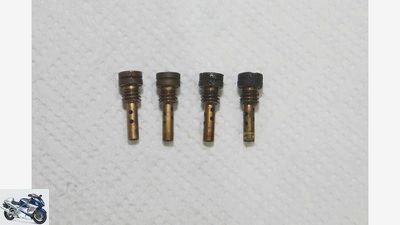
The two left idle nozzles can still be cleaned. The two on the right are junk.
Schoch
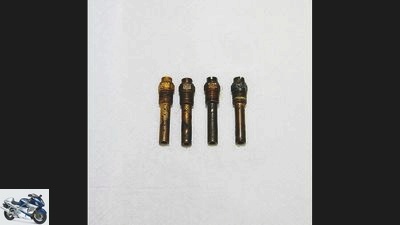
40/49
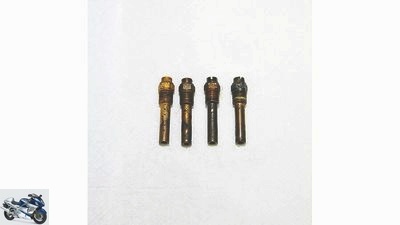
This clearly shows the different degrees of water and resin attack on the main nozzles.
Schoch
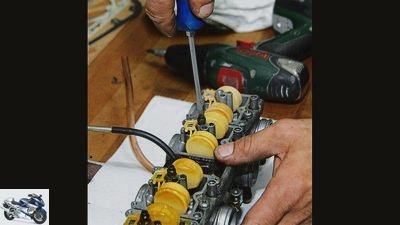
41/49
… is gummy or dirty from several carburetors, they should all be dismantled and cleaned.
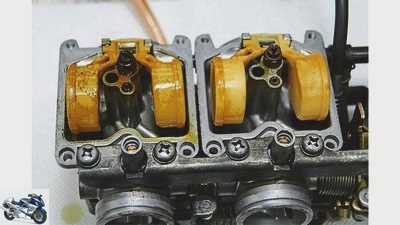
Schoch
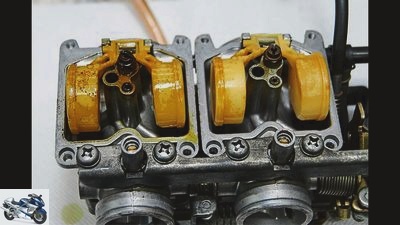
42/49
The resin-like residues also covered the float and the carburetor nozzle. Even if only one …
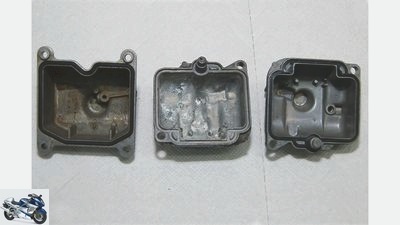
Schoch
43/49
Typical soiling in comparison (from left to right): resinified, corroded and clean.
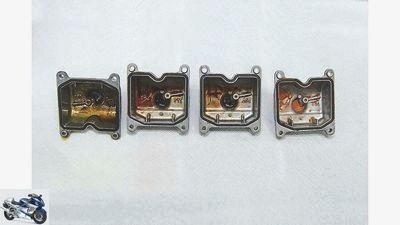
Schoch
44/49
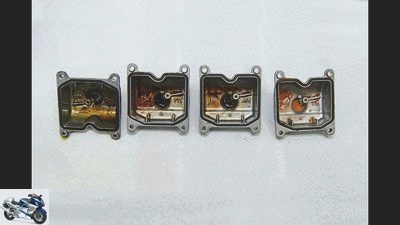
After long periods of inactivity, it is essential to remove all carburettors for precise control. Here you can see from the residue build-up in the float chambers that the bike was on the side stand.
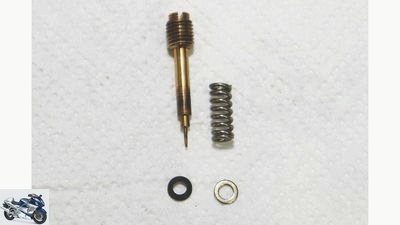
Schoch
45/49
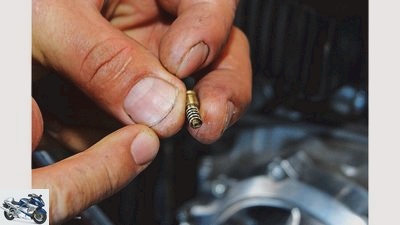
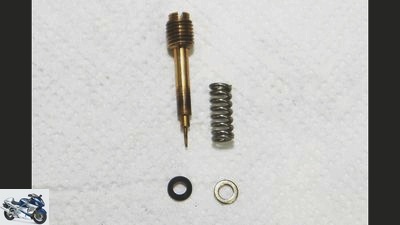
The small washer protects the O-ring from damage by the spring.
Schoch
46/49
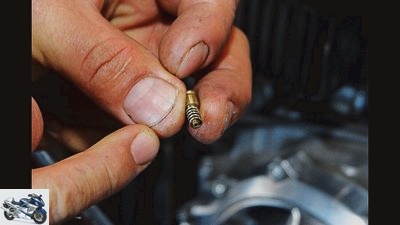
A perfect condition of the gas mixture screw is important for the correct setting of the carburetor.
Schoch
47/49
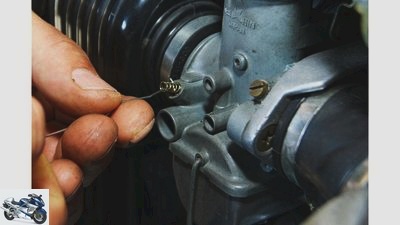
O-ring and locking spring can usually only be pulled out of the thread with a hook.
Schoch
48/49
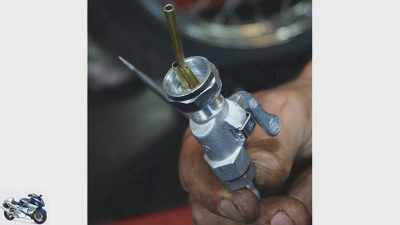
If there is insufficient fuel flow, first check the fuel line and the function of the fuel tap.
Schoch
49/49
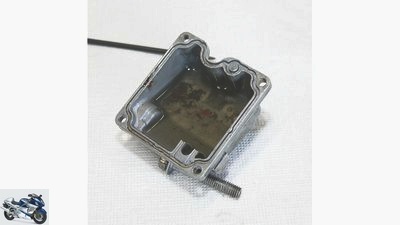
With carburetors and petrol taps without a filter, all dirt particles collect in the float chamber.
counselor
workshop
Fix carburetor problems
Fix carburetor problems
Strike in the gas works
Content of
When the engine is beating, there is no need for serious adversity. Often only the carburettors are the reason. We show how to find out about mistakes.
Marcel Schoch
05/11/2015
If the engine does not run smoothly, misfires, dies while idling or reluctantly gives up its power, this indicates problems with the mixture preparation. However, before professionals like Wolfgang Schelbert from Seeshaupt (www.wolfis-garage.de) tackle the carburetor, they first rule out other causes. “Only when you can rule out faults in the ignition, fuel supply, electrics or valve clearance, the carburetor or their peripherals come into consideration as the cause.”
Buy complete article
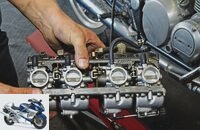
Fix carburetor problems
Strike in the gas works
6 pages) as PDF
€ 2.00
Buy now
If all measures do not work and an engine is further over-greased or does not immediately fall back into idle when the throttle grip is closed, stiff throttle and choke cables could also be the cause. New moves and the meticulous setting of the correct game help immediately.
With a little screwdriver skill and basic technical knowledge, you can solve many carburetor problems yourself. It is important, however, that the possible sources of error are systematically processed. Otherwise there is a risk that it will continue to jerk and jerk despite intensive troubleshooting.
Problem zone air filter
Schoch
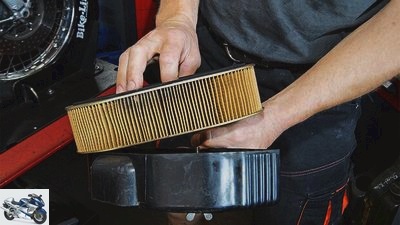
If the engine doesn’t run smoothly, it doesn’t always have to be due to the carburetors. Therefore, first rule out other possible sources of error before removing and dismantling the carburetor – for example the air filter.
However, before Wolfgang dismantles and dismantles the mixture processor, he first checks the air filter and its housing. “The air filter housing must be tight so that no secondary air is sucked in,” explains the two-wheeler professional. “The air flow and the amount of air that flows through the housing and the air filter is precisely measured and the spraying is precisely matched to it.” Additional air leads to the mixture becoming leaner and ultimately to overheating of the engine. So always check the air filter housing with the seals. The next check is on the air filter. “Clogged air filters,” explains Wolfgang, “make the mixture too greasy. Evidence is an unwilling throttle response, the engine stalling while idling and poor full load performance. ”Typical: a sooty black candle image. “Clogged air filters show a gray color; dust and dirt residues can also be seen between the lamellas”. However, apparently clean air filters can also be clogged because the finest micro-dust also clogs the pores of the filter.
In the case of paper filters, the only solution is to exchange them for new goods. Foam air filters, on the other hand, can be washed out with mild soapy water. “But only after a thorough examination,” advises Wolfgang. “Over time, the foam can become brittle or crack. Then you can’t avoid replacing it, otherwise the air throughput will change. ”If in doubt, it is better to change the air filter.
The filter can also be oily
The filter may also be oily on machines with engine ventilation leading into the air filter box. Since such a crankcase ventilation is usually installed between the air filter and the carburetor (s), the oil mist is normally drawn in by the engine. Therefore, he cannot clog the filter element. If it does, there must be another reason. In the most harmless case, only the flutter or ball valve of the ventilation is defective. However, this can also be caused by defective piston rings, worn pistons or damage to the cylinder liner or cylinder. Then an engine overhaul is inevitable.
Many air filters are additionally sealed on their outer edge so that unfiltered air cannot flow past them. “When the filter element is removed, also check this seal,” says Wolfgang’s advice, especially since it is often “damaged if the filter is improperly installed”.
Problem zone intake manifold
Schoch
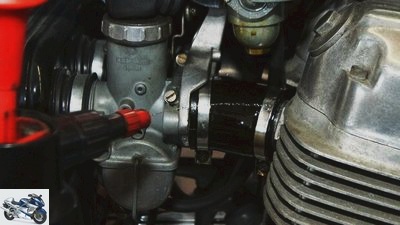
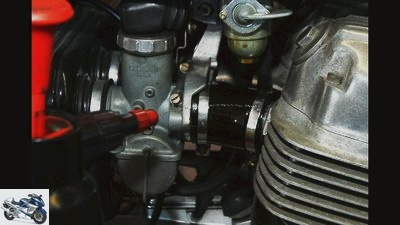
With the engine running, the air intake system can be checked for leaks with a starter spray or engine cleaner.
If the engine runs unevenly, external air in the area of the intake manifold can also be the cause. Therefore check the intake manifold before and after the carburettor for leaks and tightness, especially the hose clamps. Because mistakes are often made when fastening them, says Wolfgang: “If the clamps are tightened too much, the plastic or rubber on the edge of the clamp can tear. This then causes external air to enter the intake system. ”This also happens through aging, when the plasticizers evaporate in the intake manifold. This can usually not be seen from the outside. “That’s why I always remove the sockets on older motorcycles and press them by hand,” explains Wolfgang. “You can see the cracks.”
In order to quickly identify leaks in these areas, Wolfgang Startpilot sprays or a (flammable) engine cleaner on the intake manifold while the engine is idling. If the speed increases, the intake manifold or its seal on the cylinder head is leaking.
Trouble with outside air in the carburetor
Schoch
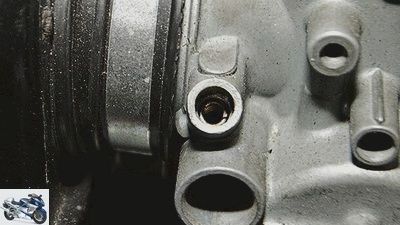
If the O-ring of the gas mixture screw is missing or damaged, the carburetor draws in external air at this point.
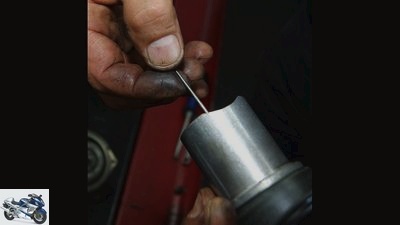
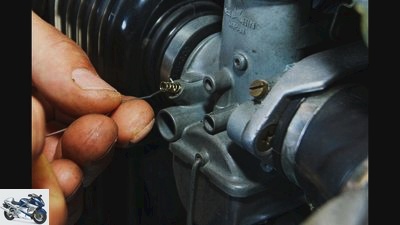
Only when Wolfgang has eliminated all typical sources of error in the periphery does he take care of the carburetor (s). First, he checks the small O-ring seals on the mixture and idle gas screw. Before unscrewing the idle mixture control screw, first turn it all the way in and count the turns. “This basic setting makes assembly easier later, and synchronization in multi-cylinder engines in particular is faster.” After removing the respective adjusting screws, a spring is revealed, then a small washer and finally an O-ring. The latter usually gets stuck in the threaded hole of the carburetor, but it can be pulled out with a small hook.
Check the needle tips and threads of the adjusting screws
The condition of these O-rings must be perfect, otherwise the carburetor will draw in external air via the adjusting screw. “The small sealing rings only cost a few cents, so replacing them is always advisable,” says Wolfgang. On this occasion, the needle tips and threads of the adjusting screws are also checked. The regulating screw for the idle mixture must not have any residues at the tip. This would be an indication that there is dirt in the channels of the carburetor. In such a case, a carburetor has to be removed and completely dismantled in order to clean it thoroughly.
When it comes to adjusting screws for idle gas, a scrutinizing look – especially with slide carburetors – is the conical tip. The height of the slide and thus the idle gas can be correctly adjusted via the cone. If the cone is knocked out or has grooves, the idle can no longer be adjusted correctly. Which is of course particularly annoying with engines with several carburettors, because they can then no longer be properly synchronized.
Debris Problems
Schoch
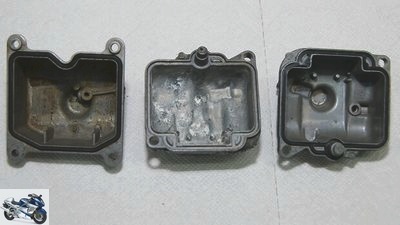
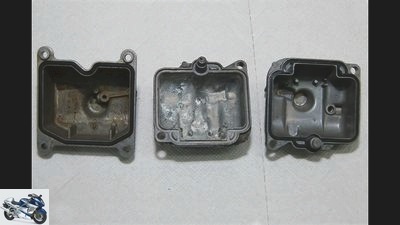
Typical soiling in comparison (from left to right): resinified, corroded and clean.
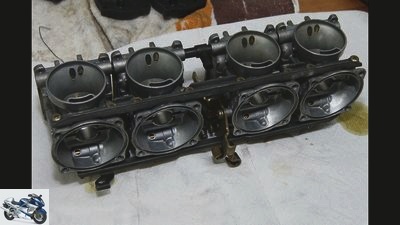
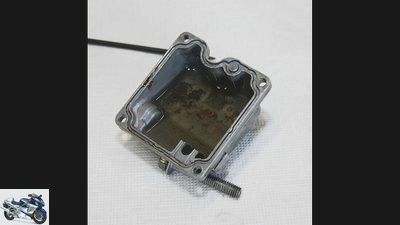
There is also a lot of trouble in the swimmer chambers. The causes are complex, they also make themselves noticeable through different symptoms. In the case of machines that have been standing still for a long time without the fuel having been drained from the float chambers, these and the nozzles in them often have a tough to firm, resin-like coating. These residues build up as the gasoline evaporates over time. They clog all nozzles and channels inside the carburetor and can no longer be released even with fresh fuel. Then only a thorough cleaning in the ultrasonic bath will help. “To find out whether a carburetor is gummy, you unscrew the float chamber,” says Wolfgang. “In multi-cylinder motorcycles, this applies to all carburetors. But not every swimmer chamber has to be gummy. ”For example, when you have a long slumber on the side stand. Because, like any liquid, fuel always flows to the lowest point. Most of the fuel quantitatively evaporates in the lowest-lying float chamber, which is why the gumming can be particularly strong here.
Corrosion problems
Schoch
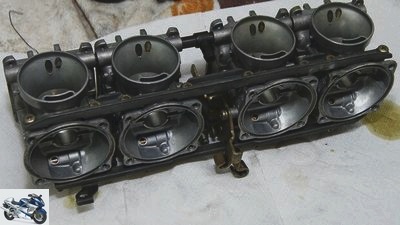
Before long downtimes, it is advisable to preserve the carburettor by dismantling it and painting it with a thin layer of engine oil.
But even draining the fuel before long periods of time does not always help. If the motorcycle was in a damp place, the carburetors, which are usually made of aluminum, can corrode on the inside. Typical features are white, powdery residues in the float chamber. If you start the engine without removing the residue, you risk clogging the nozzles. “If the aluminum inside is only slightly corroded, cleaning in an ultrasonic bath can usually save the carburetor,” says Wolfgang. With advanced corrosion, a carburetor is only worth scrap. It goes without saying that at the first signs of aluminum corrosion, the steel parts of a carburetor, such as needles, washers or float axles, are examined for rot.
Coat the carburetor with penetrating oil
Corrosion in the carburetor can be prevented by draining the gasoline before long periods of idle time and by coating the partially dismantled carburetor with a thin layer of penetrating oil on the outside and inside. Particularly recommended when standing outdoors or in cold and damp rooms. In the case of two-stroke engines with mixed lubrication, it is sufficient to let off the fuel, because it already contains oil.
When the float chamber has been removed, always check its seal. Replace squashed or drooling seals immediately! In extreme cases, heavily dripping carburetors can lower the gasoline level in the carburettor so much that the mixture becomes lean and the engine overheats. If you are unwilling to accept the throttle and lack performance at full load, also think about this defect! The float can also get stuck because of a squashed seal. “The same applies, by the way, if the float or the float chamber is not installed correctly,” says Wolfgang. “Then either the carburettor overflows or the engine dies because no more fuel can flow through the closed float chamber valve.”
Problems with the swimmer
Schoch
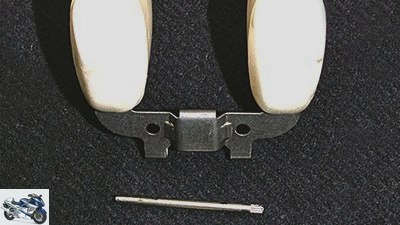
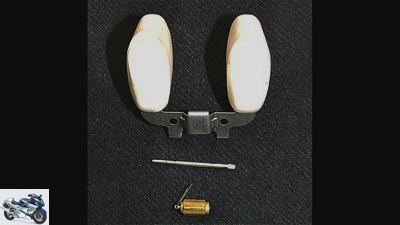
The float and float needle valve are responsible for the correct fuel level in the carburetor.
The float unit itself, consisting of float and float needle valve, can also cause trouble. “One of the more rare defects is a leaky float,” says Wolfgang. “In the event of a leak, the float needle valve no longer closes and the gasoline runs unhindered into the carburettor.” If this happens unnoticed when the motorcycle is parked, the entire tank content can leak out. Then there is the risk that the fuel will also completely flood the engine. For this reason, always close the fuel cock whenever possible.
However, this defect rarely occurs in more modern plastic floats. Such a mishap happens more often with those made of soldered copper sheet, since vibrations can lead to the breakage of soldered joints. Whether a float is tight can only be checked when it is removed. Shaking reveals whether there is liquid in it. Leaky plastic floats should always be replaced. Wolfgang: “Repairs are pointless here, as most of the adhesives dissolve in the gasoline. Metal ones, however, can be soldered. Make sure that the float has the same specific weight afterwards as before, so that the fuel level in the float chamber does not change. “
Check the setting of the float
After removing the float, it is time to check the float needle valve. At its tip there is a conical sealing surface. This must be in perfect condition. “To check the valve, you let fuel run through the gasoline line into the carburetor and push the float slightly upwards,” explains Wolfgang. “If it drips, the needle valve must be replaced, otherwise the mixture will become over-greased when driving due to the constantly high gasoline level in the float chamber.”
This can also happen due to errors when attaching and detaching the float chamber, says Wolfgang: “The needle holder on the float can be bent, causing the fuel level in the float chamber to adjust. With the result that the engine runs too rich or too lean. ”Therefore always check the setting of the float! The repair manual reveals the correct data; measurements are taken with a caliper or a folding rule. To do this, turn the carburetor housing upside down until the float closes the needle valve. The reference dimension for the correct value of the float is usually the sealing surface of the float chamber. If the measurement result is outside the tolerance, the fuel level in the float chamber can be corrected by carefully bending the suspension of the needle valve on the float.
Problem areas of the constant pressure carburetor
Schoch
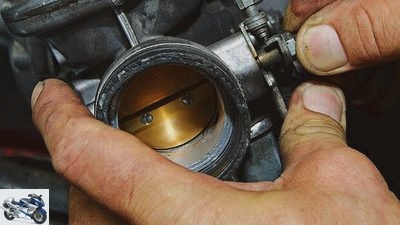
A loose throttle valve is noticeable by an unstable idle gas. Your two fastening screws must be secured. A worn out throttle valve axis lets the engine draw in outside air and run too lean.
With constant pressure carburetors, the throttle valve, throttle valve axis or the slide diaphragm occasionally cause trouble. “If the engine runs restlessly or dies while idling, a loose throttle valve can be to blame,” says Wolfgang. Remedy: “Unflange the carburetor from the intake manifold and check the screw connection of the throttle valve on its axis.” Loose screws must be replaced with new ones and secured with screw adhesive. A worn-out axis of the throttle valve can also cause problems. “If there is play in the axle, the motor draws in outside air and runs too lean.” Often times, it is not possible to set a stable idle.
The repair of a worn throttle valve axle is professional work, because pressing out and setting the bearing bushes requires special tools and experience. The typical defects in constant pressure carburetors also include cracked slide diaphragms. Then the engine no longer takes on the gas and only runs at idle. To change the slide diaphragm, unscrew the carburetor cover so that the slide can be pulled out of the carburettor together with the membrane. Then pull or unscrew the membrane from the slide. Wolfgang advises regular control of the valve diaphragm. Wavy or already porous membranes indicate that they will soon fail.
Wear on slide and nozzle needle
Schoch
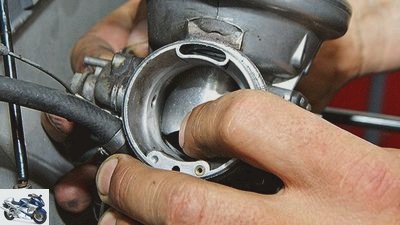
Checking the slide play with your finger is only possible with the carburettors removed.
The slide itself sometimes causes problems, regardless of whether it is a constant pressure or slide carburetor. If there is a lack of steady idle in particular, the slide could have too much play. “Motorcycles with open intake funnels are particularly affected by this, as the dust in the unfiltered air causes excessive wear on the valve. If play is found, the slide must be removed and checked for abrasion points. If it actually shows signs of friction, the slide guide in the carburetor housing is usually also damaged, ”explains Wolfgang. If that is the cause of excessive play, a new carburetor must be found. The nozzle needle also wears out faster with unfiltered air because it lies in the direct gas flow. So always check the nozzle needle and nozzle holder for wear. “Rust as a result of long idle times can also destroy the compound needle,” our motorcycle professional knows. Worn nozzle needles generally make the engine run too richly, which manifests itself in high fuel consumption and sooty spark plugs. The only remedy is a new nozzle needle and a new nozzle assembly.
Bottlenecks in the fuel supply
Schoch
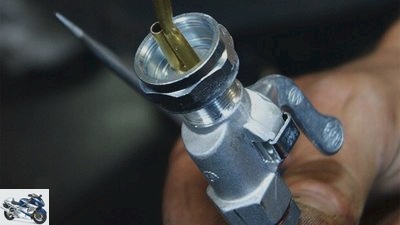
If there is insufficient fuel flow, first check the fuel line and the function of the fuel tap.
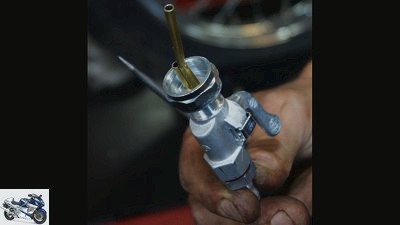
If an engine simply dies while driving or only runs jerkily, this can be an indication of a lean mixture due to a clogged fuel tap. The check is simple: pull off the fuel hose and open the tap – if there is no fuel flowing in one or all of the positions of the fuel tap, it must be removed and the filter cleaned. A defect on the tap itself is rather rare. Usually it is only deposits or dirt that impede the flow of fuel. If you find dirt in the filter or in the float chamber of the carburetor, you cannot avoid cleaning the tank. To do this, drain and filter the fuel, provided that it is then to be refilled. “The dirt in the fuel is usually rust from the tank,” says Wolfgang. “In this case, cleaning the fuel tank is no longer sufficient. In order to have permanent rest, it has to be professionally derusted and refurbished. “
Dropouts due to water in the fuel
Schoch
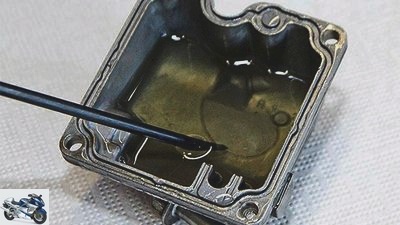
Here, water in the gasoline has collected into a clearly visible bubble that clogs the nozzles as soon as it is sucked in.
With classic cars in particular, you always have to struggle with water in the gasoline. Over time, this collects in the float chamber and forms a water bubble in the fuel. If this bubble gets into the main jet while driving, the water closes its bores – the engine suddenly runs out of fuel, jerks or dies. “The problem will be dealt with in a moment,” says Wolfgang calmly. “Simply dismantle the corresponding float chamber and dispose of the fuel and water it contains.”
Seal or clogging?
However, this does not eliminate the cause of this phenomenon. Because the water almost always reaches the carburetor from the tank. The only remedy here is to drain the spray and dry the container thoroughly. “The fact that water gets into the tank when it rains or when it is being washed is mostly due to a broken tank lid seal or a non-functioning water drainage in the tank lid. The seal is quickly replaced. On the other hand, there may be a blockage in the drain. Often, however, the drainage pipe that leads through the inside of the tank is rusted through. ”Serious damage as it can sometimes not be repaired. In this case, the only thing left to do is to replace the tank.
Insidious defects include clogged ventilation holes in the tank cap. If these are clogged, a vacuum builds up in the tank as the fuel level drops while driving. At some point the fuel stops flowing and the engine cuts out. When checking the gasoline level through the open tank cap, the negative pressure is imperceptibly equalized, gasoline can continue to run and the motorcycle drives again – until the game starts all over again. With these symptoms, think about blocked tank vents and clean their bore.
More tips and pictures
<!– ESI FOR ads.BannerGallery / irelements / esielement / eyJwYWdlIjoiL3N0YXJ0c2VpdGUvIiwibGF5b3V0IjoiYXJ0aWNsZSIsImVsZW1lbnQiOiJhZHMuQmFubmVyR2FsbGVyeSIsImlyQ29uZmlnIjoiMTQ3MzQ0NjgiLCJwYXJhbXMiOnt9LCJpc01vYmlsZSI6ZmFsc2V9 –> <!– CACHEABLE –>&# 34;,&# 34; rectangle&# 34 ;: “<!–# include virtual = \&# 34 / irelements / esielement / eyJwYWdlIjoiL3N0YXJ0c2VpdGUvIiwibGF5b3V0IjoiYXJ0aWNsZSIsImVsZW1lbnQiOiJhZHMuUmVjdGFuZ2xlR2FsbGVyeSIsImlyQ29uZmlnIjoiMTQ3MzQ0NjgiLCJwYXJhbXMiOnt9LCJpc01vYmlsZSI6ZmFsc2V9 \&# 34; –> <!– ESI FOR ads.RectangleGallery / irelements / esielement / eyJwYWdlIjoiL3N0YXJ0c2VpdGUvIiwibGF5b3V0IjoiYXJ0aWNsZSIsImVsZW1lbnQiOiJhZHMuUmVjdGFuZ2xlR2FsbGVyeSIsImlyQ29uZmlnIjoiMTQ3MzQ0NjgiLCJwYXJhbXMiOnt9LCJpc01vYmlsZSI6ZmFsc2V9 –> <!– CACHEABLE –>&# 34;,&# 34; sky&# 34 ;: “<!–# include virtual = \&# 34 / irelements / esielement / eyJwYWdlIjoiL3N0YXJ0c2VpdGUvIiwibGF5b3V0IjoiYXJ0aWNsZSIsImVsZW1lbnQiOiJhZHMuU2t5R2FsbGVyeSIsImlyQ29uZmlnIjoiMTQ3MzQ0NjgiLCJwYXJhbXMiOnt9LCJpc01vYmlsZSI6ZmFsc2V9 \&# 34; –> <!– ESI FOR ads.SkyGallery / irelements / esielement / eyJwYWdlIjoiL3N0YXJ0c2VpdGUvIiwibGF5b3V0IjoiYXJ0aWNsZSIsImVsZW1lbnQiOiJhZHMuU2t5R2FsbGVyeSIsImlyQ29uZmlnIjoiMTQ3MzQ0NjgiLCJwYXJhbXMiOnt9LCJpc01vYmlsZSI6ZmFsc2V9 –> <!– CACHEABLE –>&# 34;}}” ga-track-vis =”article.gallery.inline.vis” class =”v-A_-article__inline-container”>

Schoch


49 pictures
Pictures: Carburetor problem solving guide
go to Article
To home page
Schoch
Schoch
Schoch
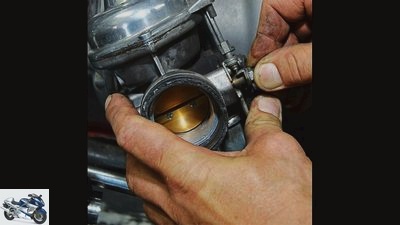
Photo: Schoch
Schoch
Schoch
Schoch
Schoch
Schoch
Schoch
Schoch
Schoch
Schoch
Schoch
Schoch
Schoch
Schoch
Schoch
Schoch
Schoch
Schoch
Schoch
Schoch
Schoch
Schoch
Schoch
Schoch
Schoch
Schoch
Schoch
Schoch
Schoch
Schoch

Photo: Schoch
Schoch
Schoch
Schoch
Schoch
Schoch
Schoch
Schoch
Schoch
Schoch
Schoch
Schoch
Schoch
Schoch
Schoch
Schoch
1/49
Related articles
-
Carburetor functionality in the video
Smartereveryday 49 pictures Schoch 1/49 If the engine does not immediately idle when you let go of the throttle grip, the ability of the throttle cable…
-
Restoration of the BMW R 80 G-S, part 3 structure, carburetor, electrics
Photo: Koch 10 pictures Cook 1/10 There are reasons why the R 80 G / S is back in the workshop after just a few hours. More about this in the MOTORRAD…
-
archive counselor workshop Advisory: clean the carburetor Advice: clean the carburetor Clean the carburetor More than 90 percent of the motorcycles…
-
Adjusting the carburetor: the correct mixture composition
Schermer counselor workshop Adjusting the carburetor: the correct mixture composition Adjust the carburetor This is how the correct mixture composition…
-
Restoration of the BMW R 80 G-S part 4 engine and carburetor adjustment
Cook 23 pictures Cook 1/23 Small and big changes make the almost 70 hp of the renovated R 80 G / S. Cook 2/23 The new, original air filter sits on this…
-
Help with engine problems – When the motorcycle does not run properly
counselor workshop Help with engine problems – When the motorcycle does not run properly Error analysis in case of engine problems 50 reasons your…
-
Advisory: synchronize the carburetor
Schermer 5 pictures Schermer 1/5 Step 1: Preliminary work: To adjust the carburettors, they must be freely accessible. So down with the tank… Schermer…
-
MOTORCYCLE screwdriver tip on starting problems
Ralf Petersen 19th pictures Ralf Petersen 1/19 Starting problems on the motorcycle are tricky. They can occur without warning, whether the engine is cold…
-
Ducati Multistrada V4 recall: engine replacement after valve problems
Ducati 45 pictures Ducati 1/45 Ducati brings the new Multistrada with a V4 engine. Ducati 2/45 Ducati has made the Multistrada even more versatile….
-
Comparison of carburetor injection
motorcycles Comparison carburetor / injection Comparison carburetor / injection (Ge) mixed calculation The days when the good old carburettors were…