Table of contents
- Restoration of the BMW R 80 G / S Part 2, drive
- With a lot of strength and caution
- All ball bearings should be replaced
- Check transmission gears for wear
- Specialist advice: change the leg spring on the automatic switch
- Wire up the electrical system, put the carburetor on, put schnapps in the tank and go?
- Control of the angle drive

fact
17th pictures
Cook
1/17
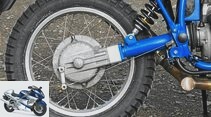
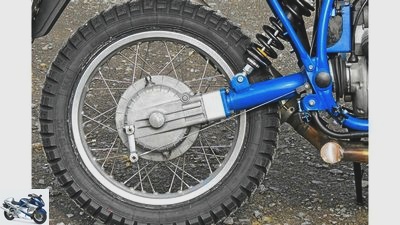
Single-arm swing arm with the 50 millimeter long aluminum milled part between the flange (arrow). Due to the longer lever arm, the Wilbers shock absorber had to be tuned differently. The cardan reactions are significantly reduced by the extension, the suspension travel is around 10 percent longer and the steering geometry is a bit more manageable.
Cook
2/17
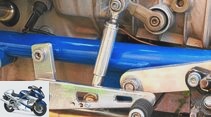
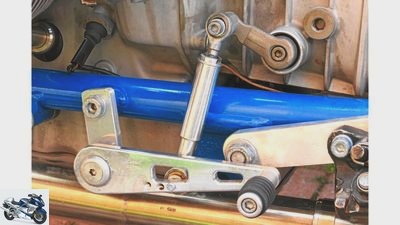
Experimental set-up: For better shiftability, the pivot point of the shift lever moved downwards (arrow), and the lever transmission was experimented with in order to minimize both shift force and shift travel.
Cook
3/17
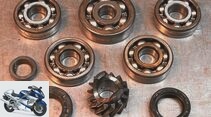
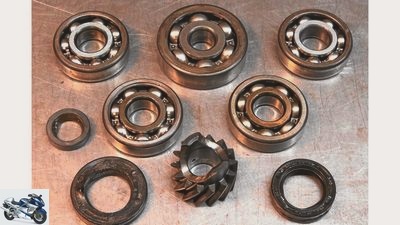
Sorted out: All ball bearings were replaced, even if nothing suspicious was noticeable in terms of running noise and play. Of course there were also new Simmerrings and a primary gear without pitting.
Cook
4/17
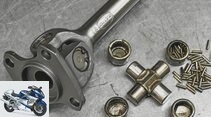
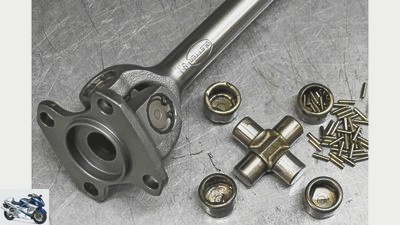
Salad on the universal joint of the cardan: The strong surface breakouts on the cross pin, where the needles were incorporated, which made a complete renewal inevitable, are clearly visible.
Cook
5/17
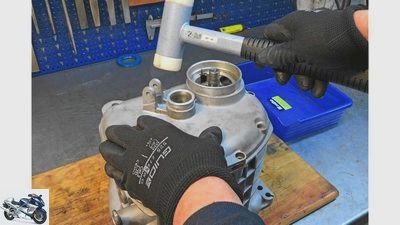
After the gear cover has heated up, it is pulled over the bearing rings by light blows with the plastic hammer. The shafts are then driven into their final position with light strokes.
Cook
6/17
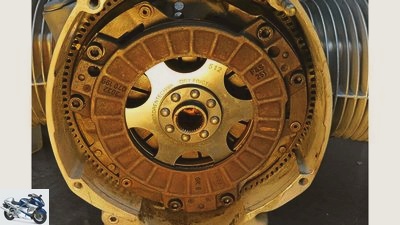
The flywheel and clutch pressure plate are fit again after thorough cleaning and removing the running surfaces with lapping cloth. Only the friction disc was replaced, the centering was done with a self-turned aluminum mandrel.
Cook
7/17
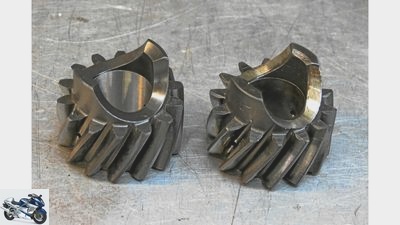
The old, helical toothed primary gear (right) with the two grooves for the Knagge damper was replaced by a new component (left), as surface chippings were already evident on some tooth flanks, so-called pitting.
Cook
8/17
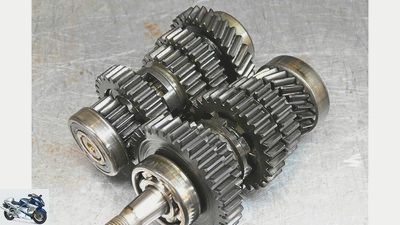
All transmission shafts and gears were in very good condition and could be reused without reworking. Only the ball bearings have been completely replaced.
Cook
9/17
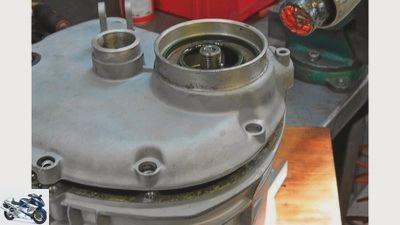
Heated to around 100 degrees with a hot air dryer, the bearing seats in the gear cover expand. This is the only way to pull the cover off the outer rings of the ball bearings.
Cook
10/17
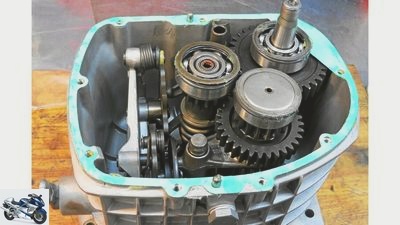
Freshly assembled gearbox with automatic gearshift and shift shafts The spacers and oil baffles (arrow) are fixed with grease, as is the paper seal.
Cook
11/17
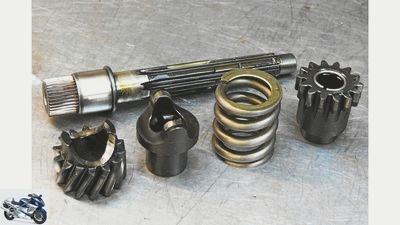
The transmission input shaft in its individual parts. In front the primary gear with the counterpart of the Knagge damper and the compression spring. The gear on the right transfers the rotation of the kick starter to the crankshaft.
Cook
12/17
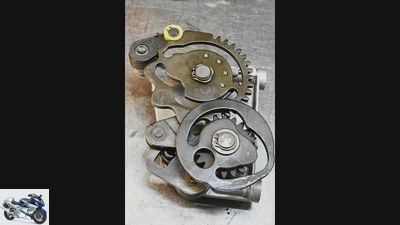
The automatic gearshift with the link discs for the gearshift forks and the gearshift star with locking pawl is a robust component. When assembling, make sure that the two toothed disks marked with punch marks engage correctly.
Cook
13/17
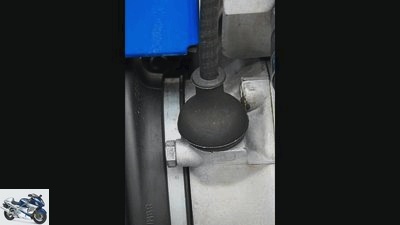
The new rubber grommet prevents rainwater from entering the housing via the gear ventilation and speedometer drive.
Cook
14/17
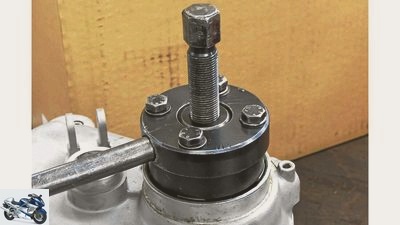
The flange could only be removed from the cone with the massive pull-off bell from BMW. Attempts with solid three-arm pullers were doomed to failure.
Cook
15/17
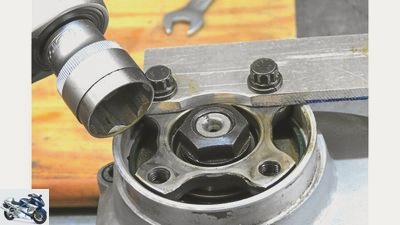
Temporary but functional counter-holder to loosen the central nut that holds the cardan flange on the cone. All four screws do not necessarily have to be engaged.
fact
16/17
Wire up the electrics, put the carburetor on, put schnapps in the tank and go – no way. There was still a lot of work to do before the engine was allowed to hum for the first time.
Cook
17/17
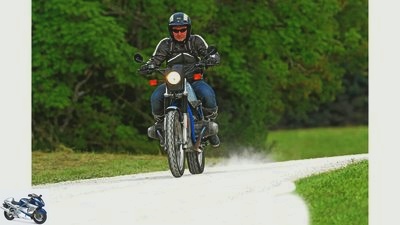
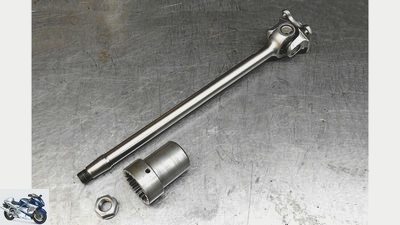
Extension: The cardan shaft with the renovated universal joint was extended by 50 millimeters by Herbert Gletter, the spiral-toothed flange is screwed onto the cone. A second shock absorber between the gearbox and cardan is no longer required. So far without any noticeable effects on the load change behavior or the driving comfort.
counselor
workshop
Restoration of the BMW R 80 G / S
Restoration of the BMW R 80 G / S
Part 2, drive
Content of
Even if the boxer of the BMW R 80 G / S does its job without suspicious noises or cracking gears, the drive train should be carefully examined during the renovation.
Werner Koch
09/10/2014
Like the engine itself, the transmission and cardan did not make any suspicious noises or defects during the test drive after 114,000 kilometers. Massive damage can indicate severe pitting of the gears through loud howling in certain gear steps or through grinding noises in all gear steps that ball bearings have leaked. There was no mention of this on the BMW R 80 G / S. Even the cardan made no complaints under all load conditions.
Buy complete article

Restoration of the BMW R 80 G / S
Part 2, drive
6 pages) as PDF
€ 2.00
Buy now
Even the oil from the drive did not suggest that one or the other component was already in an advanced state of decay. For this reason, it is advisable to inspect all components in the drive, from the coupling to the angle drive in the cardan, at every major overhaul. If the visual inspection doesn’t reveal any cause for concern, so much the better. If, as in our case, a number of components are already on the verge of complete failure, the effort has been worth it. If a gear wheel or bearing dissolves into its components while driving, the damage is much greater and can also irreparably destroy intact components. Not to mention the risk of falling from blocked gear wheels.
With a lot of strength and caution
As with the engine overhaul, a number of pull-off devices are also used on the drive train. If you can make do with universal pullers inside the switch box, a robust puller bell is essential for the flange at the gearbox output in order to pull the cardan connection from its cone. Here you have to work with a lot of force and caution, as the puller and the flange literally blast off the gear shaft with a loud bang and violent jerk. To loosen the nuts and bolts on the shafts that have been tightened with high torque, you should not use the ratchet but a toggle so as not to destroy the ratchet mechanism.
After heating, the gear cover is pulled evenly from the bearings with light blows of a plastic hammer. The gear shafts should be vertical. This prevents the spacers from falling during dismantling and no longer being able to be clearly assigned to the respective shaft.

workshop
Restoration of the BMW R 80 G / S
Part 1, engine
read more

workshop
Restoration of the BMW R 80 G / S
Part 2, drive
read more
workshop
Restoration of the BMW R 80 G / S
Part 3 structure, carburetor, electrics
read more

workshop
Restoration of the BMW R 80 G / S
Part 4, engine and carburetor adjustment
read more
Restoration of the BMW R 80 G / S part 1 – 6 as PDF in the e-kiosk
All ball bearings should be replaced
If neither the gear shafts nor the housing are replaced, this spacing can be reused without remeasuring. When changing the ball bearings, the tolerances with regard to the width of the outer ring are so small that you can confidently save yourself this trouble.
With the exception of the robust roller bearing of the primary shaft, all ball bearings should always be replaced when completely dismantled. Experience shows that these bearings occasionally collapse, which can lead to serious consequential damage. Presumably the ball bearings suffer severely from the axial load. This is due to the fact that the torque is transferred from the primary shaft to the output shaft via helical gear wheels. In the case of roller bearings, on the other hand, a visual and running noise test is sufficient.

Enduro
Spotlight: BMW R 80 G / S
30 years of the BMW R 80 G / S
read more

Enduro
BMW R 80 G / S against Honda XLV 750 R – the giants exchange blows
BMW R 80 G / S and Honda XLV 750 R in comparison
read more
Check transmission gears for wear
Of course, all transmission gears are carefully checked for wear on the driving dogs and pitting. In our case, however, only the primary gear on the Knagge damper had to be replaced because of a few slight surface chipping, all other components were in good condition.
If the shift forks show signs of friction on the side, it can be assumed that the edges of the driver claws on the associated gear are worn and rounded. This causal defect leads to the gear wheel trying to move sideways under load and thereby covering the shift forks with scuff marks. Then it is essential to replace both components.
Specialist advice: change the leg spring on the automatic switch
If pressed-on or shrunk-on components are renewed, they must be thoroughly degreased before assembly to ensure that the surfaces are securely seated. BMW specialists also advise changing the leg spring on the automatic gearshift. If this breaks, the circuit is paralyzed. The gearbox must be completely dismantled for the repair! No serious wear or damage is to be expected on the automatic switchgear itself.
For smoother shiftability, however, the shafts of the shift fork can be polished to reduce the friction between shift fork and shaft. However, like a fork tube, the shafts have to be polished linearly, i.e. lengthways. This is the only way to smooth out the fine machining marks on the radially ground shafts.
To assemble the three gear shafts, the housing must be heated up again so that the bearings can easily slip into their seats without damaging them. After sorting the gearshift forks and the automatic gearshift, the gearbox can be checked and shifted through. However, this is usually a bit of a shaky affair, as the waves are not really parallel. The function can only be finally assessed with the gearbox cover in place. Don’t be surprised if the gear shafts are difficult to turn in this case. We have therefore driven all the shafts into their seat as far as they will go while the gearbox housing was still hot with light blows using a steel hammer and an attached aluminum mandrel. The result was the perfect smoothness of all waves. There is no risk of damage to the ball bearings.
Wire up the electrical system, put the carburetor on, put schnapps in the tank and go?
Last but not least, the Simmerrings are driven in with a suitable sleeve and the gear oil is poured in. Important: The rubber grommet on the speedometer drive must be replaced. Because there rainwater can get into the gearbox via the worm drive, as long as the rubber grommet does not lie firmly and tightly on the speedometer cable. A small wire ring or a hose lock as well as a proper grease filling can prevent this malaise permanently.
With the cardan, MOTORRAD Classic nailed it. In order to get the best out of the BMW R 80 G / S, we decided to extend the swing arm. Too little weight on the front wheel, too short a wheelbase and too much rebound torque when accelerating due to the cardan drive – this is how the BMW drove before the renovation. So the swing arm was stretched by an aluminum spacer between the flange, the cardan shaft itself by a special process by the boxer specialist Herbert Gletter (www.gletter.de) extended by 50 millimeters. Since the wheel is now further back, the recess in the swing arm must also be extended to the rear in order to guarantee sufficient freedom of movement for the tire without having to spoke the rim too far from the center. When checking the universal joint, a slight but subjectively harmless play was found. Herbert Gletter was sure: store again, nothing else. That was a good thing, because the surfaces of all four bearing journals were worn in deep and rough. If you notice a clearly noticeable free angle of rotation of the universal joint in the degreased state, the needle bearings and the cross pin should be replaced. But that is a job for the specialist.
Control of the angle drive
Finally, the inspection of the bevel drive was on the work list, but this was done quickly after removing the crown wheel cover and a visual inspection – the crown and bevel gear were in perfect condition. Thank goodness, because a ground final drive costs a lot of money on the one hand, and adjusting the contact pattern of the hypoid toothing is a very time-consuming matter on the other.
In order to optimize the shifting process of the transmission, the actuation was designed in such a way that the pivot point of the shift lever moved downwards and the foot now less pushes forward against the shift lever but pulls it upwards. With this still provisional lever mechanism, through which the shift travel and force have also been optimized, you can do without the freely rotating shift knob. So wire the electrics, put on the carburetor, put schnapps in the tank and go – no way. There was still a lot of work to do before the engine was allowed to hum for the first time.
Related articles
-
Restoration of the BMW R 80 G-S, part 1 engine
Cook 21 pictures Cook 1/21 The good news first: It’s working. Velvety soft, with an impeccable chassis and really amazing qualities. A classic for every…
-
Restoration of the BMW R 80 G-S, part 3 structure, carburetor, electrics
Photo: Koch 10 pictures Cook 1/10 There are reasons why the R 80 G / S is back in the workshop after just a few hours. More about this in the MOTORRAD…
-
Restoration of the BMW R 80 G-S, part 6 – overview of costs and effort
Cook 9 pictures Cook 1/9 The good news first: It’s working. Velvety soft, with an impeccable chassis and really amazing qualities. A classic for every…
-
Restoration of the BMW R 80 G-S, part 5 chassis and brakes
Cook 19th pictures Cook 1/19 Cook 2/19 On the left the new, on the right the plate-shaped, warped coupling base plate. Cook 3/19 Clutch removal, act…
-
Restoration of the BMW R 80 G-S
Cook counselor workshop Restoration of the BMW R 80 G / S Restoration of the BMW R 80 G / S 160 working hours at a glance Content of All parts of the…
-
Restoration of the BMW R 80 G-S part 4 engine and carburetor adjustment
Cook 23 pictures Cook 1/23 Small and big changes make the almost 70 hp of the renovated R 80 G / S. Cook 2/23 The new, original air filter sits on this…
-
Moped restoration: Kreidler MF2
Allner 7th pictures Allner 1/7 A 36 year old wish turns into a father-son project. The moped of choice: the Kreidler MF2. Allner 2/7 The horror: But the…
-
Restoration of Moto Guzzi Le Mans I and Moto Guzzi V7 Sport
Siemer 24 pictures Siemer 1/24 Two Le Mans I and a V7 Sport in original and museum condition. Siemer 2/24 Reinhard Backer doing the freestyle. Freehand….
-
Tuning and restoration for BMW two-valve boxers
markus-jahn.com 25th pictures Stefan Wolf 1/25 BMW dealer Karl Maier (57). Jahn 2/25 Pressing: After a bath in liquid nitrogen, the valve guides are…
-
Screwdriver tips – restoration of a Honda XL 500 R
Fred Siemer 13th pictures Fred Siemer 1/13 Two friends are restoring a Honda XL 500 R.. Fred Siemer 2/13 The electrical system looked bad, but after…