Table of contents
Schermer

5 pictures
1/5
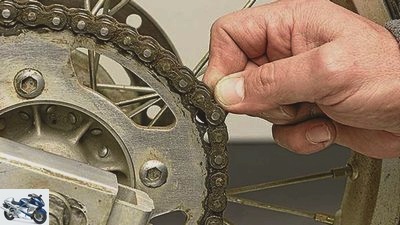
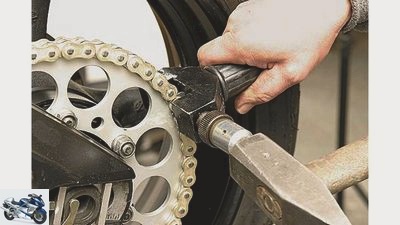
The chain can be professionally riveted using a special tool (from around 100 euros).
2/5
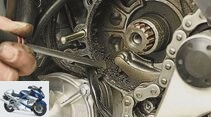
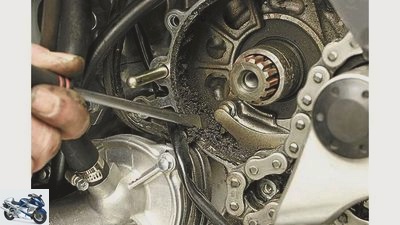
Before installing the new chain kit, remove old grease residues from otherwise hidden areas.
3/5
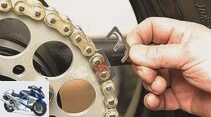
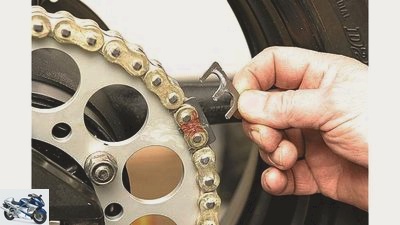
Correct riveting: A spacer gauge is helpful to ensure that the dimensions are correct.
4/5
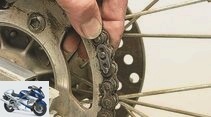
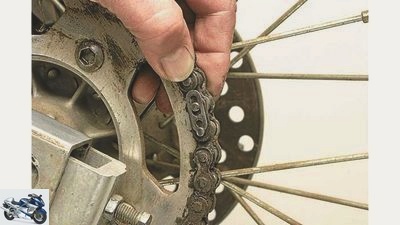
Chain with clip lock: has no place on the motorcycle due to its low resilience.
5/5
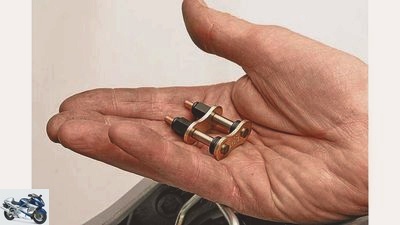
Anything but a rivet: screw links are definitely on par with rivet locks.
counselor
workshop
Advice: replace chain and sprockets
Advice: replace chain and sprockets
Replace the chain and sprockets
The mileage of modern motorcycle chains is enormous. But even with the best care, it has to be replaced at some point. Using the Suzuki Bandit 1250 as an example, we will show you how to properly replace the chain, pinion and rear sprocket.
Franz Josef Schermer
03/02/2011
The end of the chain’s life is indicated when the teeth of the sprockets become downright pointed or the chain at the rearmost point of the sprocket can be lifted by more than half a tooth height with your fingers. Another indication of the end of the chain’s service life: the rear wheel axle is far to the rear, the possibility of chain tensioning is almost exhausted. In addition, there is also a manufacturer’s wear measurement. Suzuki specifies 319.4 mm for the 1250 bandit. This measurement is taken with the following steps:
- Loosen the rear axle nut and unscrew at least two turns
-
- Loosen the lock nuts of both adjusting screws with a size 12 open-ended spanner
- Use a 10 mm open-end wrench to unscrew the adjusting screws to the rear so that the chain is taut.
- Measure at several points on the chain between the middle of the first and 21st bolts. If this dimension is more than 319.4 mm at one point, the chain must be replaced.
Change chain
With normal wear, the chain wheels and the chain are worn out at the same time, which is why the chain wheels should also be replaced in addition to the chain. Combining new and old parts makes little sense, they wear each other out extremely quickly.
Tools
The following tool parts are required to change the chain and sprockets:
- 36 mm socket for the rear axle nut
- 10 and 12 open-ended spanners for the chain tensioning screws and lock nuts.
- Torque wrench with an adjustment range of at least 120 Nm.
- Allen key for the screws of the outer chain sprocket cover, fastening screws of the speed sensor and speed sensor rotor.
- Key for the screws of the bracket of the regulator / rectifier and the clamping screw in the short gear lever.
- 32 mm socket for the pinion nut with extension to the torque wrench.
- 14 mm socket for the self-locking collar nuts on the rear sprocket.
- combined chain cutting and riveting tool
- medium hammer, small chisel, punch
- Cleaning agent (brake cleaner, WD-40), plenty of rags, good rolling bearing grease for greasing the keyways of the gearbox output shaft.
We also recommend an impact wrench to open the pinion nut, because it can be so tight that it cannot be opened even if an extension is used.
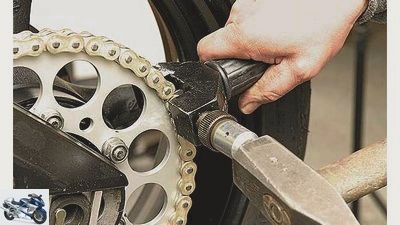
The chain can be professionally riveted using a special tool (from approx. 100 euros).
Preparations
A special tool is required to separate the old chain and rivet the new one. If there is no chain cutter riveting tool at hand, the chain can also be cut at the link plates or rivet heads with an angle grinder (“Flex”). When assembling the new chain or the new rivet link, a skilled hand is required to free-hand riveting of the protrusions on the link bolts, which guides the hammer accurately, which is not for everyone. That is why using a combination tool for cutting and riveting chains is always a better choice.
Take off the old chain
- Unscrew the outer sprocket cover.
- Unscrew regulator / rectifier.
- Unscrew the short gear lever.
- Unscrew the speed sensor.
- We recommend that you also unscrew the clutch slave cylinder so that the inner pinion cover can be completely removed without any problems.
Important: When the clutch slave cylinder is unscrewed, secure the piston with a clamp to prevent it from slipping out.
-
- Remove the inner sprocket cover.
- Pull out the clutch push rod. Loosen and remove the screws of the pinion cover, remove the cover.
- Unscrew the speed sensor rotor with a 6 mm Allen key
-
- Open the pinion nut with a 32 mm hexagon socket and extension. DO NOT attempt to open the pinion screw with an open-end wrench. It goes wrong and is very dangerous because you are sure to slip and injure your hands. Lock the rear wheel by pressing the foot brake lever. DO NOT use a gear to open the pinion nut. If the rear wheel rotates with it because the nut is extremely tight and the braking force is not sufficient to counteract when opening the nut, insert the hammer handle or piece of wood through the wheel and block a spoke against the swing arm. Caution: Do not press the hammer handle onto the brake line! The easiest way to open the nut is with an impact wrench.
- After opening the pinion nut, loosen all sprocket fastening nuts on the rear wheel and open two turns.
- Cut the chain with the chain cutting tool:
- Find the rivet link, attach the chain cutter, tighten the threaded bushing with pliers, insert the punch, hold the chain cutter with one hand and tap the punch vigorously with the hammer in the other hand: the bolt is riveted. Then lift the chain off the sprockets.
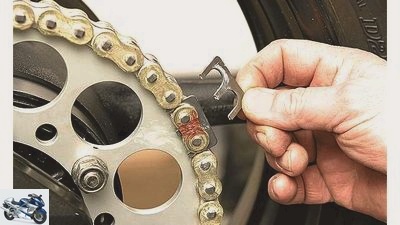
Correct riveting: A spacer gauge is helpful to ensure that the dimensions are correct.
Fit new chain and sprockets
- Pull off the old chain sprocket at the front. Clean the gear shaft with brake cleaner. Lubricate the keyways with thick grease.
- Slide on the new pinion with the label facing outwards. Put on the washer, screw on the cleaned and lightly oiled nut hand-tight.
- Change rear sprocket:
- Remove the rear wheel, unscrew the sprocket nuts, remove the old sprocket. Thoroughly clean and oil the contact surfaces on the chainring carrier and the thread of the stud bolts. Grease or oil the contact surfaces of the chain sprocket a little, attach the chain sprocket with the label facing outwards, unscrew the nuts and tighten hand-tight. Screw the chain tension adjusting screws very far into the swing arm, install the rear wheel, push the rear axle forward as far as possible.
-
- Place a new chain on the sprockets.
- Grease the rivet link well with chain grease, slide new O- or X-rings onto the bolts. Connect the ends of the chain with the rivet link: the chain must sit securely on the sprockets. Place new O- or X-rings on the protruding bolts of the mounted rivet link, apply the chain link evenly, push on and press on slightly with a chain tool.
- Insert spacer gauges on both sides of the chain: This fixes the O- or X-rings and the chain link is pressed on with the prescribed dimension.
Important: In the case of retrofit chains without the enclosed spacer gauge, the exact dimension for the outer width of the rivet link is noted in the package insert for the new chain. Suzuki names the dimension after pressing the outer plate: 21.85 to 22.15 mm.
- Riveting the chain:
- 6.1. Mount the riveting stud in the chain tool. 6.2. Attach the chain tool and press the link plate with the threaded bushing evenly onto both bolts until it rests on the spacer gauges. 6.3. Rivet the bolt protrusions with the riveting tool. Pull out the spacer gauges. 6.4. Check riveting: Suzuki mentions 5.45 to 5.85 mm for the diameter of the rivet head on the series chain; in the case of a retrofit chain, see the instruction leaflet.
- Tighten the pinion nut to 115 Nm: Lock the rear wheel with the brake. If the braking force is not sufficient, insert the hammer handle against a wheel spoke under the swing arm.
- Tighten the collar nuts of the rear chainring attachment to 60 Nm.
- Tensioning the chain: The sag of the lower chain run in the middle between the front sprocket and the rear sprocket must be 30 to 40 mm with the rear wheel extended.
- Counter the nuts on the chain tensioning bolts against the swing arm: hand-tight. Don’t forget to tighten the rear axle nut. Screw the removed parts back on.
- Wipe off any grease on the outside of the chain with a rag.
Equipment tip: From the chain brand Enuma (only available from specialist retailers, information about Motorrad Schuller, Tel. 06245/9947910, www.enuma.de) there are not only rivet locks but also screw links for most common motorcycle chains. Advantage of the chain with screw lock: It can be assembled without special tools. The screw connection is considered by experts to be very reliable and durable. If you want to continue to professionally untie and rivet your chains, you should upgrade your equipment with the high-quality chain cutting and riveting tool from Whale (available from specialist motorcycle dealers, price: approx. 190 euros).
More about technology
PS knowledge: technology
- Motorcycle technology clearly explained on 97 pages (PDF)
- From starter to spark plug
- Simple teaching of physical principles
- Tips and tricks for practitioners
To the PDF for € 9.99
#image.jpg
Related articles
-
counselor workshop Change chain set Change chain set Replace the pinion, toothed wheel and drive chain Regular chain maintenance can delay the moment of…
-
counselor workshop Change chain kit Change chain kit Change chain kit Worn drive chains usually draw attention to themselves when driving with cracking…
-
counselor workshop Chain locks Chain locks Chain locks In most cases, it is a hell of a job to replace an endless chain: remove the rear wheel, loosen…
-
Tension the chain correctly – it’s all about tension
mps photo studio counselor workshop Tension the chain correctly – it’s all about tension Tension the chain properly It’s all about the tension Is the…
-
Tips for mechanics – correct motorcycle chain maintenance
Photo: Ralf Petersen 13th pictures Ralf Petersen 1/13 / 1 / A typical lack of maintenance: everything sparkling clean, even the chain. Ralf Petersen 2/13…
-
Maintenance and care of chain, cardan shaft, toothed belt
Ralf Petersen 15th pictures Ralf Petersen 1/15 Chain, cardan or toothed belt differ not only in their functionality, but also in terms of maintenance and…
-
Cook 8th pictures Cook 1/8 Solid screwdrivers with a handy shaft are preferable to tools with bits. Cook 2/8 The standard on-board tools are replaced by…
-
counselor workshop Chain: change the translation Chain: change the translation Chain: change the translation Anyone who changes the pinion, sprocket or a…
-
Chain breaker for the motorcycle in the test
Sdun counselor workshop Chain breaker for the motorcycle in the test Chain breaker for the motorcycle in the test Cutting tool for chains Riveted…
-
counselor Used purchase Used advice Honda CB 500 Used advice Honda CB 500 From the same mould Honda’s new model in the inexpensive entry-level class had…