Table of contents
- Screwdriver tip – care and inspection of the suspension struts Tips & Tricks
- Types
- attitude
- Negative and positive suspension travel
- Adjustment of the damping on the rear shock absorber
- Maintenance / control
- More about technology
- repair
- Replacement options
- Removal / installation
- More information and an overview of the costs
- Technician courses from Ralf Petersen
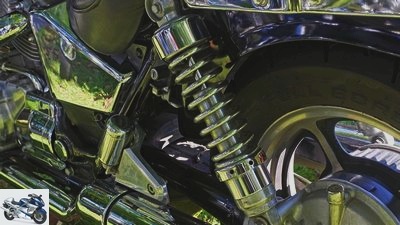
Photo: Ralf Petersen
14th pictures
Ralf Petersen
1/14
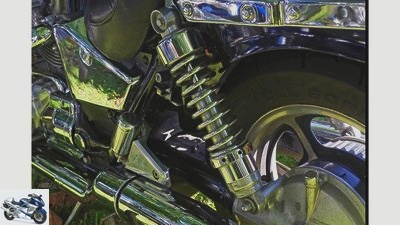
1: Classic, beautiful and easy to adjust: stereo shock absorbers.
Ralf Petersen
2/14
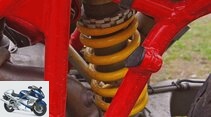
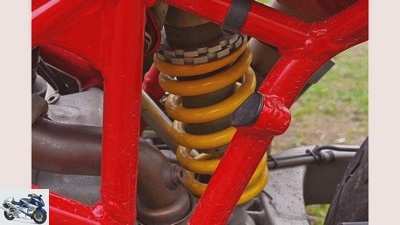
2: Efficient – the base is infinitely adjustable central spring strut.
Ralf Petersen
3/14
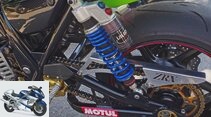
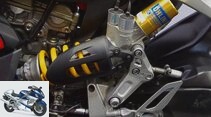
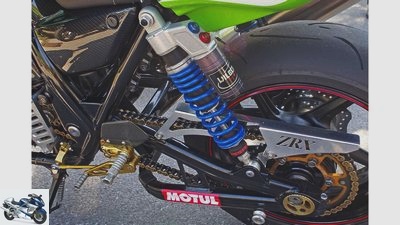
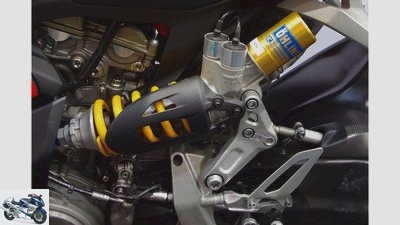
3: High-tech – fully adjustable shock absorber with expansion tank.
Ralf Petersen
4/14
4: No more dreams of the future – electrically adjustable trolleys.
Ralf Petersen
5/14
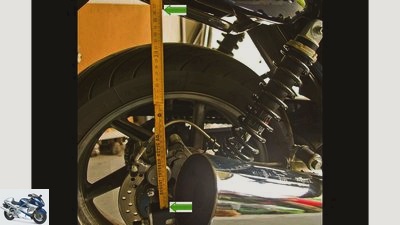
5: Measurement of positive and negative spring deflection using a folding rule.
Ralf Petersen
6/14
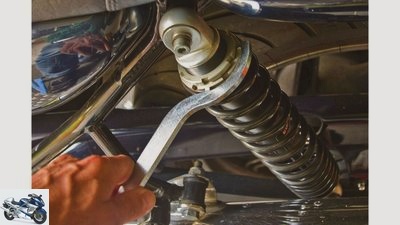
6: Correction of the spring base by adjusting the locknuts.
Ralf Petersen
7/14
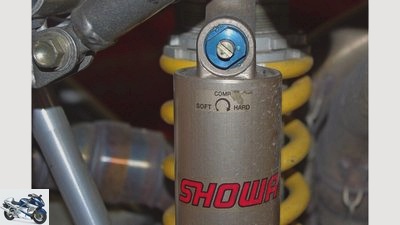
7: Compression adjustment screw, here on the expansion tank.
Ralf Petersen
8/14
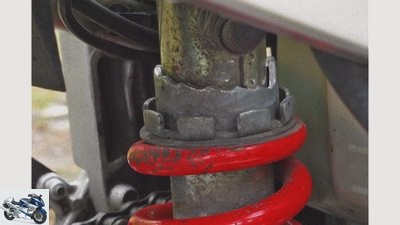
8: Maintenance required – accumulated adjustment mechanism.
Ralf Petersen
9/14
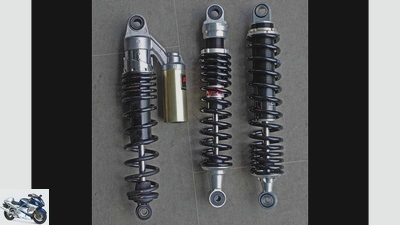
9: Exchange program – original (left), replacement of YSS and Wilbers.
Ralf Petersen
10/14
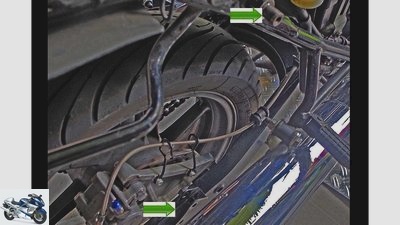
10: Easy – changing stereo struts is a snap.
Ralf Petersen
11/14
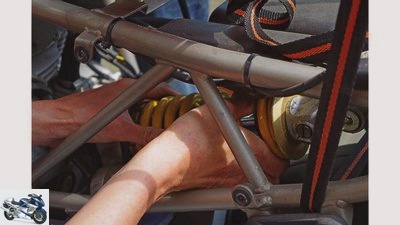
11: Much more time-consuming – changing the central spring strut.

Ralf Petersen
12/14
12: The wow factor – on a test drive with new struts.
Ralf Petersen
13/14
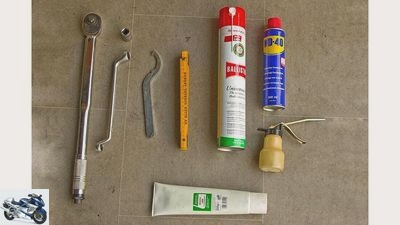
What is needed: hook wrench, folding rule, Ballistol or oil can, WD 40 / Caramba, repair instructions, torque wrench and suitable sockets, grease.
Ralf Petersen
14/14
Ralf Petersen. The author works as a further education teacher at the VHS Duisburg and has been organizing mechanics courses for 21 years.
counselor
technology & future
Screwdriver tip – care and control of the suspension struts
Screwdriver tip – care and inspection of the suspension struts
Tips & Tricks
The suspension struts of a motorcycle often do their arduous work for years and, in contrast to the telescopic fork, which regularly needs an oil change, are relatively low-maintenance. However, they also require a minimum of care and control. And at the end of their service life there is the question of repair or replacement. Tips and tricks for caring for and checking the suspension struts.
Ralf Petersen
10/13/2016
Before we reach for the tool: First of all, let’s appreciate the shock absorber, which, together with the fork, should absorb unevenness in the road surface and keep the machine steady and stable. The movement of the springs is dampened by oil, which slows it down in a targeted manner and converts kinetic energy into heat.
If the setting is incorrect or the damping deteriorates due to wear and tear, the chassis becomes unstable and the motorcycle ultimately becomes a wobbly box. So it makes sense to take care of the shock absorber in good time.
Types
Motorcycles usually have either a central spring strut (sometimes with a deflection system) or, especially in classic machines, two external stereo struts. If it does not have a hydraulic or electrical adjustment device, a central spring strut is usually difficult to access and adjusting the spring base with a hook wrench is often a terrible awkwardness.
If the damping is adjustable, there are usually corresponding adjusting screws at the bottom of the shock absorber for the rebound stage and at the top for the compression stage. In the case of electrically adjustable spring elements, servomotors take over this work. Modern struts often have an expansion tank, which makes them less sensitive to heat and therefore more resilient. The length of the spring travel varies depending on the design and intended use.
attitude
In contrast to a car, a motorcycle reacts very sensitively to a change in load (e.g. by a second person and / or luggage), because this affects the geometry of the vehicle and thus its driving behavior. In my seminars I am always amazed to find that many motorcyclists do not notice this connection.
For fear of adjusting something (and thus doing something wrong), they prefer not to change anything despite the changed load and thus achieve the exact opposite. Since the machine sinks in due to the additional weight, the caster, wheelbase and steering angle change, above all, handling and stability.
Negative and positive suspension travel
A motorcycle sags into its springs as soon as it is unscrewed from the stand, which means that a certain amount of spring travel is already used up. The value by which the machine has sagged is called the negative spring deflection, the remaining spring deflection that is still available is called the positive spring deflection. The ratio of negative to positive suspension travel should be approx. One to two thirds. A motorcycle with 110 millimeters of rear suspension travel, such as the Honda Sevenfifty used here, should only sag by a maximum of a third of the total suspension travel, in this case 35 millimeters, when loaded (i.e. crew / luggage). The spring base, which is equipped with a ratchet mechanism, can be raised using a hook spanner.
The measurement is basically simple and can be carried out using a folding rule or tape measure. Mark a point on the rear of the frame and on the swing arm – for example with a felt pen – and measure the distance between these two markings with the motorcycle fully rebounded (jacked up). This is followed by loading by the driver, co-driver and, if necessary, luggage. Each time the distance between the two marks is measured. The difference between the measured values is the negative suspension travel. As already mentioned, this should be around a third of the total suspension travel. If the value is not correct, the preload of the shock absorber is adjusted until a suitable negative spring travel is achieved.
Adjustment of the damping on the rear shock absorber
When it comes to damping, a distinction is made between rebound and compression damping. The adjustment of the rebound is usually located at the bottom of the shock absorber. It slows the rebound speed. If the rebound is too soft, the motorcycle continues to swing and is constantly restless. If the rebound is too hard, the machine begins to jump. The compression adjustment, however, is usually located on top of the shock absorber. It slows the compression speed.
If the pressure level is too hard, the motorcycle reacts insensitively and the tire tends to slip. If the pressure level is too soft, the rear wheel can jump on bumps and the road contact is severely restricted. However, many motorcycles have no adjustment option for the damping, with others only the rebound can be adjusted. The following applies to all setting options: try it out on an extensive test drive and note the results!
Maintenance / control
Maintaining a shock absorber is as simple as it is important. To prevent corrosion, you should lubricate the spring strut on the spring base with Ballistol or clean engine oil at least once a year and then adjust it in all stages. In this way, the adjustment mechanism remains smooth and functional. On many older motorcycles, the adjustment mechanism is often already jammed / rusty. With WD 40 or similar creeping agents and a little patience, you can usually make it work again. In the case of central spring struts with deflection, the lever system must also be lubricated so that it does not wear out prematurely.
It is also important to check the fastening screws (tightening values!), Which can loosen. In the end, there is a visual inspection for leaks. In our 22-year-old classic, both suspension struts are leaking, a slight oil mist can be clearly seen. Logically, the weak damping is clearly noticeable when driving. The inevitable replacement was already planned when the used motorcycle was purchased – struts are wear parts.
More about technology
PS knowledge: technology
- Motorcycle technology clearly explained on 97 pages (PDF)
- From starter to spark plug
- Simple teaching of physical principles
- Tips and tricks for practitioners
To the PDF for € 9.99
#image.jpg
repair
However, it is not absolutely necessary to replace the shock absorbers with new parts, because fortunately there are excellent specialists (e.g. Franz Racing) who overhaul an old shock absorber and restore it to a technically as good as new condition. The price for this is 300 euros per set (two struts), depending on the design / condition. At the same time, the shock absorber can also be adjusted according to individual requirements (weight / payload).
For a powder coating of the already rusted feathers you have to calculate an additional 100 euros. Replacement struts from the accessories are a real necessity. On the other hand, one should refrain from lending a hand at all possible. The shock absorber repair is really only for professionals.
Replacement options
Fortunately, the aftermarket offers a wide selection, because the original Showa struts cost almost 1200 euros as regular spare parts at Honda. Since the retro-style Sevenfifty is used for leisurely country road tours anyway, it doesn’t necessarily have to be a high-tech product in this special case. In the past, Koni shock absorbers would have been the first choice, if only because of the lifelong (!) Guarantee, but since the shock absorbers are produced under the name IKON in Australia, this promise no longer applies. You are spoiled for choice. The type-specific internet forums often contain suggestions and experience reports, but ultimately the decisive factors are budget and purpose. For test purposes, I installed and tried out YSS and Wilbers shock absorbers.
YSS offers the matching pair of shock absorbers at a price of 230 euros. They are continuously adjustable in the spring base using a locknut and the workmanship makes a surprisingly good impression for the price. The Wilbers struts for 649 euros are also infinitely adjustable using countered locknuts, have high-quality self-aligning bearings in the strut eye and shine with very good workmanship. When ordering, the driver was also asked about the rider’s weight and the struts were produced accordingly – of course, there would be a slightly longer delivery time.
Removal / installation
Since the Sevenfifty has two external spring struts and a practical main stand, dismantling is not a problem. For a motorcycle with a central spring strut without a main stand (such as a Ducati Monster that was overhauled last year), you have to come up with something (in this case, attach the machine to the ceiling with lashing straps). With the Honda, it is sufficient to loosen the fastening screws and remove the first shock absorber, clean the brackets for the shock absorber eye, grease well and mount the new shock absorber. Then do the same with the other shock absorber. Then tighten the fastening screws with the specified torque and adjust the spring base to the weight, done. Now for the test drive – the moment of truth: For the test lap, I chose a suitable part of my home route, which offers almost every type of road surface, potholes, bumps and curves over almost 40 km of country road. Conveniently, the worst bumpy slope is only two kilometers away.
I also drove this piece particularly intensively in both one and two-person operation. In order to really have a direct comparison, I completed the first lap again with the old shock absorbers, after 30 minutes of conversion the YSS followed and then, after another conversion, the Wilbers struts. Even the switch to YSS was a revelation, in combination with the also overhauled telescopic fork, the previously badly underdamped Sevenfifty now glides confidently even over the worst road sections, the suspension struts react sensitively to road bumps of all kinds and also offer good comfort. For the low price it was a real surprise. Of course, due to the price, I had higher expectations of the Wilbers shock absorbers, which fortunately were not only met but even exceeded. In terms of responsiveness and comfort, they are even better than the YSS products, also in two-person operation. But they show their real potential on the pothole track, the Honda is absolutely stable on its tracks and shows itself completely unimpressed even at higher speeds. Our conclusion after this screwdriver campaign: Both struts are an excellent replacement for the original shock absorbers, depending on the requirements and budget, the choice may be different. Personally, I decided on the Wilbers variant – you don’t indulge in anything else!
More information and an overview of the costs
Ralf Petersen
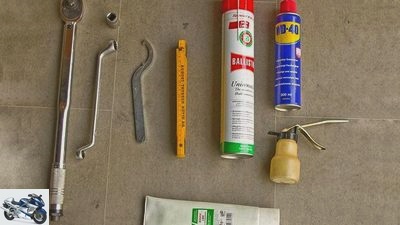
What is needed: hook wrench, folding rule, Ballistol or oil can, WD 40 / Caramba, repair instructions, torque wrench and suitable sockets, grease.
What is needed:
- Hook wrench
- Folding rule
- Ballistol or oil can
- WD 40 / Caramba
- Repair manual
- Torque wrench and matching sockets
- fat
Replacement strut costs:
- Honda original parts (Showa) 1200 euros
- YSS 230 euros
- Wilbers 649 euros
Repair costs:
- Overhaul approx. 300 euros per pair (stereo struts)
- Painting of the spring 80 euros
Technician courses from Ralf Petersen

Ralf Petersen
Ralf Petersen.
Ralf Petersen works as a further education teacher at the VHS Duisburg and has been organizing mechanics courses for 21 years. 12 to 15 practical seminars on maintenance, repair and technology are offered every year. In 2015, Delius Klasing Verlag published his book “Basiswissen Motorrad-Technik”. Info: www.rrp.de.ki; Facebook: Motorrad-Technik Petersen
Related articles
-
counselor technology & future Rear suspension Rear suspension Rear suspension The first motorcycles had a rigid rear suspension. Since bumps in the road…
-
Suspension special: Part 3 – Strut damping
triumph accesories landing gear & Spring elements Suspension special: Part 3 – Strut damping Suspension special: shock absorber The right set-up for the…
-
Screwdriver tip for the check before the main inspection
Ralf Petersen 14th pictures Ralf Petersen 1/14 Don’t forget: papers, ABEs, tire approvals and a key for the steering lock. Ralf Petersen 2/14 Only with…
-
Workshop – screwdriver tip for the inspection
Ralf Petersen 15th pictures Ralf Petersen 1/15 Every motorcycle must be serviced regularly if it is to function properly. Ralf Petersen 2/15 What is…
-
Suspension special: Part 9 – Strut tuning
Jahn accesories landing gear & Spring elements Suspension special: Part 9 – Strut tuning Suspension special: strut tuning What good is the conversion of…
-
Suspension special: Part 7 – rear
archive accesories landing gear & Spring elements Suspension special: Part 7 – rear Suspension special: rear Does the motorcycle drive strange lines?…
-
motorcycles Suspension tuning Suspension tuning The right twist If you want to raid the curbs with momentum, you not only have to have yourself fully…
-
Suspension guide – correctly adjusting the damping, part 2
Cook counselor workshop Adjusting suspension / damping correctly, part 2 Guide: correctly adjusting the suspension / damping, part 2 A mystery for many:…
-
Wilbers suspension elements for the BMW R nineT being tested
Bilski 11 pictures Bilski 1/11 Among other things, Wilbers offers an alternative shock absorber for the R nineT. Optionally complete (whoever wants with…
-
Screwdriver tip: retreading wheels
Ralf Petersen 15th pictures Suzuki 1/15 So that everything runs smoothly. The screwdriver tip for everything to do with bikes. Ralf Petersen 2/15 What…