Table of contents
- Adviser: repairing the brake caliper We show how a brake caliper is professionally overhauled
- More about technology
Franz-Josef Schermer
6th pictures
Franz-Josef Schermer
1/6
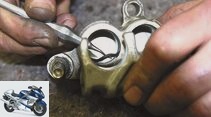
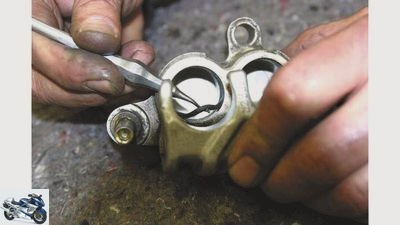
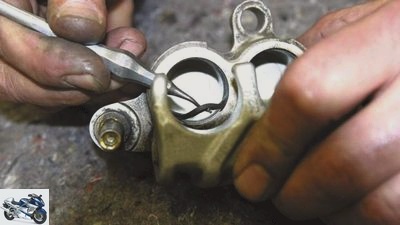
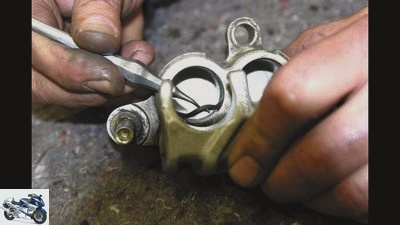
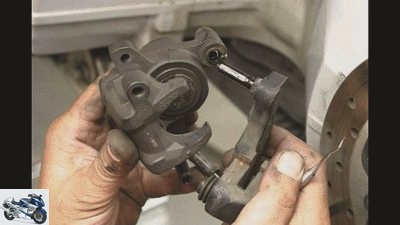
Removal of the piston sleeve with a dentist’s hook. Use new parts when installing.
Franz-Josef Schermer
2/6
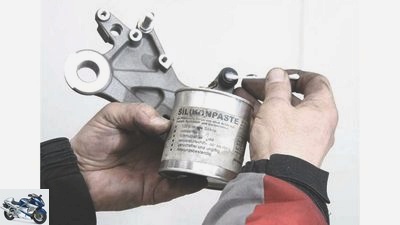
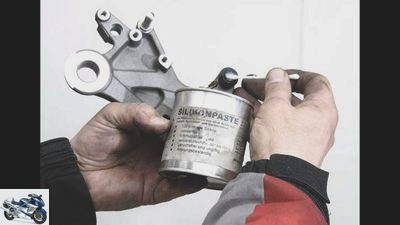
Lubricate the sleeves with silicone paste or brake fluid before assembling.
Franz-Josef Schermer
3/6
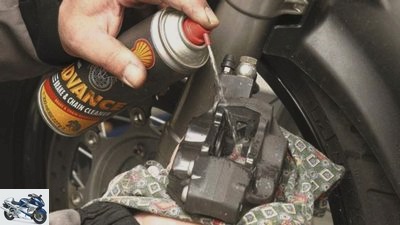
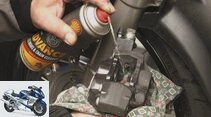
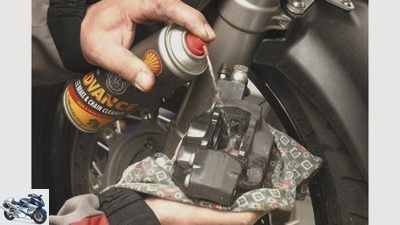
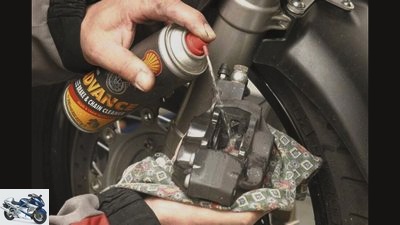
Get rid of the dirt. It is best to only use brake cleaner to clean the brake system.
Franz-Josef Schermer
4/6
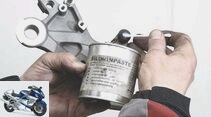
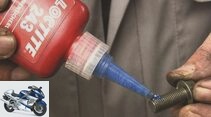
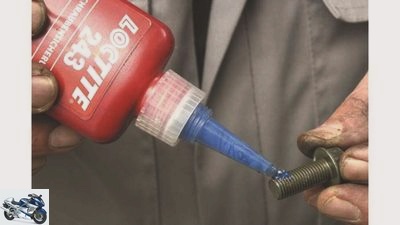
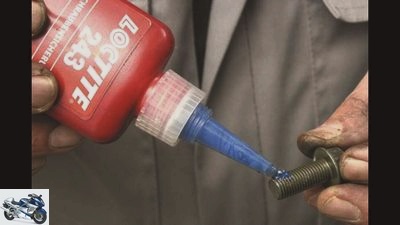
Secure the screws with a drop of Loctite. Carefully clean the threads beforehand.
Franz-Josef Schermer
5/6
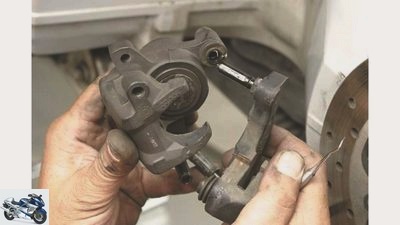
Make sure that the pins are easy to move and that the sleeves do not twist.
Franz-Josef Schermer
6/6
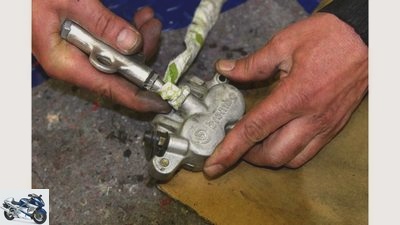
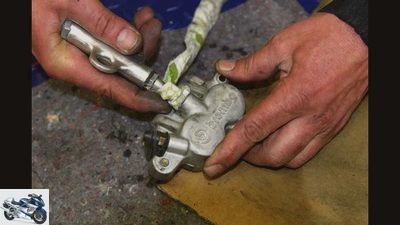
Blow out the brake piston with compressed air through the inlet hole.
counselor
workshop
Adviser: repairing the brake caliper
Adviser: repairing the brake caliper
We show how a brake caliper is professionally overhauled
The brakes are extremely stressed when driving down passes or on the racetrack. The abrasion is particularly hard on the brake calipers. In this workshop episode, we show how a brake caliper is professionally overhauled.
Franz Josef Schermer
05/17/2010
Preparatory work
1. Remove the brake pads.
2. Open the hollow screw with which the brake hose is attached to the brake caliper (or the brake pump) while the brake caliper (or the brake pump) is still screwed tight.
3. Front brake: Open the connecting screws of the brake caliper halves as long as the brake caliper is still screwed tight.
Disassemble the brake caliper
1. Unscrew the brake caliper.
2. Unscrew the connecting screws on the front caliper, separate the brake caliper halves from each other: Use a plastic hammer to help with light blows so that the adhesive can loosen at the point of separation.
2.1. The rear brake caliper usually consists of one piece and cannot be unscrewed.
3. Front and rear: Push out the brake piston:
3.1. Place a cloth over the brake piston.
3.2. Place the brake calliper on a solid wooden surface with the brake pistons pointing downwards.
3.3. Blow compressed air into the brake fluid inlet bore (see photo show) or the bore of the bleeder nipple while keeping the open bore closed: This is how the brake pistons can be ejected.
Attention: Be careful when handling compressed air! Carefully dose the air pressure so that the brake pistons do not shoot out! Take your fingers out of the caliper to avoid injury.
4th. Lever out dust seals and piston sleeves with a small screwdriver or a dentist’s hook (see photo show).
Important: Do not reuse dust seals and piston sleeves, get new parts before starting work!
5. Cleaning: Thoroughly clean the piston bores in the brake caliper halves, removed pistons and sealing ring grooves.
5.1. Stubborn dirt with z. B. Spray WD-40 and rub off with a rough cloth.
Important When cleaning the brake calipers: do not work on the brake pistons or piston bores with emery or file! Do not tinker with sharp-edged objects such as screwdrivers or wrenches in the brake calliper, otherwise the sliding surfaces of the brake pistons could be scratched!
Check the brake caliper components
1. Brake pistons and associated holes in the brake calliper must not have any grooves, scratches, rust scars or other damage. If so, they have to be renewed.
If there is the slightest doubt about the perfect condition of the surfaces, new pistons must be installed (see photo show).
2. There are no fixed wear dimensions for the holes in
the brake calipers and brake cylinders as well as their brake pistons. If precision measuring devices are available, the clearance between the brake piston (outer diameter) and the housing bore (inner diameter) can be measured. Reference value: The game may be around a tenth of a millimeter.
3. More important than possible air between the brake piston and the bore is that the surface of the bore and piston is as smooth as possible.
Assemble the brake caliper.
Conversely to the decomposition – Special note:
1. Cleanliness of the grooves for piston sleeves and
Check the sealing rings at every angle before inserting the new sealing rings.
2. Before inserting the sleeves and sealing rings, thoroughly lubricate them with pure silicone grease or a special paste for piston sleeves (see photo show).
If there is no pure silicone grease or special brake paste (brake grease) available, moisten all components with clean brake fluid.
3. Carefully insert sealing and dust rings into their grooves.
4th. Place the brake piston with the closed side facing inwards (open side outside) on the hole and push it very deeply into the blind hole.
4.1. The sealing lips of the sealing rings must not twist when inserting the pistons!
5. Assemble the front brake calipers:
5.1. Put a drop of Loctite “high strength” into the internal thread of the inner wheel brake caliper half.
5.2. Insert a new O-ring into the recess of the brake calliper connection hole.
5.3. Assemble the brake caliper halves precisely, screw in the screws and tighten with 22 Nm (see photo show).
| Exemplary tightening torques | |
| Front brake | Brake caliper fastening screws to fork dip tube |
26 Nm |
| Brake pad retaining pin | 16 Nm | Banjo bolts brake hose- connections |
23 Nm |
| Bleeder valve in the brake caliper | 7.5 Nm | Brake disc fastening screws | 23 Nm |
Loctite “high Strength” on cleaned thread
give: connecting screws of the
Caliper halves
on retaining plate
give caliper slide pin
<!– ESI FOR ads.BannerGallery / irelements / esielement / eyJwYWdlIjoiL3N0YXJ0c2VpdGUvIiwibGF5b3V0IjoiYXJ0aWNsZSIsImVsZW1lbnQiOiJhZHMuQmFubmVyR2FsbGVyeSIsImlyQ29uZmlnIjoiMTQ3MDY1MTgiLCJwYXJhbXMiOnt9LCJpc01vYmlsZSI6ZmFsc2V9 –> <!– CACHEABLE –>&# 34;,&# 34; rectangle&# 34 ;: “<!–# include virtual = \&# 34 / irelements / esielement / eyJwYWdlIjoiL3N0YXJ0c2VpdGUvIiwibGF5b3V0IjoiYXJ0aWNsZSIsImVsZW1lbnQiOiJhZHMuUmVjdGFuZ2xlR2FsbGVyeSIsImlyQ29uZmlnIjoiMTQ3MDY1MTgiLCJwYXJhbXMiOnt9LCJpc01vYmlsZSI6ZmFsc2V9 \&# 34; –> <!– ESI FOR ads.RectangleGallery / irelements / esielement / eyJwYWdlIjoiL3N0YXJ0c2VpdGUvIiwibGF5b3V0IjoiYXJ0aWNsZSIsImVsZW1lbnQiOiJhZHMuUmVjdGFuZ2xlR2FsbGVyeSIsImlyQ29uZmlnIjoiMTQ3MDY1MTgiLCJwYXJhbXMiOnt9LCJpc01vYmlsZSI6ZmFsc2V9 –> <!– CACHEABLE –>&# 34;,&# 34; sky&# 34 ;: “<!–# include virtual = \&# 34 / irelements / esielement / eyJwYWdlIjoiL3N0YXJ0c2VpdGUvIiwibGF5b3V0IjoiYXJ0aWNsZSIsImVsZW1lbnQiOiJhZHMuU2t5R2FsbGVyeSIsImlyQ29uZmlnIjoiMTQ3MDY1MTgiLCJwYXJhbXMiOnt9LCJpc01vYmlsZSI6ZmFsc2V9 \&# 34; –> <!– ESI FOR ads.SkyGallery / irelements / esielement / eyJwYWdlIjoiL3N0YXJ0c2VpdGUvIiwibGF5b3V0IjoiYXJ0aWNsZSIsImVsZW1lbnQiOiJhZHMuU2t5R2FsbGVyeSIsImlyQ29uZmlnIjoiMTQ3MDY1MTgiLCJwYXJhbXMiOnt9LCJpc01vYmlsZSI6ZmFsc2V9 –> <!– CACHEABLE –>&# 34;}}” ga-track-vis =”article.gallery.inline.vis” class =”v-A_-article__inline-container”>
Franz-Josef Schermer


6th pictures
Pictures: Guide: Repairing the brake caliper
go to Article
To home page
Franz-Josef Schermer
Franz-Josef Schermer
Franz-Josef Schermer
Franz-Josef Schermer
Franz-Josef Schermer
Franz-Josef Schermer
1/6
More about technology
PS knowledge: technology
- Motorcycle technology clearly explained on 97 pages (PDF)
- From starter to spark plug
- Simple teaching of physical principles
- Tips and tricks for practitioners
To the PDF for € 9.99
#image.jpg
Related articles
-
Brembo at EICMA: GP4-rr brake caliper and radial clutch pump
Motorcycle fair in Milan EICMA 2021 Presented by Brembo accesories landing gear & Spring elements Brembo at EICMA: GP4-rr brake caliper and radial clutch…
-
Guide to changing the brake pads on the motorcycle
Ralf Schneider counselor workshop Guide to changing the brake pads on the motorcycle Change the brake pads on the motorcycle Tips from professionals…
-
Ralf Petersen counselor workshop Brake system screwdriver tips Brake system screwdriver tips Everything on stop If you want to move forward quickly, you…
-
New Brembo racing brake system for the World Superbike
WSBK 6th pictures WSBK 1/6 The WSBK’s new brake calipers are derived from MotoGP. Cooling fins are milled into the body for the hot races. WSBK 2/6 As…
-
Brake problems: Harley-Davidson recall for Street 500 and 750
Harley-Davidson motorcycles Brake problems: Harley-Davidson recall for Street 500 and 750 Harley-Davidson Street 500 and 750 Recall Brakes with corrosion…
-
Adviser: change the wheel bearing
Schermer 7th pictures Schermer 1/7 Changing the wheel bearing Step 7: When driving in, carefully tap into the outer ring with a mandrel.. Schermer 2/7…
-
Recall BMW G 310 and C 400X: Brake calipers can corrode
Imre Paulovits counselor traffic & business Recall BMW G 310 and C 400X: Brake calipers can corrode Recall BMW G 310 and C 400X Brake calipers can…
-
BMW recall: brake calipers can sweat
BMW motorcycle counselor traffic & business BMW recall: brake calipers can sweat BMW recall in the USA Brake calipers can sweat Because brake fluid can…
-
Brake performance in comparison: MotoGP versus Formula 1
Brembo Sports & scene Motorsport Brake performance in comparison: MotoGP versus Formula 1 Brake performance in comparison: MotoGP versus Formula 1 At the…
-
Schermer counselor workshop Change brake fluid Change brake fluid Fill the brake system with new fluid Soft pressure point, spongy brake. It is high time…