Table of contents
- Advice: Remove / maintain shock absorbers and reversing levers Lubricated and sprung
- Maintenance and assembly
- More about technology
Cook
counselor
technology & future
Advice: Remove / maintain shock absorbers and reversing levers
Advice: Remove / maintain shock absorbers and reversing levers
Lubricated and sprung
Do you need a new shock absorber? Should new reversing levers lower or raise the machine? Then we will be happy to help you.
Werner Koch
06/18/2009
When converting the rear suspension, a moderately difficult problem must be solved right from the start: relieving the rear wheel swing arm. To do this, professionals use an assembly stand that attaches to the frame, or they hang the motorcycle on the workshop ceiling with a sturdy strap. A simpler solution is recommended for the one-off conversion: The motorcycle is tilted to the left via the side stand and supported by a solid substructure on the frame, on the footrests or on the muffler, so that the rear wheel is completely relieved. To be on the safe side, the front brake is blocked with a rubber band so that the machine cannot tip over, and the handlebars are turned to the left.
Cook
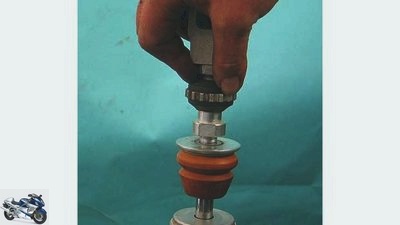
A constant resistance must be built up when the piston rod is pushed in.
First test: The rear wheel is moved up and down in the unloaded state. There should be no or only minimal play. If the rocker can be moved freely up and down by more than two millimeters with a loud clicking noise, a fingertip is used to check each bearing point on the deflection levers or the shock absorber for vertical play. Often these height play add up on the rear axle from several needle roller bearings with radial play. Then only specially made oversize inner rings help, for example made by chassis guru Emil Schwarz (www.emilschwarz.de). Play in the deflection / shock absorber can lead to uncontrolled jumping of the wheels when there are potholes. And sports motorcycles then tend to chatter, which is annoying vibrations when turning and when leaning, especially when they are soled with racing tires or slicks.
Cook
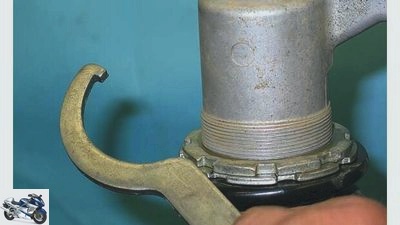
The locknuts are loosened on the previously cleaned thread of the shock absorber.
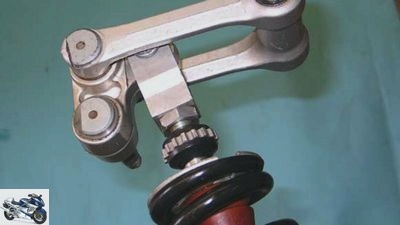
Depending on the position, suspension struts can be removed quickly and easily up or down. But occasionally it is necessary to remove the complete bell crank in order to be able to thread the shock absorber down through the rocker arm. Before the reversing levers are removed, sketch and mark the installation position and the respective bolts. In the case of suspension struts with hydraulic pre-tensioning, this must be unscrewed from the frame and the line pushed behind the suspension strut without kinking. In the case of retrofit struts, it is always advisable to check the width of the fastening eyes and the installation length. Deflection levers or tension struts for raising or lowering the vehicle are compared with the original parts before the replacement and the length from hole to hole is measured and noted.
Maintenance and assembly
Cook
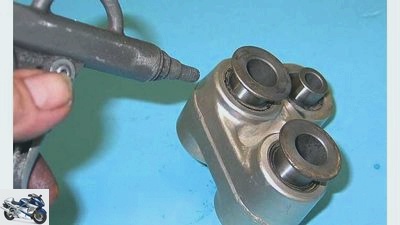
When cleaning the outside, the sleeves remain in the bearings and oil seals.
Due to the exposed installation position of the deflection, it is usually extremely dirty or corroded. A brass brush or compressed air can be used to remove stubborn dirt. The bearing inner rings must remain in the sealing rings, otherwise fine dirt particles will penetrate the needle roller bearings. After cleaning, the bearing rings are removed, cleaned and reassembled with a fresh grease pack. With many shock absorbers, however, a spring press is required for this work step. In this case, only going to a specialist or a well-equipped motorcycle workshop will help. Before attempting to remove the spring with the assembly lever or screwdriver, be warned, because the enormous spring force can cause serious injuries if handled improperly. In any case, the pre-tensioned spring length must be measured and noted before dismantling. If the piston rod of the shock absorber is grooved or smeared with oil, the sealing rings and guides are usually worn out, which means that a repair or replacement with a retrofit strut is necessary.
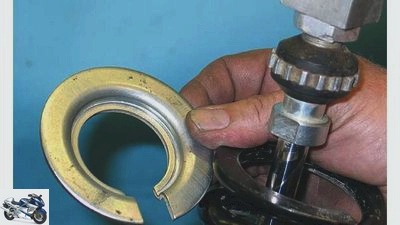
Cook
The slotted plate can only be removed when the spring is completely relaxed.
During the next test, the piston rod is pushed into the damper against the pressure of the gas cushion in the shock absorber. An even, creamy hydraulic resistance must be felt up to the point of reversal. Under no circumstances should there be short, jerky resistance losses with slurping noises from the damping. This would conclude that there is air in the system and also suggest an exchange. At the “Rebound” the damper rod must automatically push itself slowly and evenly out of the damper cylinder as far as it will go. This process can be repeated with different settings of the damper screws if the basic setting has been noted beforehand. If the adjustment options work, you will notice significant differences in the compression and rebound damping force. ATTENTION: These tests can only be carried out with the usual central spring struts with separate gas pressure cushions. If there is nothing wrong with the function of the damper, all components are assembled in reverse order. When installing the damper, make sure that the rebound setting on the fork base is on the correct, accessible side. If not, simply turn the fork foot 180 degrees with a suitable mandrel or wrench.
Before assembly, all bolts are first greased and nuts without a retaining ring are coated with liquid threadlocker. Then the motorcycle is removed from the temporary support and all nuts and bolts are tightened in a loaded condition. This guarantees that all screw connections are positioned with slight vertical play in the direction of the load and do not only sit under high load while driving. If you are not sure, use a torque wrench and the factory-specified tightening values. To be on the safe side, all screw connections are checked for tightness after the first test drive. The next episode “Workshop guide” in MOTORRAD 16/2009 deals with changing the rear wheel / chain bearings.
More about technology
PS knowledge: technology
- Motorcycle technology clearly explained on 97 pages (PDF)
- From starter to spark plug
- Simple teaching of physical principles
- Tips and tricks for practitioners
To the PDF for € 9.99
#image.jpg
Related articles
-
Suspension special: Part 3 – Strut damping
triumph accesories landing gear & Spring elements Suspension special: Part 3 – Strut damping Suspension special: shock absorber The right set-up for the…
-
Advice: adjust springs and dampers
Schermer counselor workshop Advice: adjust springs and dampers Advice: adjust springs and dampers Tips for adjusting the suspension and damping On modern…
-
counselor technology & future Rear suspension Rear suspension Rear suspension The first motorcycles had a rigid rear suspension. Since bumps in the road…
-
Honda counselor Used purchase Used advice Honda CBF 500 Used advice Honda CBF 500 More than a driving school bike In the ranking of the most…
-
Used advice Honda CB 750 Seven Fifty
counselor Used purchase Used advice Honda CB 750 Seven Fifty Used advice Honda CB 750 Seven Fifty Hydro culture What do the CB 750 and these plants have…
-
Second-hand advice on Honda CX models
MOTORCYCLE archive counselor Used purchase Second-hand advice on Honda CX models Second-hand advice on Honda CX models Rarity value The Honda CX models…
-
fact counselor Used purchase Second hand advice Ducati 996 Second hand advice Ducati 996 good job Cubic capacity cannot be replaced by anything except…
-
Jakob Mayer 19th pictures Jakob Meyer 1/19 With this TuneUp, too, we couldn’t complain about too little screwdriving work. But the effort was definitely…
-
fact counselor technology & future Workshop: chassis Workshop Chassis: adjust and improve correctly Content of “I can’t get the bucket around the bends…
-
Screwdriver tip – care and inspection of the suspension struts
Photo: Ralf Petersen 14th pictures Ralf Petersen 1/14 1: Classic, beautiful and easy to adjust: stereo shock absorbers. Ralf Petersen 2/14 2: Efficient -…