Table of contents
- Werner works in the Classic workshop 80,000 km engine inside
- Check the oil pan and magnetic drain plug
- Pure primary drive with impeccable oil bath clutch
- Spray and brush what it takes
- Witches Pippi and sandblasting cabin
Werner Koch
19th pictures
Werner Koch
1/19
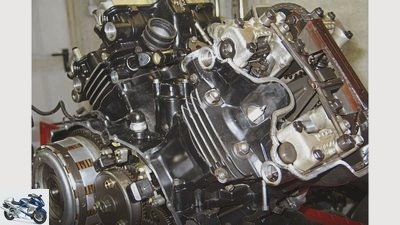
As a reminder: A Honda VF 1000 F2 was purchased in autumn 2015 for 680 euros…
Werner Koch
2/19
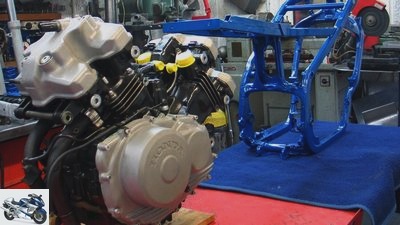
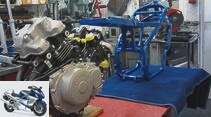
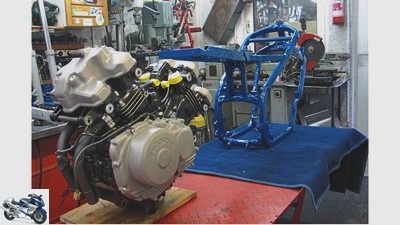
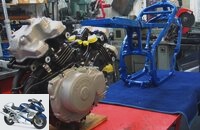
So that the freshly coated frame is not scratched during engine assembly,…
Werner Koch
3/19
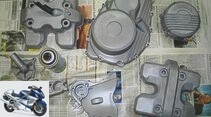
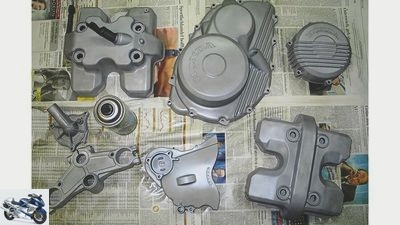
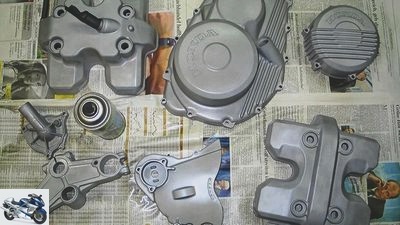
After sandblasting, the bare aluminum parts are given several layers of semi-gloss clear lacquer.
Werner Koch
4/19
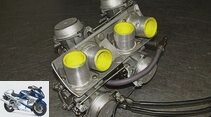
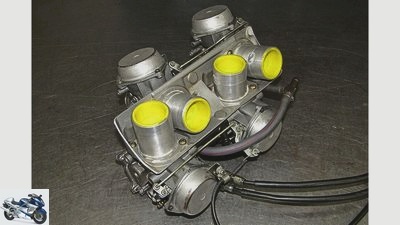
Carburetor quartet with new, slimmer intake pipes, from which we hope for a better torque curve.
Werner Koch
5/19
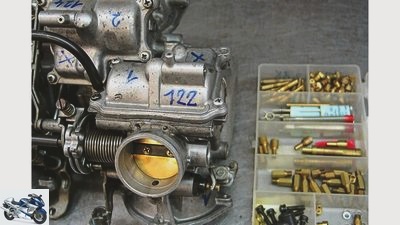
The individual air filters require a larger spray, which we raised by six points on suspicion. The candle image and the test bench show whether it fits.
Werner Koch
6/19
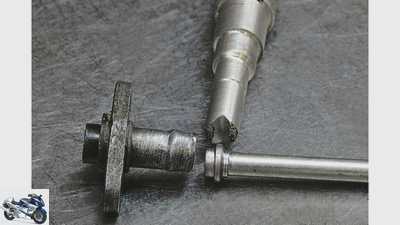
The original oil connections are given a bead with a self-made “pressing tool” so that the oil hoses sit firmly and securely.
Werner Koch
7/19
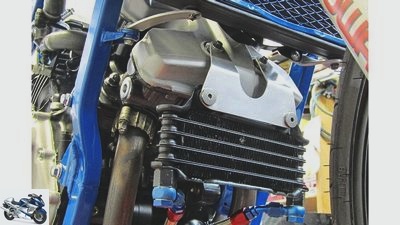
The oil cooler with double cooling surface now hangs under the front cylinder head cover and is connected with classic Goodrich fittings.
Werner Koch
8/19
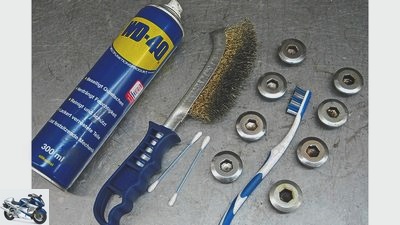
With WD-40, cotton swabs and brushes, we tackle the rust film on the chrome-plated motor screws and bolts.
Werner Koch
9/19
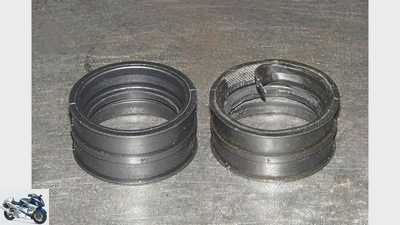
In the case of our 30-year-old Honda, the old sockets (right) were torn and had to be replaced. If you save on the parts that are not always cheap, you are in trouble with secondary air.
Werner Koch
10/19
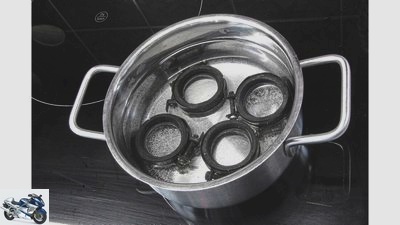
The cured rubber suction nozzles are boiled in a water bath shortly before assembly. This improves the elasticity and thus the ease of assembly of the carburetor.
Werner Koch
11/19
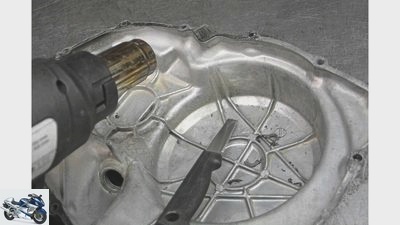
Seals that are decades old are often so hardened that they literally have to be puttied off. It’s better if the remaining sealant is made a little smoother with a hot air blower.
Werner Koch
12/19
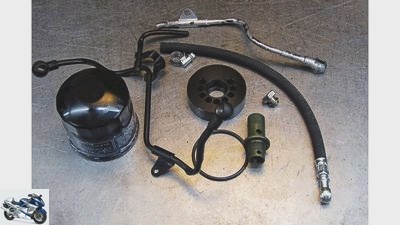
The black adapter now sits between the engine block and the oil filter, which draws the oil directly from the filter and transports it to the camshafts via the hose line. This oiling kit is intended to counteract the typical VF 1000 wear on the cams.
Werner Koch
13/19
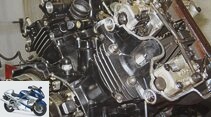
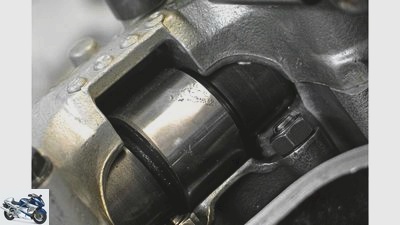
Pitting on the inlet cam. The sharp-edged outbreaks were smoothed out, the further course of the damage is observed.
Werner Koch
14/19
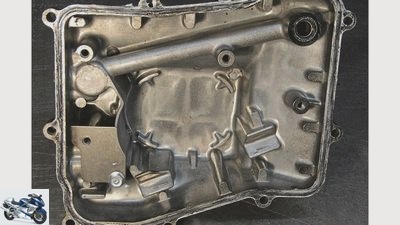
In order to thoroughly remove the deposits in the entire oil pan, the baffles must also be dismantled. Very important: replace all O-rings of the oil pressure lines and the sealing cord of the oil pan yourself and fix with grease before assembly.
Werner Koch
15/19
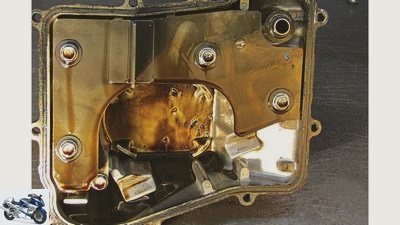
Wear particles and material breakouts collect at the bottom of the oil pan. These can be separated into steel and non-ferrous metals with a magnet and, with a little experience, their origin and damage can be determined.
Werner Koch
16/19
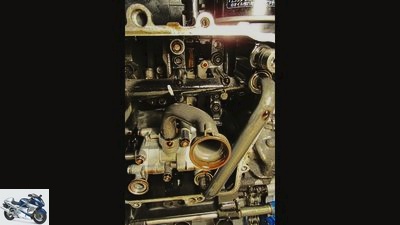
The dismantling of the oil pan reveals a view into the basement of the Honda engine. With a flashlight and a small mirror, the surfaces of the gear wheels can also be checked for possible breakouts.
Werner Koch
17/19
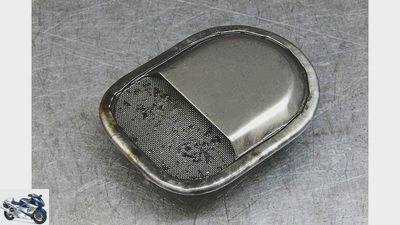
The sieve on the snorkel filters the coarse particles from the engine oil. In our VF 1000 engine, these were mainly sealant residues. There was hardly any metallic abrasion, which suggests that the engine mechanics are largely in order.
Werner Koch
18/19
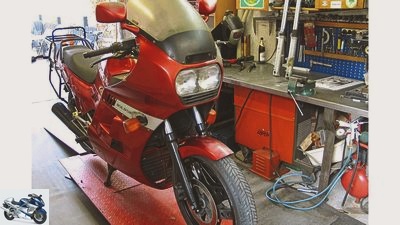
…The mighty touring carriage is supposed to leave the classic workshop as a naked cafe racer with minimalist equipment, but TuV-compliant.
Werner Koch
19/19
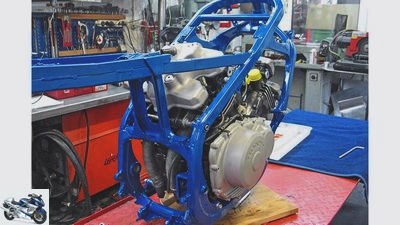
…we thread the frame with two men contactlessly around the motor.
counselor
workshop
Cafe Racer conversion project Xpresso V4
Werner works in the Classic workshop
80,000 km engine inside
Content of
With more than 80,000 kilometers under your belt, you are already worried about the situation with the V4 engine of the Honda VF 1000 F2. We took a look – and can give the all-clear.
Werner Koch
05/06/2016
You buy a pig in a poke for 680 euros, so the mouse won’t bite a thread. After all, at the handover the engine of the Honda VF 1000 F2 actually purred like a kitten. However, you only know what the mechanics really are after a thorough technical check. In principle, the following applies: If an engine starts immediately, then runs steadily and steadily at idle and spontaneously accelerates, you can assume that everything that happens in the combustion chamber will also work.
Buy complete article
Werner works in the Classic workshop
80,000 km engine inside
6 pages) as PDF
€ 2.00
Buy now
In concrete terms, this means: on the whole, the valves and piston rings still seal well, the carburettor system is clean, does not draw in any secondary air or has no torn membranes. In addition, such a running behavior suggests that the ignition and spark plugs function properly, at least when they are lukewarm, and that both the timing and the valve clearance are correctly set. For me, another indication of the fundamentally healthy mechanics of the dohc four-cylinder was the inconspicuous sound of the Honda VF 1000 F2 engine. Accordingly, valve clearance that is too large should not be an issue, nor should excessive wear on the crankshaft and primary drive or on the clutch. I was also able to rule out a rusted exhaust system or leaky manifold connections – due to possibly torn off studs.
Check the oil pan and magnetic drain plug
Although a test drive with the bugged Honda VF 1000 was out of the question. The fork oil had spilled over the brake discs and brake calipers on its way out, the front tire tread was lost, and the chassis, which was deeply sunk at the front and rear, made it clear: the air is out of here. So I left it at that and trusted the Honda quality, also when it came to the drivetrain and transmission.
Despite the acoustically inconspicuous mechanics, the innards should be thoroughly inspected for wear and damage at such high mileage. This can be done relatively reliably, even without complete disassembly, by removing all of the engine covers and checking the mechanical components. Very important: the check of the oil pan and magnetic drain plug. Take a close look at deposits and particles in the network of the oil suction snorkel! If metal flakes or foreign bodies are found, they are separated into steel and non-ferrous material using a magnet.
With a little experience, steel particles can be analyzed for their origin. Sharp-edged, hard parts with a smooth side are usually the result of chipping on the gears, known as pitting. Small sheet steel parts, on the other hand, could come from a burst ball bearing cage, and silvery, sticky aluminum sludge is often an indication of worn camshaft bearings or a loose ball bearing seat.
Pure primary drive with impeccable oil bath clutch
With a small flashlight and a mirror with a handle you can look at the innards with the oil pan removed. Even the tooth flanks of the gear unit can be examined for possible damage when they are turned slowly. To clean the oil pan, please always remove the baffle plates and then screw them back on with Loctite.
Steel particles piled up like crystals on the magnet of the drain plug, which turn into a metal paste when you touch them, mostly come from the gearbox, but are harmless as normal abrasion. Fortunately, I only found a lot of remains of sealant in my Honda, which had been applied a little generously to the valve cover rubbers. Remnants of it were also to be found on the bottom of the clutch cover, behind which, however, a clean primary drive with a flawless oil bath clutch was visible.
Werner Koch
After sandblasting, the bare aluminum parts are given several layers of semi-gloss clear lacquer.
Only at the top, in the cylinder head, did I find what I was looking for. However, the small surface breakouts on the camshafts, a typical defect in Honda’s VF 1000 engines, could not be detected in the sump of the oil pan. The inlet cam of the first cylinder was hit hardest. Nevertheless, the camshaft stays in for the time being, I rounded off the sharp-edged breakouts with a fan grinder and 150 grit. This measure prevents the oil film from being scraped off by the sharp edges. Inadequate lubrication is said to exacerbate the problem on the V4 engines, which is why the “Oiling Kit” from VF 1000 specialist Maniac-Motors in Nuremberg is now installed (www.maniacmotors.de, phone 09 11/969 49 83). With this conversion, the oil is pressed directly from the oil filter to the camshafts. As standard, the oil flow takes a strange detour via the gearbox output bearing and only from there to the camshafts. Why Honda gave priority to the ball bearing on the gearbox in the oil circuit cannot be conclusively explained, especially since a roller bearing can easily do without oil pressure and with a small amount of oil spray. Let’s just hope that the direct oil supply can stop pitting on the cams. I will watch and report. My diagnosis after the examination: Except for the cams, the Honda VF 1000 F2 makes a healthy impression.
After more than 30 years, the paper seals on the engine covers have condensed into a bone-dry and stubborn material. If, as here, a hardening sealant is still involved, the whole thing becomes an annoying scrubbing with a triangular scraper and knife. It works better if you make the old seal pliable with a hot air blower.
Flexibility is also required when threading the carburetor battery into the four suction rubbers. Little trick: boil the rubbers beforehand in hot water and then quickly use the regained flexibility. In our case there was nothing left to save because the rubber was torn down to the fabric. Ordered from AC-Motorradteile in Worms (www.acmotorradteile.de, phone 0 62 41/30 98 85), the spare parts were in the mailbox two days later – great!
Spray and brush what it takes
After checking the innards, it went to the periphery of the Honda engine, which had worried me during the first inspection. Rust couldn’t be missed, especially on the chrome engine screws and bolts. New parts? Too expensive and not always available. Re-coat? No, we want to drive, not win any customizer prices. And that also works with chrome surfaces that have tiny pimples. The miraculous effect of the brass brush and the WD-40 give you a passable shine back. So I sprayed and brushed whatever it took.
The Xpresso V4 is supposed to be a naked, unobstructed cafe racer. The only question is how this can be achieved with a total of three coolers? My solution: I just sorted out the small water cooler from the cladding bow. To do this, the engine oil flows through the twice as large radiator of a Suzuki GSX 750 F. In the hope that the airy frame allows the engine to radiate significantly better heat over the surface and the large water cooler – now mounted vertically and free-standing – with efficient flow Prevents heat collapse. A little daring, but the same applies here: trying is better than studying.
I stapled the new oil cooler to the valve cover with a 1.5-millimeter aluminum sheet and connected it to the oil circuit with new steel-sheathed lines and classic Goodridge fittings. I pressed the necessary bead into the standard connection tube on the oil pan with a tool I built myself so that the oil hose sits firmly and securely.
Witches Pippi and sandblasting cabin
We come to the carburetor battery of the Honda VF 1000 F2, which was wrapped in a fat cocoon of dust, cobwebs and street dirt when it was bought. Inside, however, it was in a pleasantly good condition – all nozzles free, no deposits. Only the foul, as usual, stink of old gasoline, the dreaded witch’s pippi, spread. A brass brush and WD 40 for the exterior also helped with the carburetors. Technically, I have enlarged the main nozzles from 116/118 to 122/124 in order to do justice to the four planned, open individual air filters. And of course the stops on the throttle valves were shortened in order to remove the 100 hp throttling that was mandatory at the time. In addition, the rubber air funnels were replaced by slim aluminum tubes. With a diameter of only 40 instead of 48 millimeters and four different lengths, the new funnels are intended to elicit a few additional Newton meters of torque from the V4, even if the smaller cross-section may cut off the maximum output – nominally 116 hp. Does it work? The test stand will show.
Last but not least, the black engine covers went into the sandblasting cabin. Then the parts were cleaned without thinner or brake cleaner, but with a powerful jet of compressed air and painted with a thick layer of colorless silk matt from the spray can. This look goes a bit in the direction of the sand cast surface, as was seen earlier with the prototypes in racing. But watch out: after sandblasting, the surfaces are extremely sensitive, even small bumps or metallic touches create ugly, shiny quirks and stripes. So pack everything well in towels or foil during transport!
The beautiful V4 is not mounted in the chassis, but the chassis around the engine. This makes installation easier and prevents flaws in the frame. Fork in, wheels in and go – no way! Now it’s getting difficult, the right and time-consuming screwdriving begins. More about the structure and tuning of the chassis in MOTORRAD Classic 7 + 8/2016.
Related articles
-
Werner is working on the Honda Xpresso V4
markus-jahn.com 19th pictures factstudio.de 1/19 Data recording instead of a lathe: Classic tinkerer Werner Koch appreciates both. Werner Koch 2/19 Carpe…
-
Yamaha TRX 850 conversion: Endurance racer from the architect
Rob Hamilton 7th pictures Rob Hamilton 1/7 Josh converted his own TRX 850 into an endurance racer. Rob Hamilton 2/7 With the original fairing, the…
-
Ducati 999 Cafe Racer from Freeride Motos
Kevin Abelard / Freeride Motos 16 pictures Kevin Abelard / Freeride Motos 1/16 Ducatis 999 was frowned upon because of its appearance. Today it is an…
-
Conversion of the BMW R nineT Racer by JvB-moto
Jens vom Brauck 19th pictures Jens vom Brauck 1/19 Harmony meets spirit. Jens vom Brauck 2/19 The designer from JvB-moto presents his interpretation of…
-
Ox One: Cafe Racer style electric motorcycle
Ox Motorcycles 16 pictures Ox Motorcycles 1/16 Ox Motorcycles is a Spanish startup. Ox Motorcycles 2/16 With the Ox One, the Iberians want to bring their…
-
Guareschi Moto build birthday racer Le Mans I
GC Corse 8th pictures GC Corse 1/8 In 2103 the Guareschi brothers finally took over the workshop from their late father. They have been offering frame…
-
TuneUp 2.0 Tuning and Conversion Guide Honda Fireblade
Ines Mannl 17th pictures Ines Mannl 1/17 Don’t worry, it has to be that way! Even if this Honda is not ready to drive, it all serves a higher goal!…
-
Benelli Leoncino 500 Sport: two-cylinder as a cafe racer
News 2022 New motorcycle items for 2022 Benelli 5 pictures Benelli 1/5 Benelli presented the Leoncino 500 in China. Benelli 2/5 In Europe, the model was…
-
KTM 390 Duke Cafe Racer: India is rebuilding
Salman Aarif 7th pictures Salman Aarif 1/7 Rajputant Custom from Jaipur in India is converting the Ktm 390 Duke into a Cafe Racer. Salman Aarif 2/7 The…
-
Peugeot P2X Cafe Racer and Roadster
Jorg Kunstle 6th pictures Peugeot 1/6 Peugeot presented two new entry-level bikes in Paris. Peugeot 2/6 The P2X Cafe Racer comes as a sporty retro bike….